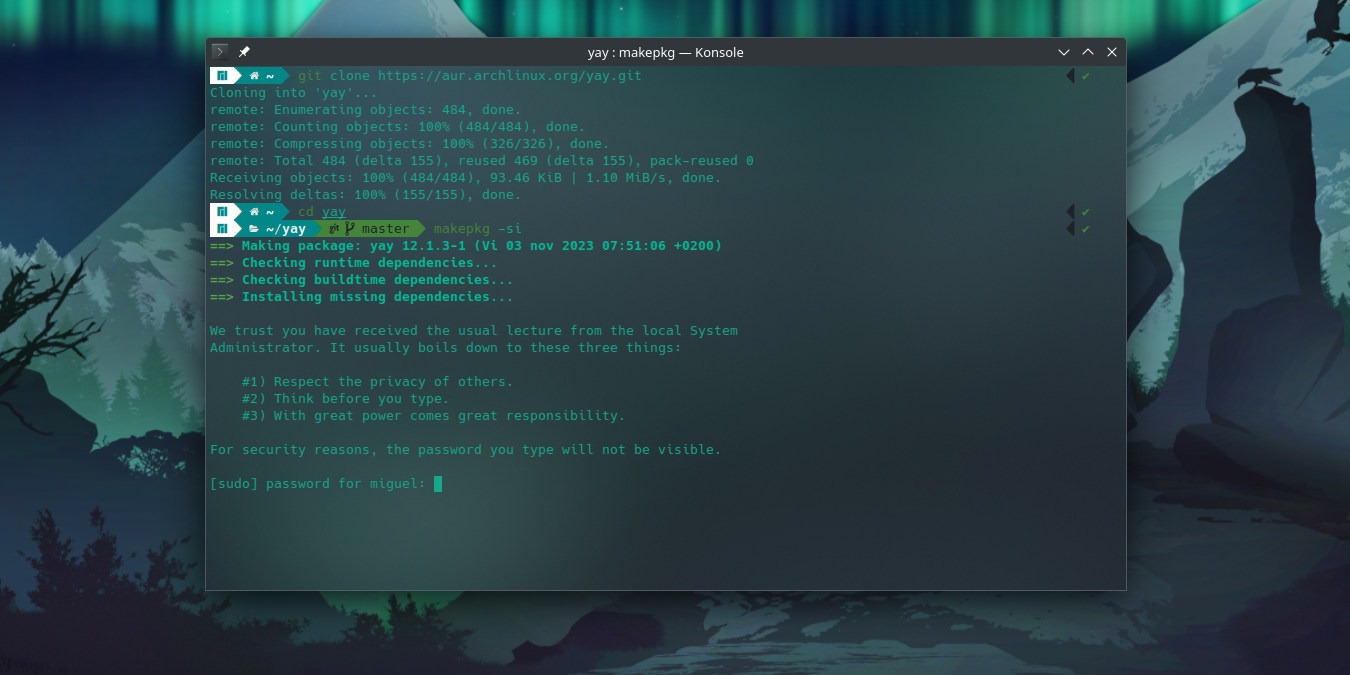
It seems that no matter which distro you use, the terminal emulator remains its most boring fixture. The good thing is that you can make it look a little nicer with its many customization options. Here, you’ll learn how to customize the Linux terminal in a way that provides it with a little bit of flair.
Customize the Terminal in GNOME
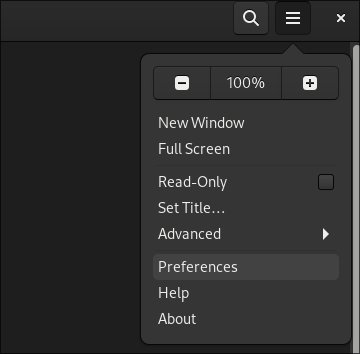
If you use Ubuntu, Fedora, Pop!_OS, Rocky Linux, AlmaLinux, or SUSE, they all come with the GNOME desktop environment preinstalled with the GNOME terminal. To start customizing this terminal, click the hamburger menu (the three lines in the upper right-hand corner) and click “Preferences.”
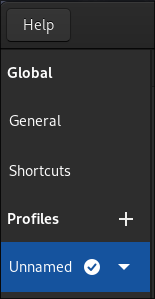
To the left under “Profiles,” select “Unnamed.” The default profile in a stock GNOME terminal emulator is always labeled this way.
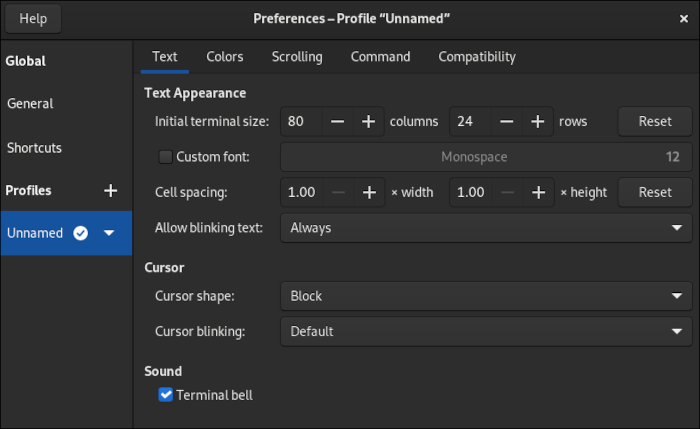
The window you navigated to has tabs designated for the “theming” of your terminal. By default, the first tab you land on would be “Text.”
Customizing Text
Here, you can set various customization options such as the terminal’s size in units representing how many blocks of text fit in the columns and rows or whether you want to exchange the default blinking block representing your position in the prompt for something else.
Click on the “Cursor shape:” drop-down and select “Underline.” You can now navigate back to your terminal without exiting the preferences screen you have opened and check what changed.

An underline cursor is less intrusive and often preferred by people who work with the Linux terminal a lot. The I-Beam is another satisfying alternative. Since the changes apply live, you can play around with any settings you want here until the terminal fits your preferred text style.
Customizing Colors
On the Colors tab, you’ll find a variety of different options that allow you to set the entire palette that the terminal uses.
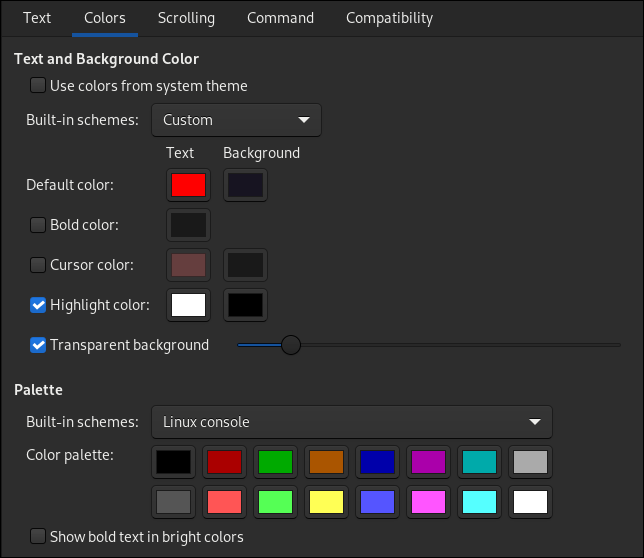
In addition to setting colors, you can set a transparent background here by enabling the option and moving the slider to suit your preference. The lower value in the slider increases opacity.
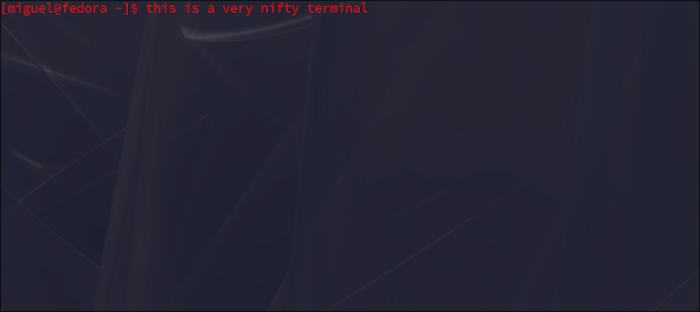
If you aren’t getting a lot of luck setting colors up or just aren’t up to picking everything out yourself, try some of the built-in color schemes available to you in the drop-down menus. You’ll also be able to set up light or dark modes by simply clicking on them there.
Customizing Scrolling
Although you may overlook this tab, it contains one pretty powerful option: It can make your terminal look very sleek by removing the scrollbar. Remove the check next to “Show scrollbar” and you’re golden!
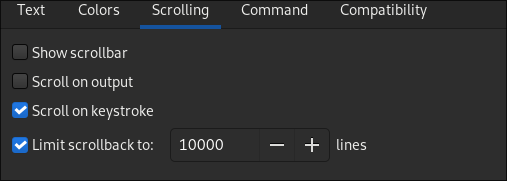
The “Limit scrollback to:” option controls how many lines of text you can scroll back to in your terminal’s output. Removing the limit may be useful when you want to have full access to every line of your logs when you are doing something very complex.
If you set a limit and you choose to stop at a certain point of the terminal’s output to read it, it will force you past it once it reaches the line limit.
The Command Tab
This part of the profile allows you to customize how the terminal interacts with your system through its shell. Generally, it’s not important to interact with this menu, especially if you’re a new user to shell scripting.
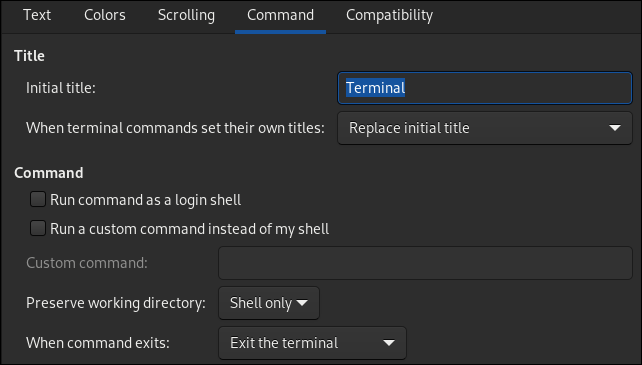
The “Title” section is self-explanatory. The “Initial title” setting, however, is something you will never see unless you change what terminal commands can do to the title. The drop-down menu immediately underneath allows you to direct where the title goes.
“Run command as a login shell” refers to what profile it should read from. By default, your shell will read information from the .bashrc file in your home folder. Enabling this option will instead try to read from either .bash_profile or .profile in the same location.
“Run a custom command instead of my shell” allows you to execute something other than the default shell for your account. This can be another shell like zsh, fish, sh, or dash. Normally, you would fare better changing the default shell in its entirety so that it opens in every terminal you ever install on your system. However, if you want to use an alternative shell only in GNOME terminal, this is the easiest way to do it!
The Compatibility Tab
This tab is used to change how the terminal behaves with your keyboard input and, in some cases, how it displays output. You can change the behavior of your backspace and delete keys. Just note that it will radically alter your terminal’s behavior.
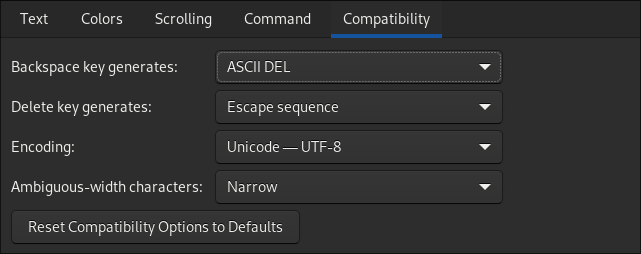
If you ever get lost with these options, there’s always a reset button below all other options that lets you magically restore things back to how they were.
Customize the Terminal in KDE
If you are on KDE desktop, your system comes with Konsole. Konsole is a highly customizable terminal, but it’s not going to win any awards for ease of navigation through its menus.
To customize Konsole, you cannot edit the default profile. Instead, you must create a new one, which will automatically clone the settings from the former.
Click the hamburger menu on the right-hand side, hover over “Settings,” and click “Configure Konsole…”
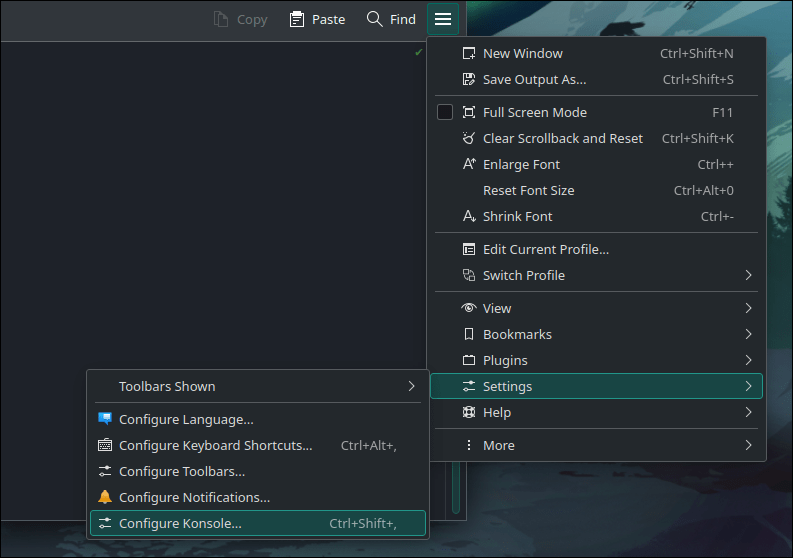
Navigate to “Profiles” and click “New”. This will open the profile editing window where you can adjust your profile to your heart’s content.
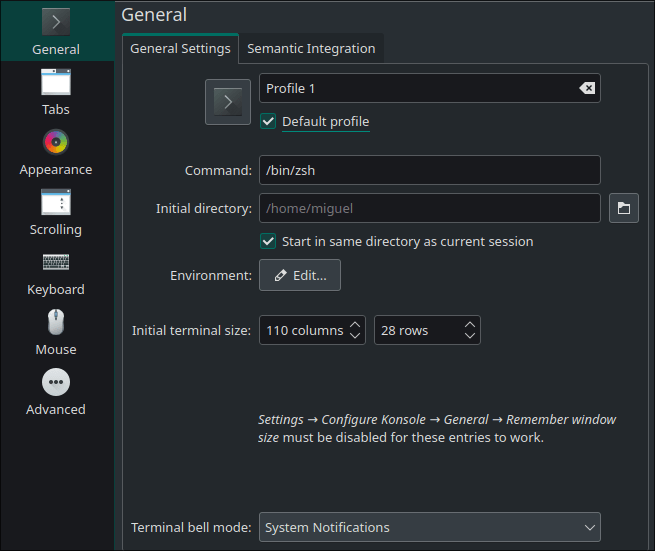
Make sure you click “Default profile” to make any changes to this profile apply to the terminal immediately.
Customizing Tabs
Since Konsole is a tabbed terminal emulator (pressing Ctrl + Shift + T opens a new tab), you can customize how the tabs show up in the “Tabs” section.
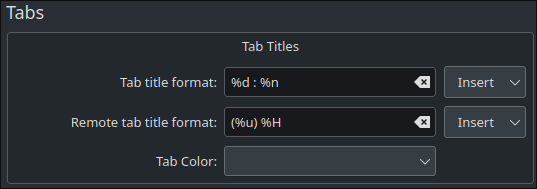
Press the “Insert” drop-down to see what you can put into tab titles and play around with the formatting at your leisure.
Customizing Appearance
Here, you’ll find all the themes you can put into your terminal. The “Get New” button lets you download themes from the KDE community repository. Some themes that come pre-installed will have both a light and dark version.
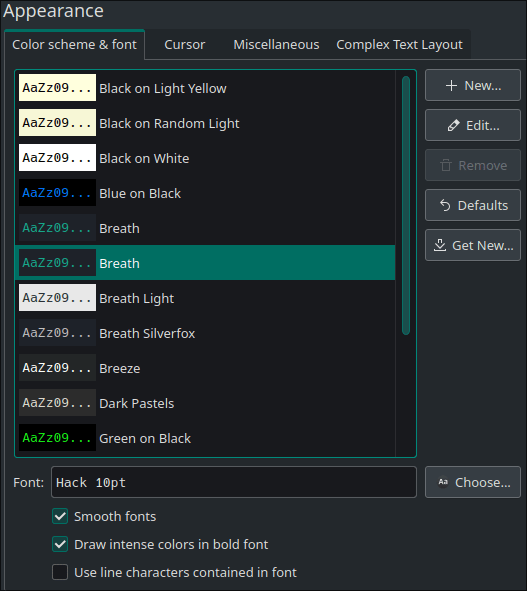
To customize the current theme, just click the “Edit” button.
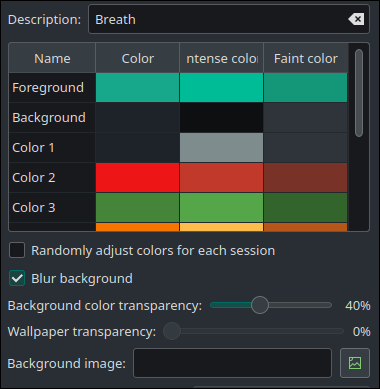
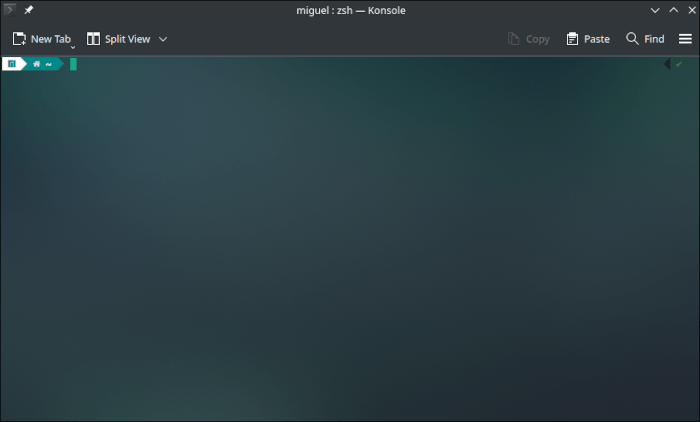
You can add a cool effect by ticking “Blur background” and setting a color transparency right below the option.
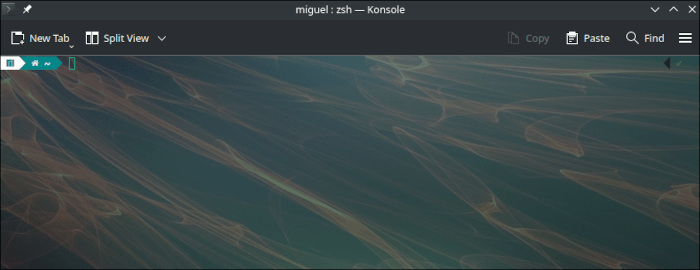
In addition to diffusing the terminal’s background with whatever’s behind it, the theme editor also allows you to set a custom background image with its own transparency level.
Customizing Scrolling
The scrolling menu is very similar to the one found in GNOME.
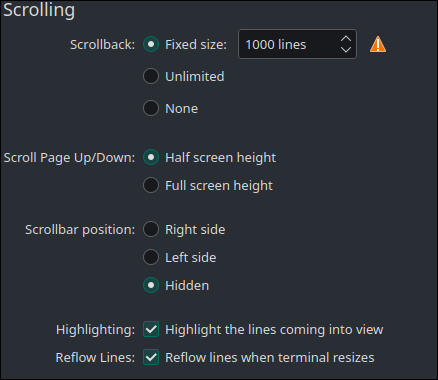
You can hide your scrollbar by selecting “Hidden” under “Scrollbar position”. The “Scrollback” option lets you set how many lines of output your terminal is allowed to keep.
The only real difference from GNOME is that you can specify whether you want to go half a screen up or a full screen up when pressing Page Down or Page Up.
The option to “reflow” lines when resizing the terminal will automatically format the text within Konsole to fit the screen and wrap into a new line where needed. Turning this off makes the terminal difficult to navigate, but may be useful if you just want one output per line.
Take Things a Little Further!
Now that you’ve learned how to customize your Linux terminal window, you may be interested in editing your prompt. In that case, you should read our guide on customizing a Bash prompt.
Once you get comfortable with that, you can even use Starship to create amazing cross-shell prompts that you can save and share with other machines that use Linux!
Our latest tutorials delivered straight to your inbox