
It is a common practice for some Windows laptop manufacturers to preinstall McAfee Antivirus software on their devices. After the trial period, a pop-up will typically prompt you to renew the software. If you do not wish to renew it, you can uninstall it. This tutorial demonstrates how to remove McAfee from a Windows 11 PC.
Good to know: should you install a third-party antivirus if you have Windows Security? Check out our post to find out.
1. Remove McAfee via Settings
The easiest way to completely uninstall all McAfee products and services from your Windows PC is by accessing the Settings app. Before starting the removal process for McAfee, it is recommended to close all open apps, as they may interfere with the uninstallation process.
Press Win + I to launch the Settings app. Click Apps in the left pane, followed by Installed apps on the right pane.
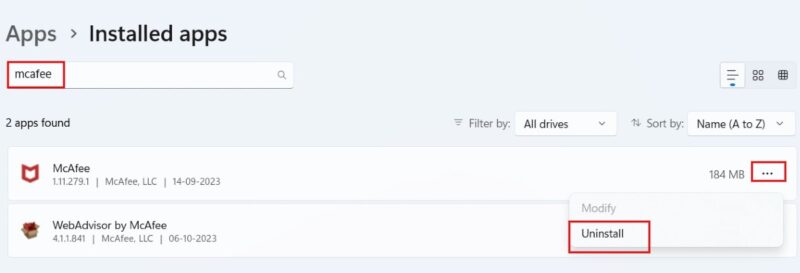
Type “mcafee” in the search bar in the right pane. Click the three-dot icon next to McAfee, then Uninstall in the pop-up menu. Press Uninstall again to confirm.
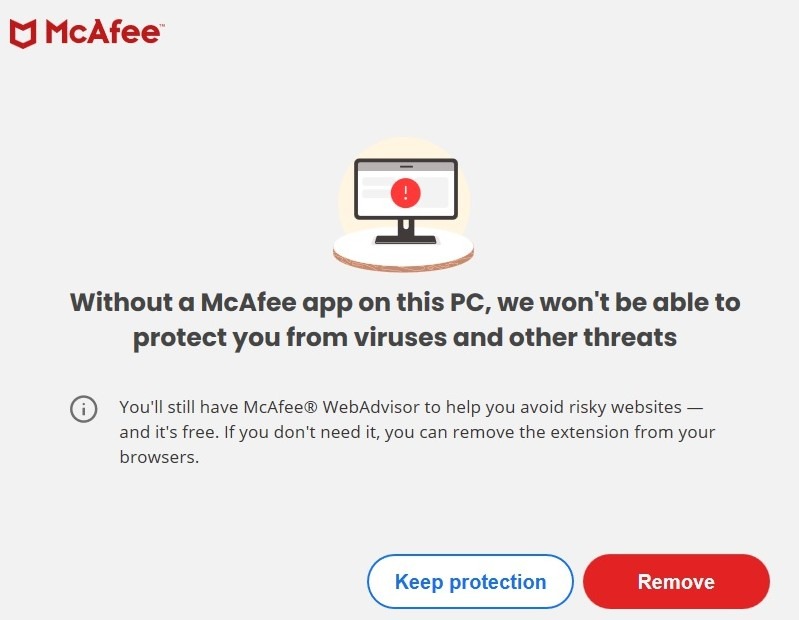
The McAfee uninstallation screen will prompt you to select the reason for removing the software. Click No thanks, then click Remove to confirm you’re removing the McAfee software.
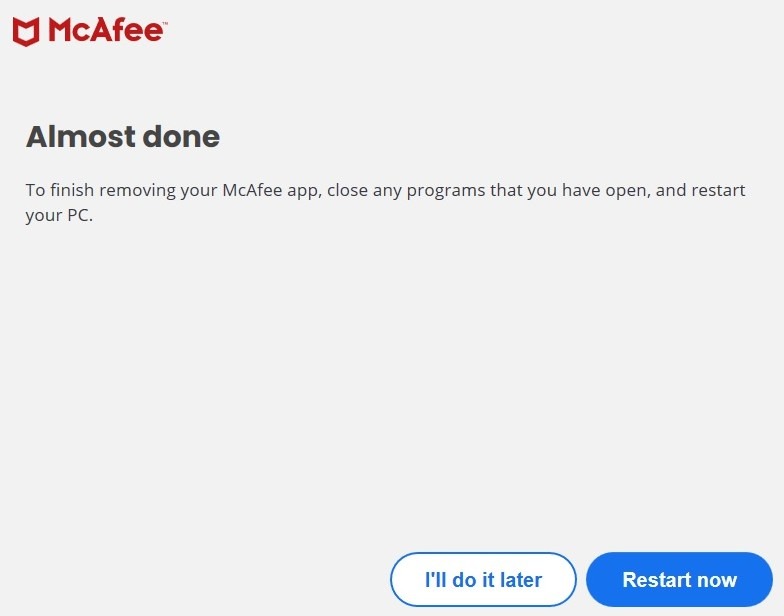
Click Restart now on the McAfee screen to restart your computer.
Please note that this removal process will not eliminate the McAfee WebAdvisor, a free tool that monitors the safety of websites. If you wish to get rid of it, go to Installed apps again, look for WebAdvisor by McAfee, and click the three dots. Follow the on-screen instructions to complete the removal process.
Tip: learn how to remove a virus from your PC without using an antivirus.
2. Remove McAfee via Control Panel
You can also remove McAfee from your Windows computer using the Control Panel.
Type “control panel” in the start menu Search bar, and open the Control Panel app.
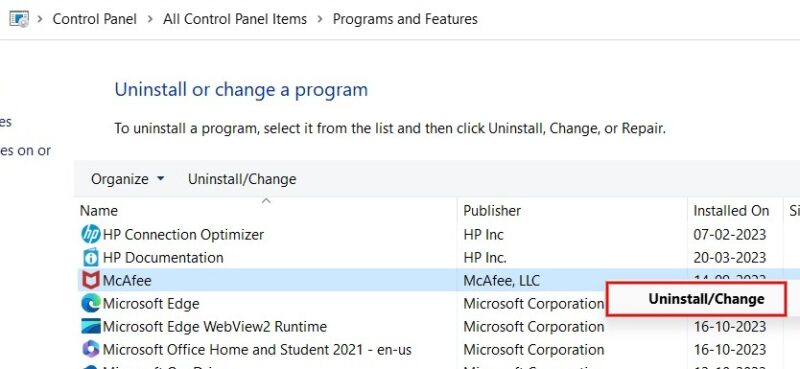
Click Programs and Features in the Control Panel window. Right-click on McAfee in the list of programs, click Uninstall/Change, and follow the on-screen instructions.
3. Remove McAfee Using MCPR Tool
If you are unable to remove McAfee using the above methods, you can use the dedicated tool, MCPR (McAfee Consumer Product Tool), to completely remove the McAfee products and services.
Download the MCPR tool from the official McAfee website. Launch the executable, and click Yes to provide permission for the tool, if prompted.
Click Next in the McAfee removal screen. Press Agree, followed by Next. In the Security Validation screen, type the characters as shown, and click Next.
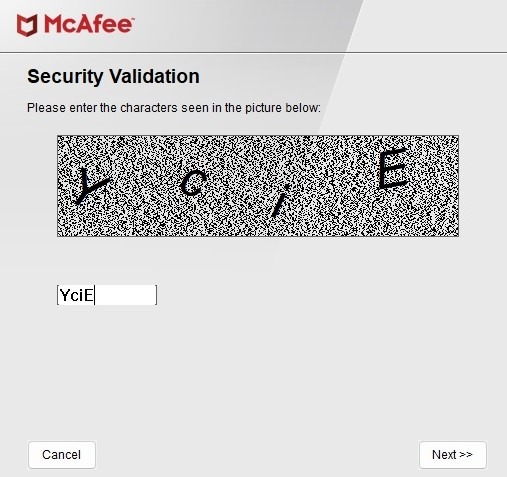
The removal process will begin. It may take 10 to 15 minutes, depending on your PC’s configuration.
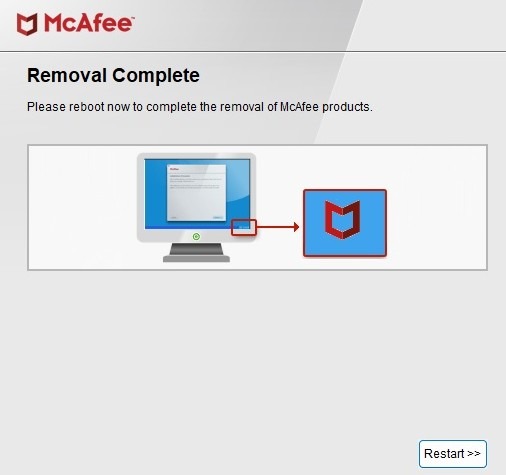
Once you see the “Removal complete” message on the McAfee screen, click the Restart button to complete the removal process.
FYI: learn how to use Microsoft Defender from the Command Prompt.
How to Remove McAfee’s Leftover Files
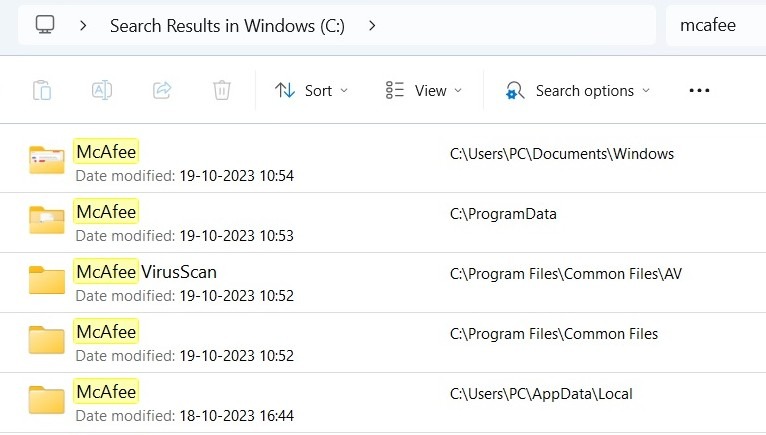
The above methods, especially the MCPR tool, will completely remove all McAfee products and services from your Windows computer. However, third-party apps like McAfee may leave residual files and processes on your PC, even after uninstallation, which you must manually delete.
Press Win+ E to launch File Explorer, and navigate to the C drive. In the search bar in the top right, type “mcafee,” and press Enter. Delete all files and folders related to McAfee from the results.
FYI: put your antivirus to the test to gauge its efficacy. Read on to learn how to get started.
If you face any issues removing McAfee from Windows, activate the super administrator account, and repeat the steps. Also, make sure your computer is connected to the Internet to successfully remove the McAfee license.
Image credit: DepositPhotos. All screenshots by Meenatchi Nagasubramanian.
Our latest tutorials delivered straight to your inbox