The launch of macOS Catalina ended Apple’s support for 32-bit hardware, an event that was a long time coming but rendered millions of systems unable to run an up-to-date version of the operating system they were designed for. In another universe, this may have spelled doom for you if you owned an old Mac system, but in this one, there’s always Linux to come to the rescue!
We’ll show you how to breathe some new life into that computer and avoid adding e-waste by installing a Linux distro on it!
Picking a Distro
While looking for Linux distros to install on your old Mac, you may have noticed that most of them only support 64-bit systems. Many distros that still ship 32-bit versions are either obscure, have very small passionate communities that aren’t very welcoming to newcomers, or haven’t been maintained in ages.
You’re not completely out of luck, though. There are three mainstream distros that will still work on a 32-bit machine without issues:
1. Debian
This is the old “tried-and-true” distro that’s very familiar to anyone who’s spent any time around Linux. It features a desktop, high compatibility with a large hardware library and a strong emphasis on stability. If you’ve never used Linux before, you won’t find it incredibly intimidating.

To get Debian in 32-bit, go to the “Getting Debian” page on the distro’s official site and click the download link labeled “32-bit PC netinst ISO.” This will download a minimal version of the operating system that will require an internet connection to install.
2. Linux Mint
If you want a more streamlined experience with a desktop environment that looks like “Windows”, Linux Mint has you covered. It has a graphical frontend for every possible use, meaning you won’t have to spend time in the terminal fiddling with things to install applications from the outset.
Although in general, Linux Mint isn’t known for offering 32-bit versions of its distro anymore, the Mint developers continue to update the Debian edition (LMDE) with support for it.
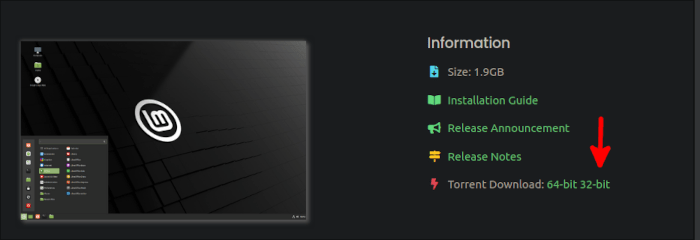
To get LMDE, go to its download page from Linux Mint’s official site, click the large “Download” button, then select “32-bit” under the “Torrent Download” links.

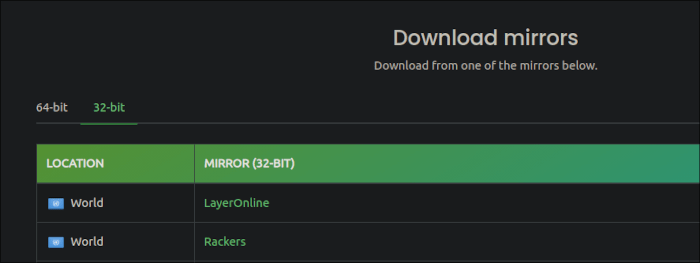
If you don’t want to use a torrent to get your distro, choose a mirror from the ones available below that, and be sure to select the “32-bit” column.

3. Arch Linux
If you already have a wealth of experience with Linux systems and believe that you can stomach a terminal-based installation, then go ahead and use Arch Linux on your old Mac! Few people know this, but Arch Linux has a 32-bit community-maintained variant.
All you have to do is navigate to Arch Linux 32’s official download page and grab it using the method of your choice!
If you want a little guidance on how to get up and running with Arch, be sure to read our guide.
Installing Linux on Your Old Mac
Whether you chose Linux Mint or Debian as your distro, the installation process is very similar for both. The main difference between the two is that Linux Mint puts you in a live desktop environment that you can try out before installation.
Note: To provide a simple, straightforward guide, we’ve chosen Linux Mint Debian Edition to install on a 32-bit machine that resembles the hardware configuration of an old Mac. If you chose to use Arch, you may want to follow the guide linked to earlier rather than the rest of this article.
- Take the ISO and create a bootable USB drive out of it.
- Insert the USB drive into a USB slot in your old Mac and turn it on.
- Get into the pre-boot configuration screen (EFI/UEFI). Depending on the system, you may have to hold either the Option ⌥ key or a combination of Option ⌥, Command ⌘, O, and F.
- Once in, navigate to boot options and ensure that the USB drive is the top priority.
- Save your options and reboot.
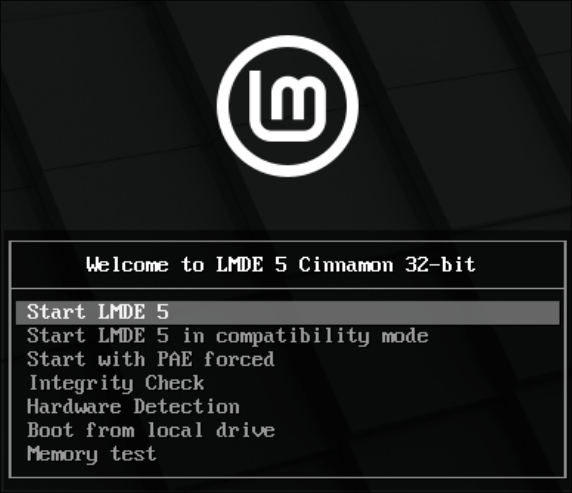
- Booting from your USB disk, select “Start LMDE”. If you’re installing Debian, select “Graphical Install.” It will take you straight to the installer.

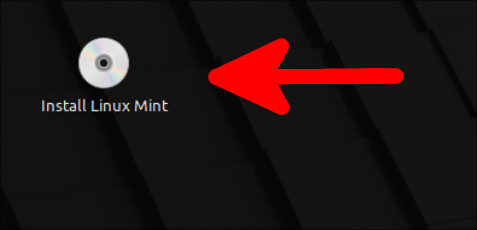
- Let the system boot, then double-click on “Install Linux Mint.”

- Click the “Let’s Begin” installer to begin the installation.
- Select the details that are appropriate for you (language, time zone, keyboard layout, etc.) and continue as normal. When picking out a computer name, the installer may automatically generate one for you. You don’t have to keep it. If you want a simpler name, go ahead and choose it as long as it isn’t the same as other computers on your network (in case you ever plan to use network-based sharing applications like Warpinator).
- Once you’re done setting up your system account, you’ll be prompted to choose whether you want to install the distro using your entire disk or partition it manually. The first option will erase all system data and install your distro as the only operating system on your computer. If you want to partition manually, just know that you need to create at least one partition with the mount point at “/” to serve as the main file system. Generally, it’s best to first do a backup of any important data you may have in it and then use the entire disk.

- Let the installer finish copying your files and then click “Restart Now” at the end to finish the installation and boot into your new system.
In Linux Mint, a warning will appear telling you to check your video drivers.

This is because it either couldn’t find any video hardware on the computer or the drivers required to use them. If you’re on a sufficiently old system (most 32-bit computers are considered old) you probably didn’t have any video hardware to speak of.
Problems With Display?
If all you get is a black screen after you’ve made your selection on the pre-boot menu, the distro you’re trying to install is attempting to use the kernel mode setting on your graphics hardware but isn’t able to render anything to your display.
Try disabling your kernel mode setting while in the menu and see if this works.
In Debian:
- From the menu, press E on your keyboard to edit the kernel command line.
- Look for a line that starts with
linuxfollowed by some blank space and a long line that containsvmlinuzwithin it. After the wordquiet, addnomodeset.
Your command line should look something like this:
/boot/vmlinuz-[some-kernel-version] root=UUID=[some numbers here] ro quiet nomodeset
In Linux Mint (LMDE):
- From the menu, press Tab on your keyboard. The kernel boot command will show up right away.
- After the words
quiet splashaddnomodeset.
Your command line should look like this:
/live/vmlinuz boot=live config initrd=/live/initrd.lz live-media-path=/live quiet splash nomodeset --
Note that if you’re using a Mac computer with Nvidia hardware, which often appeared in models from the early 2010s, you should also add nouveau.nomodeset=0 after nomodeset.
Frequently Asked Questions
How do I know if my Mac is outdated?
The moment your hardware no longer supports the latest version of macOS, it’s technically outdated. Apple’s support cycle allows for a three-year period where the company will continue to provide security updates for older versions of its operating system. Once that three-year period expires, you’re out of luck. At this point, your system can still run the version of macOS presently installed on it, but it will be less safe and pleasant to use over time. It’s more feasible at that point to use a different operating system.
Are older MacBooks still worth buying?
In general, most serious developers of alternative operating systems (which includes Linux distros) have either phased out 32-bit processor architecture support or plan to in the future. As long as what you’re buying supports 64-bit, it can at least run Linux. However, if you plan on buying a MacBook to take advantage of its pure feature set, ensure that you don’t buy models that stopped being produced more than 5 years ago. Anything older than that may not have proper support from Apple’s new OS releases or support lifecycles.
Image Credit: Modern Office Interior by Wallpaperflare
Our latest tutorials delivered straight to your inbox