
Listmonk is a simple, all-in-one self-hosted newsletters and mailing lists solution for Linux. Unlike traditional mailing list programs, it excels in providing a lean platform that is lightweight and fast. Here we show you how to install Listmonk using Docker on Ubuntu, and how to get started using it to send newsletters.
Advantages of Using Listmonk
One of the biggest selling points of Listmonk is that it can work with almost any external mail delivery server on the Internet. This means that you can send your newsletters with a hosted mail provider such as Gmail or your own self-hosted mail setup.
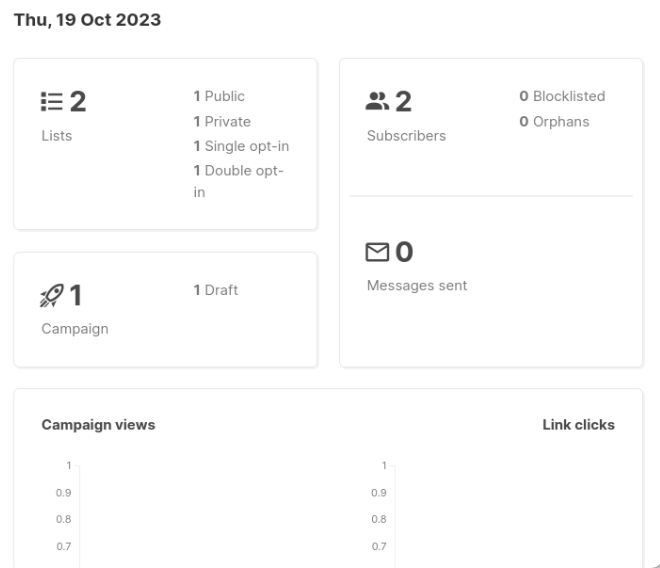
Listmonk also comes with the ability to create programmable email templates. This makes it possible to create custom emails that can adjust itself depending on the context through which the user receives the message.
Lastly, Listmonk comes with an intuitive analytics module for you to track every newsletter running inside the program. It can track both the amount of clicks each message gets as well as the overall views an entire mailing list achieves in a period of time.
Installation of Listmonk
Obtaining Docker and Docker Compose
Assumption: This article assumes that you are running Listmonk on an always-on VPS. Further, it also assumes that you already have a domain name with an A and PTR record pointing to your VPS.
To begin, retrieve the repository key for the Docker and Docker Compose packages:
curl -fsSL https://download.docker.com/linux/ubuntu/gpg | sudo gpg --dearmor -o /etc/apt/keyrings/docker.gpg
sudo chmod a+r /etc/apt/keyrings/docker.gpg
Create the new repository file for your Docker and Docker Compose packages:
sudo nano /etc/apt/sources.list.d/docker.list
Write the following line of code inside your new repository file:
deb [arch=amd64 signed-by=/etc/apt/keyrings/docker.gpg] https://download.docker.com/linux/ubuntu jammy stable
Update and upgrade your entire Ubuntu system by running the following command:
sudo apt update && sudo apt upgrade
Install the Docker Engine along with Docker Compose and its component dependencies:
sudo apt install docker-ce docker-ce-cli containerd.io docker-compose-plugin docker-buildx-plugin nginx git curl
Ensure that your current user has the right permissions to access the Docker binaries:
sudo usermod -aG docker ramces
Setting Up and Deploying Listmonk
Create a new folder for your Docker files inside the home directory of your current user:
mkdir ~/listmonk && cd ~/listmonk
Create a new configuration file for your Listmonk instance:
nano ./config.toml
Paste the following code inside your new configuration file:
[app]
address = "0.0.0.0:9000"
admin_username = "listmonk"
admin_password = "listmonk"

[db]
host = "listmonk_db"
port = 5432
user = "listmonk"
password = "INSERT_RANDOM_PASSWORD_HERE"

database = "listmonk"

ssl_mode = "disable"
max_open = 25
max_idle = 25
max_lifetime = "300s"

params = ""
Note: You can easily create a random password with the command: cat /dev/urandom | tr -dc 'A-Za-z0-9' | fold -w 32 | head -n 1
Save your new configuration file, then create your Listmonk instance’s docker-compose.yml:
nano ./docker-compose.yml
Paste the following block of code inside your new .yml file. This is the default docker-compose.yml file for Listmonk that I modified to work with my timezone:
---
version: "3.7"
x-app-defaults:
  restart: unless-stopped
  image: listmonk/listmonk:latest
  ports:
    - 9000:9000
  networks:
    - listmonk
  environment:
    - TZ=Asia/Manila
x-db-defaults:
  image: postgres:13
  ports:
    - 9432:5432
  networks:
    - listmonk
  environment:
    - POSTGRES_PASSWORD=INSERT_RANDOM_PASSWORD_HERE
    - POSTGRES_USER=listmonk
    - POSTGRES_DB=listmonk
  restart: unless-stopped
  healthcheck:
    test:
      - CMD-SHELL
      - pg_isready -U listmonk
    interval: 10s
    timeout: 5s
    retries: 6
services:
  db:
    image: postgres:13
    ports:
      - 9432:5432
    networks:
      - listmonk
    environment:
      - POSTGRES_PASSWORD=INSERT_RANDOM_PASSWORD_HERE
      - POSTGRES_USER=listmonk
      - POSTGRES_DB=listmonk
    restart: unless-stopped
    healthcheck:
      test:
        - CMD-SHELL
        - pg_isready -U listmonk
      interval: 10s
      timeout: 5s
      retries: 6
    container_name: listmonk_db
    volumes:
      - type: volume
        source: listmonk-data
        target: /var/lib/postgresql/data
  app:
    restart: unless-stopped
    image: listmonk/listmonk:latest
    ports:
      - 9000:9000
    networks:
      - listmonk
    environment:
      - TZ=Asia/Manila
    container_name: listmonk_app
    depends_on:
      - db
    volumes:
      - ./config.toml:/listmonk/config.toml
  networks:
  listmonk: null
volumes:
  listmonk-data: null
Deploying the Listmonk Docker Container
Run the following Docker command to generate your instance’s database file:
docker compose up db
Open a new SSH connection, then start the build process for Listmonk by running the “listmonk” binary inside its Docker container:
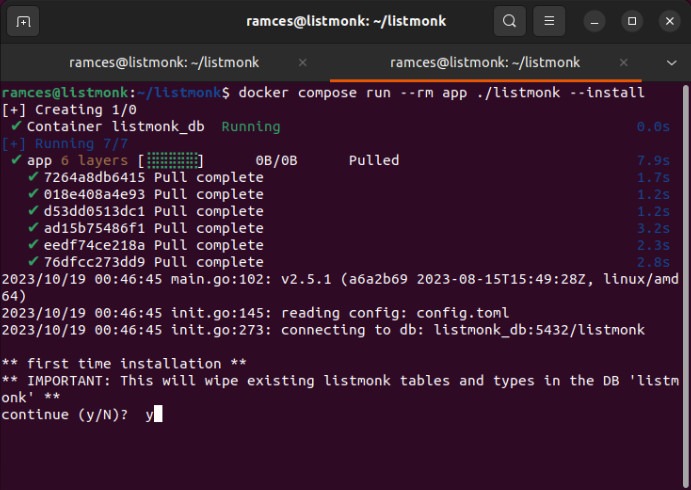
docker compose run --rm app ./listmonk --install
Type “Y”, then press Enter when the build script asks you to wipe any existing data on the running database. This will ensure that your Listmonk container is clean when it starts.
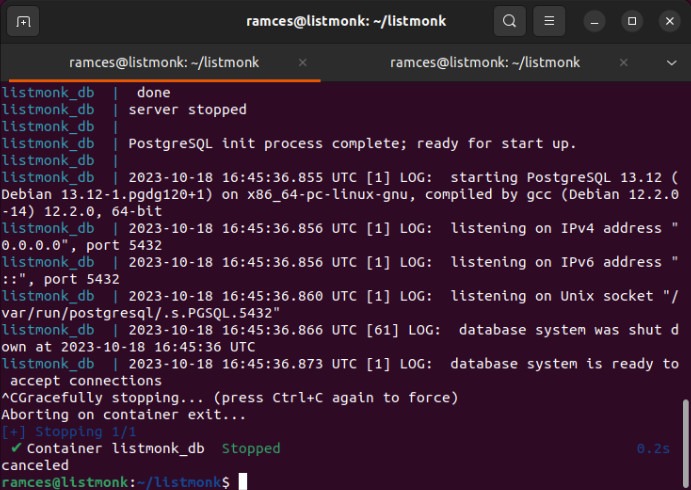
Go back to SSH session for your instance’s database then press Ctrl + C to end the session gracefully.
Lastly, restart all the Docker containers for Listmonk with its proper settings:
docker compose up -d app dbCreating Nginx Reverse Proxy
Even though Listmonk has started running on a Docker instance, it is not publicly accessible until you have configured a reverse proxy to link to it. Follow the instructions below to configure an Nginx reverse proxy.
Create a new site config file for your Listmonk instance:
sudo nano /etc/nginx/sites-available/listmonk
Paste the following block of code inside your new site config file:
server {

        server_name listmonk.myvpsserver.top;

        location / {
                proxy_pass http://127.0.0.1:9000;
                proxy_http_version 1.1;
                proxy_set_header Upgrade $http_upgrade;
                proxy_set_header Connection "upgrade";
                proxy_set_header X-Forwarded-For $proxy_add_x_forwarded_for;
                proxy_set_header Host $host;
        }
}
Link your new config file from /etc/nginx/sites-available to /etc/nginx/sites-enabled:
sudo ln -s /etc/nginx/sites-available/listmonk /etc/nginx/sites-enabled/
Restart your Nginx server daemon by running the following command:
sudo systemctl reload nginxInstalling SSL Certificate
Once you have configured the reverse proxy, your site will be publicly accessible. However, it is not secure as there is no SSL certificate. Thus, the next step is to install the SSL certificate.
Ensure that the core snap daemon is running in your system:
sudo snap install core
Install the certbot snap package from the Electronic Frontier Foundation (EFF). This utility will allow you to request an SSL certificate which your server can use to encrypt connections between hosts.
sudo snap install certbot --classic
Test whether your certbot package is properly running by registering it to the EFF:
sudo certbot register --agree-tos -m you@your-email.invalid
Obtain a new SSL certificate for your Listmonk installation by running the following command:
sudo certbot --nginx -d listmonk.myvpsserver.top
Accessing and Configuring Listmonk
Open a web browser, then navigate to the address of your Listmonk instance. This will bring up a simple web page with a login button.
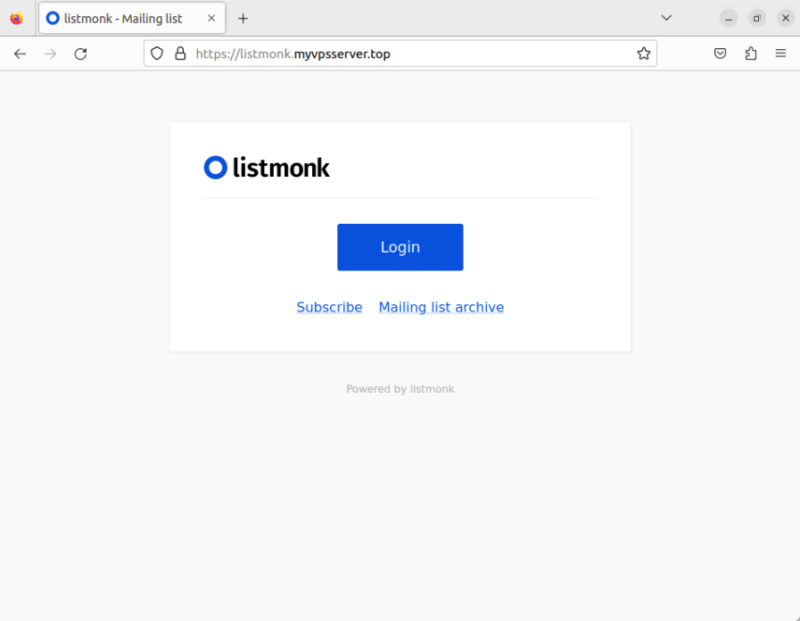
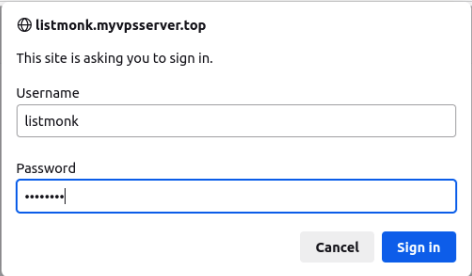
Click the “Login” button, then type “listmonk” on both the User Name and Password fields.
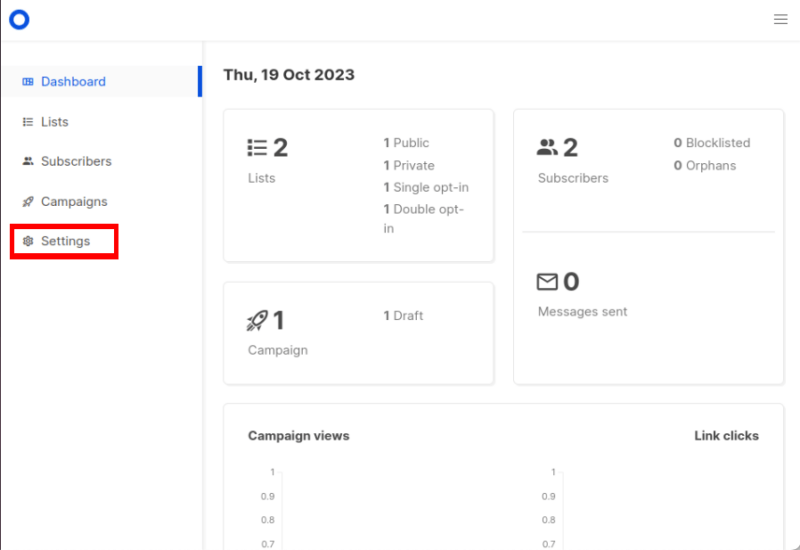
Doing that will load the main dashboard for your Listmonk instance. Click the “Settings” option on the page’s left sidebar.
Replace the value of the “Root URL” textbox with the complete address of your Listmonk instance.
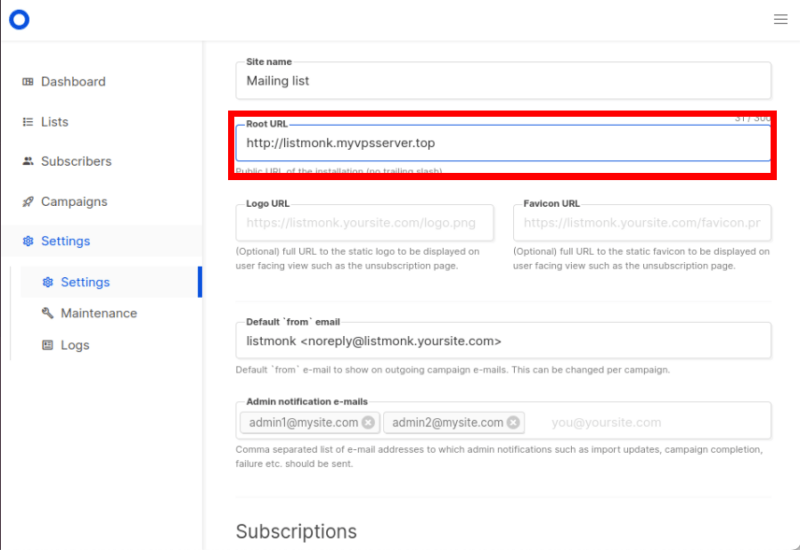
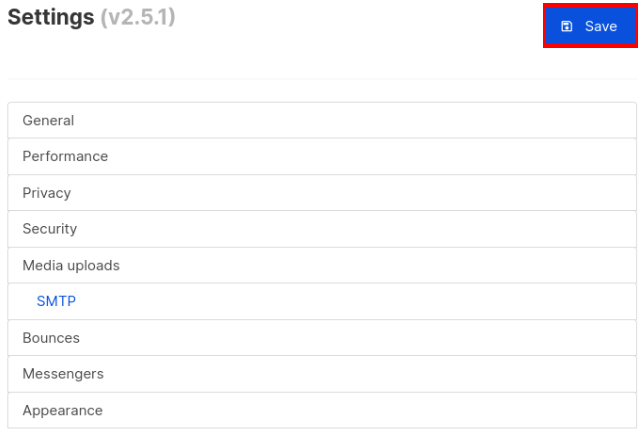
Click “Save” on the page’s upper right corner to save the new setting.
Note: Don’t forget to change the default username and password.
Linking a Gmail Account to Listmonk
Login to your Gmail account, then click your user’s icon on the page’s upper right corner.
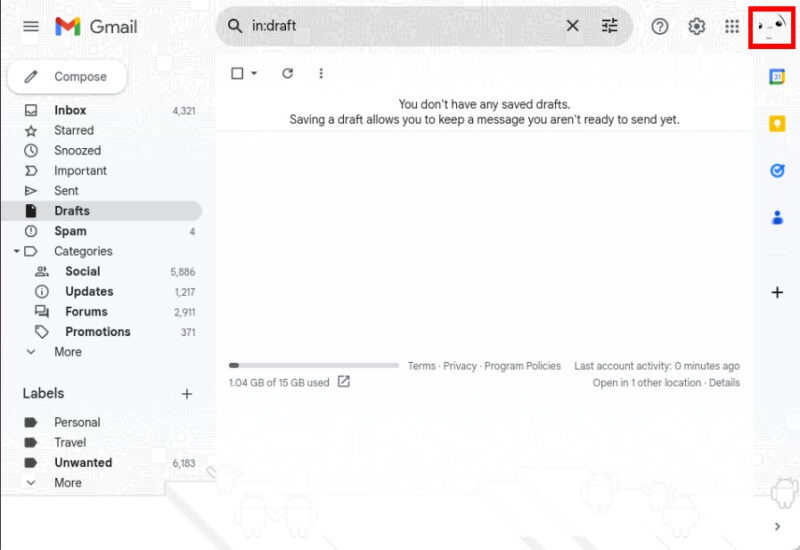
Click “Manage your Google Account.”

Click the “Security” category on the page’s left sidebar. Select the “2-Step Verification” option inside the Security subpage.
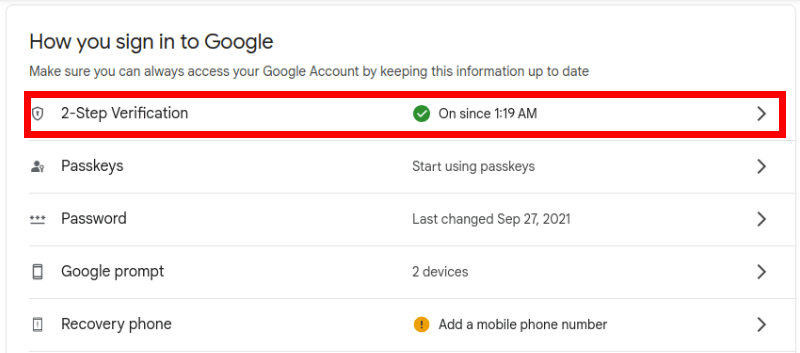
Scroll down to the bottom of the page, then click the “App Passwords” button.

This will bring up a prompt to ask you for the name of the application that you want to link. Type “listmonk”, then click “Create.”
The page will then pop up a small window with 16 random characters grouped in fours. Copy this to a text file then click “Done.”

Go back to your Listmonk dashboard page then click the “Settings” option on the page’s left sidebar.
Select the “SMTP” tab on the page’s upper bar. Click the “Gmail” link below the “Auth Protocol” dropdown box.
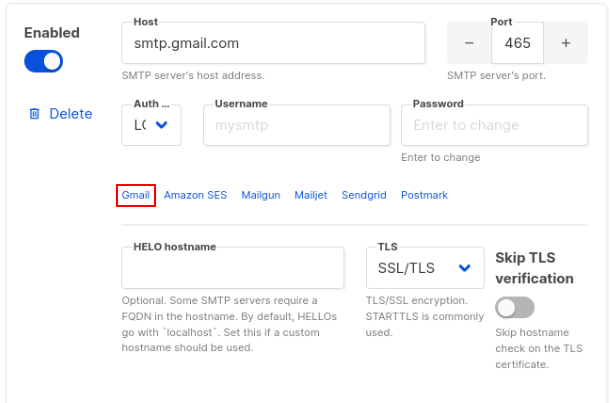
Type the complete email address of your Gmail account in the “Username” field.
Click the “Password” field, then type the 16-letter string you copied from the Gmail website without spaces.
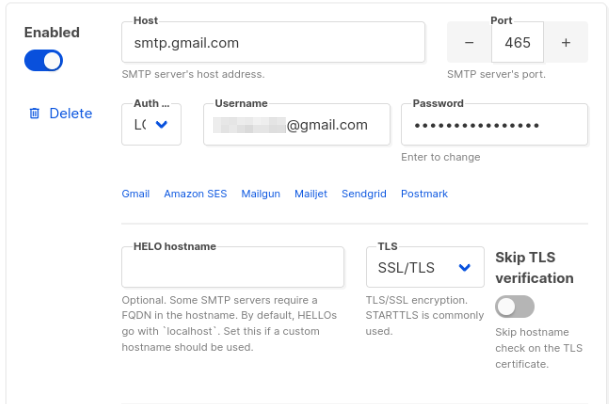
Click “Save” to apply your new SMTP settings.
Lastly, go to the General tab then replace the value of the “Default ‘from’ address” textbox with the address of your Gmail account.
Creating a New Listmonk Newsletter
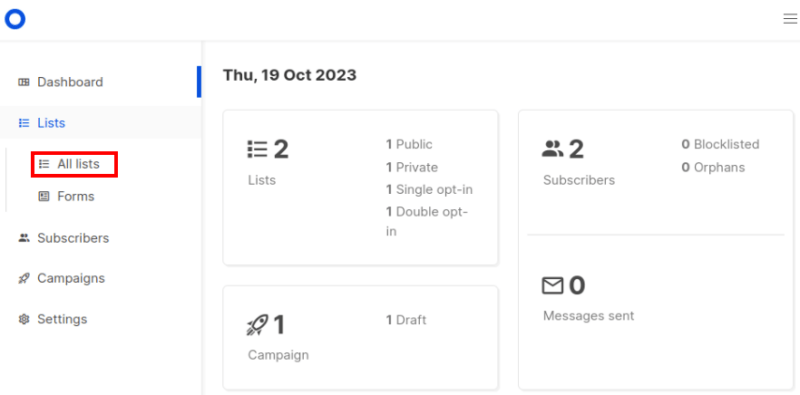
Go to your Listmonk Dashboard page, click the “Lists” category then click the “All lists” option.
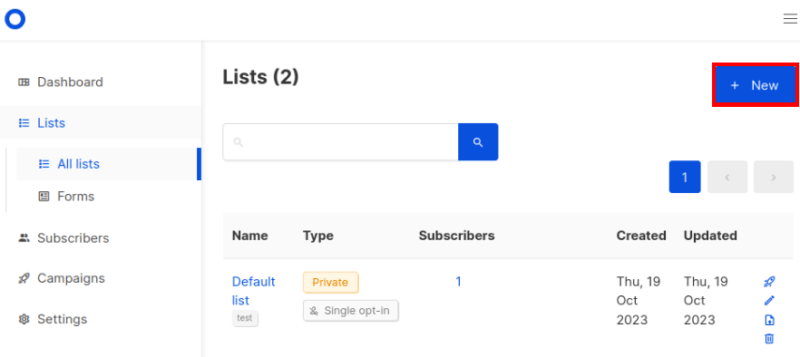
Select the “New” button on the page’s upper right corner.
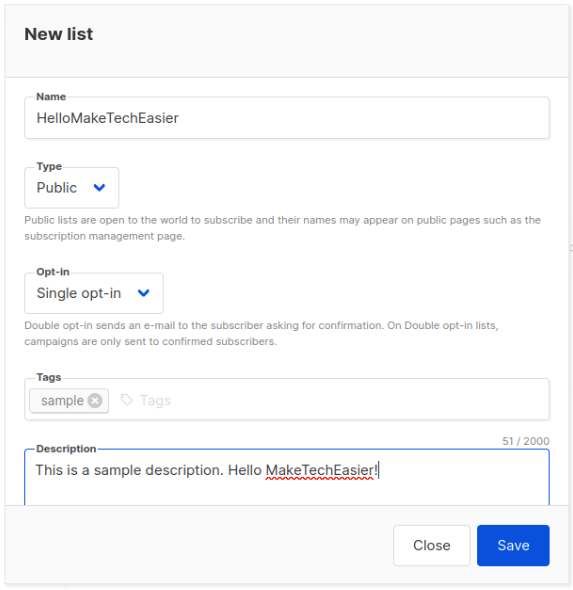
Fill in the details of your new mailing list, then click “Save.”
That’s it. You have completed installing Listmonk.
Hosting your own newsletter is just one part of creating your own digital platform. Learn how you can extend this by hosting a blog in Linux using Ghost and run your own web Kanban board with Kanboard.
Image credit: Newsletter – written on an old typewriter by 123RF. All alterations and screenshots by Ramces Red.
Our latest tutorials delivered straight to your inbox