Nostr is an innovative protocol that creates a decentralized social media platform that is both lightweight and flexible. To make this work, the Nostr network relies on simple node relays to carry encrypted messages towards their intended recipients. Here we guide you through the process of creating a Nostr Relay node using Nostream on Ubuntu. We also show you how to connect to your new node on both Gossip and Amethyst clients.
Why Use Nostream?
Nostream is a nostr relay, written in Typescript. The main advantage of using nostream is that it gives you control over your social media data. Similar to Pleroma, hosting your own Nostr relay node means that you own your platform and data as you broadcast it over the network.
In addition, Nostream supports a fully Dockerized installation. This means you can easily deploy it on any existing server stack.
Installing Nostream
Obtaining Docker and Docker Compose
Assumption: This article assumes that you have a VPS with at least 8GB of RAM as well as a domain name with an A and PTR record pointing to your server’s IP address. It also assumes that you already have a Nostr account with a working keypair.
To start, fetch the signing key for the Docker project’s binary package repository:
curl -fsSL https://download.docker.com/linux/ubuntu/gpg | sudo gpg --dearmor -o /etc/apt/keyrings/docker.gpg
sudo chmod a+r /etc/apt/keyrings/docker.gpg
Create a new repository file for Docker inside your “/etc/apt/sources.list.d”:
sudo nano /etc/apt/sources.list.d/docker.list
Paste the following block of code inside your new repository file and save it:
deb [arch=amd64 signed-by=/etc/apt/keyrings/docker.gpg] https://download.docker.com/linux/ubuntu jammy stable
Update and upgrade your Ubuntu system by running the following command:
sudo apt update && sudo apt upgrade
Install the Docker binary along with its Docker Compose plugin and dependencies:
sudo apt install docker-ce docker-ce-cli containerd.io docker-compose-plugin docker-buildx-plugin nginx git nodejs npm
Lastly, add your current user to the Docker system group:
sudo usermod -aG docker ramces
Obtaining and Installing nostream
Fetch the git repository for nostream and go inside the repository folder:
git clone https://github.com/Cameri/nostream.git && cd ./nostream
Run the nostream bootstrap script to build and deploy the nostream server daemon to as a Docker container on your system:
./scripts/start
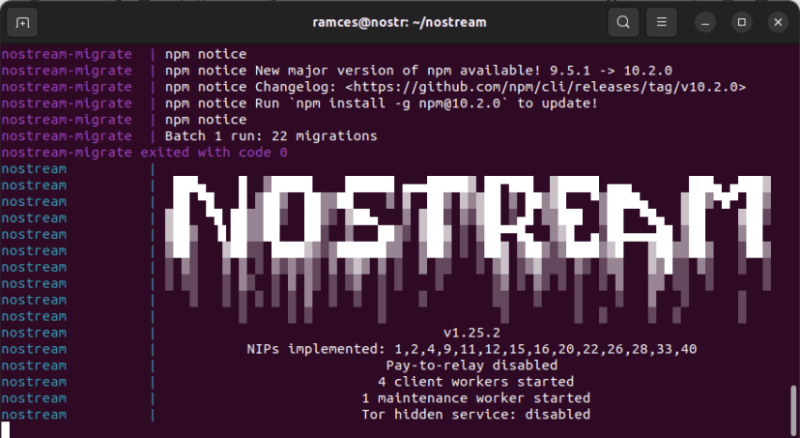
Wait until the nostream Docker container prints the “nostream” logo, then press Ctrl + C.
Open the configuration file for your nostream instance using your favorite text editor:
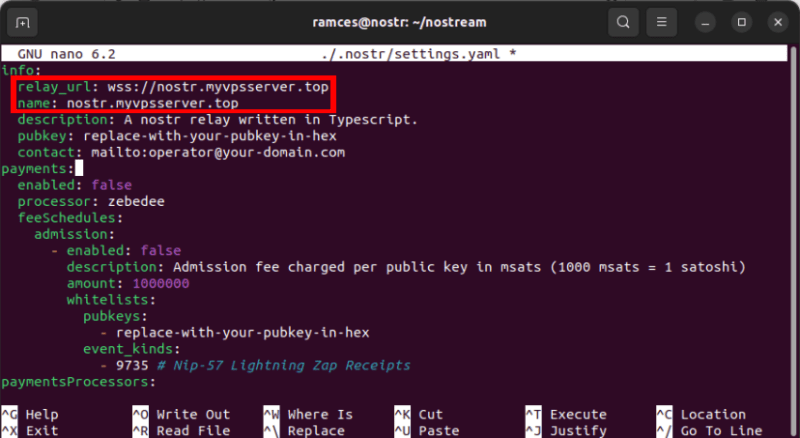
nano ./.nostr/settings.yaml
Replace the value of the relay_url: and name: variable with your instance’s domain name.
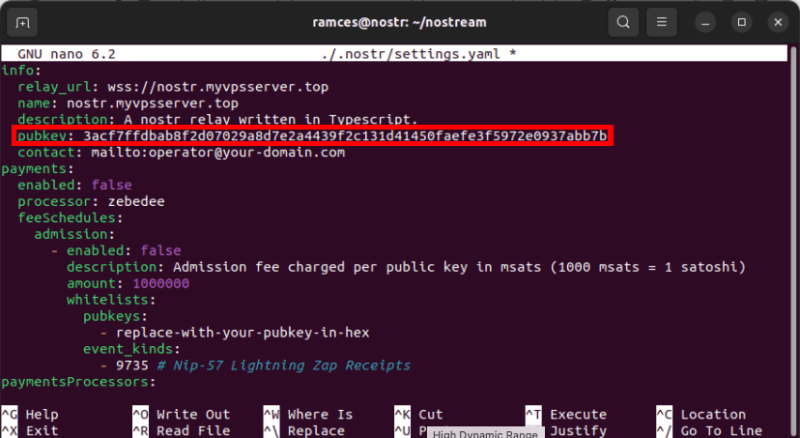
Replace the value of the pubkey: variable with the public key of your primary Nostr account.
Change the email address on the contact: variable with a working one that you are currently using.
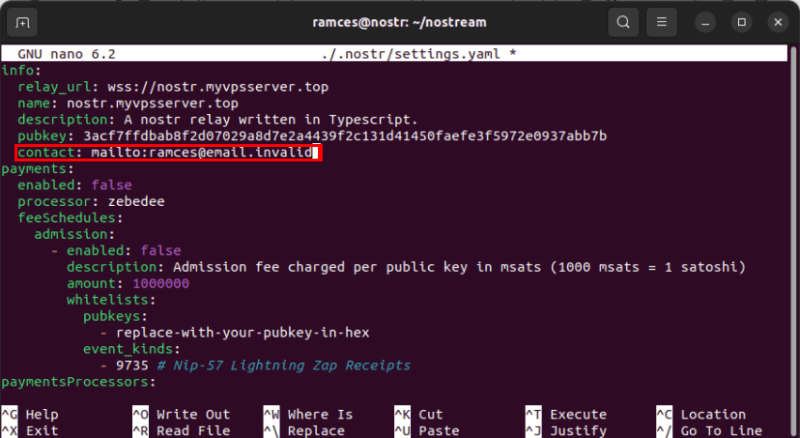
Open your instance’s “docker-compose.yml” file:
nano ./docker-compose.yml
Scroll to the “environment:” category, then replace the value of the “SECRET:” environment variable with a random string of characters.
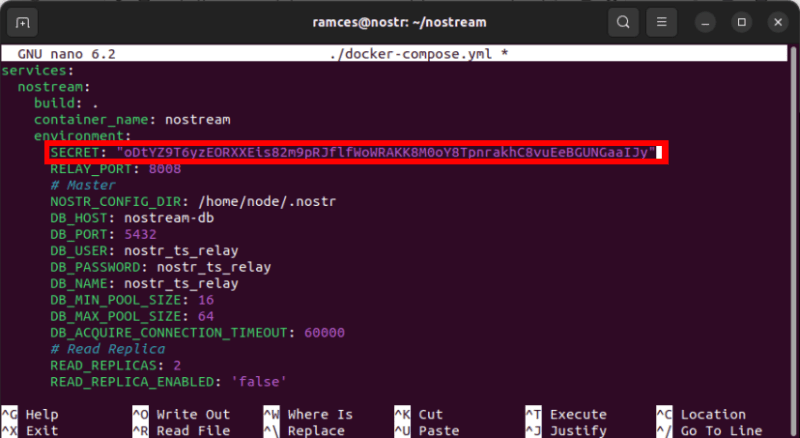
Note: You can run the following command to generate a random string of characters: cat /dev/urandom | tr -dc 'A-Za-z0-9' | fold -w 64 | head -n 1
Lastly, restart your nostream instance:
./scripts/start
Accessing Nostream Publicly
To be able to access nostream on your domain name, we need to create a Nginx reverse proxy to route the traffic to the Docker instance.
Create a new site configuration file for your nostream instance:
sudo nano /etc/nginx/sites-available/nostream
Paste the following block of code inside your new site configuration file:
server {

        server_name nostr.myvpsserver.top;

        location / {
                proxy_pass http://127.0.0.1:8008;
                proxy_http_version 1.1;
                proxy_set_header Upgrade $http_upgrade;
                proxy_set_header Connection "upgrade";
                proxy_set_header X-Forwarded-For $proxy_add_x_forwarded_for;
                proxy_set_header Host $host;
        }
}
Create a symbolic link for your new site configuration file inside “/etc/nginx/sites-enabled/”:
sudo ln -s /etc/nginx/sites-available/nostream /etc/nginx/sites-enabled
Test your Nginx’s settings:
sudo nginx -t
If everything is fine, apply your new settings by restarting your Nginx server daemon:
sudo systemctl restart nginxSecure Nostream with SSL Certificate
Ensure that the core snap package is running on your VPS:
sudo snap install core
Install the certbot snap package from the Electronic Frontier Foundation (EFF):
sudo snap install certbot --classic
Register your certbot installation to the EFF by running the following command:
sudo certbot register --agree-tos -m you@your-email.invalid
Request a new SSL certificate for your nostream reverse proxy:
sudo certbot --nginx -d nostr.myvpsserver.top
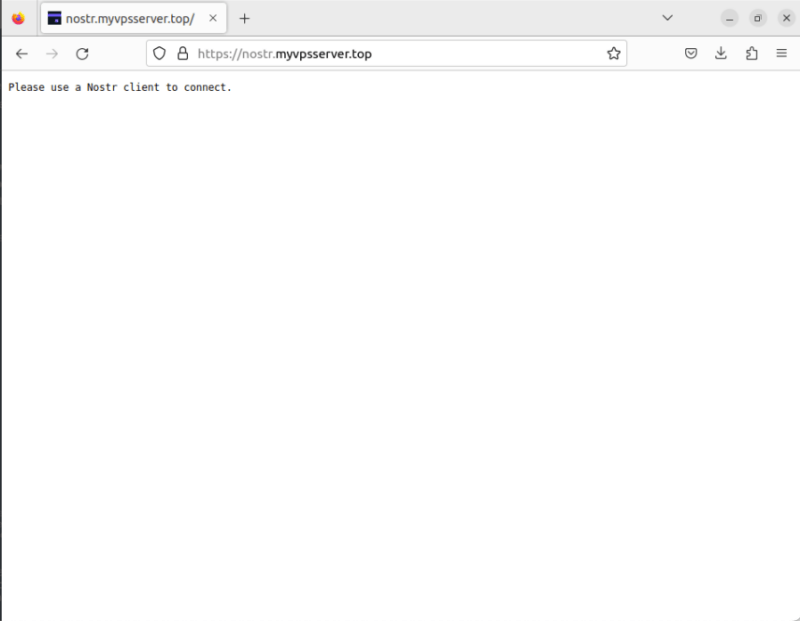
Test whether your new nostream relay is working by opening a web browser and navigating to its web address.
Linking nostream with the Gossip Nostr Client
To link your new nostream relay with Gossip, click the “Relays” category on the program’s left sidebar.
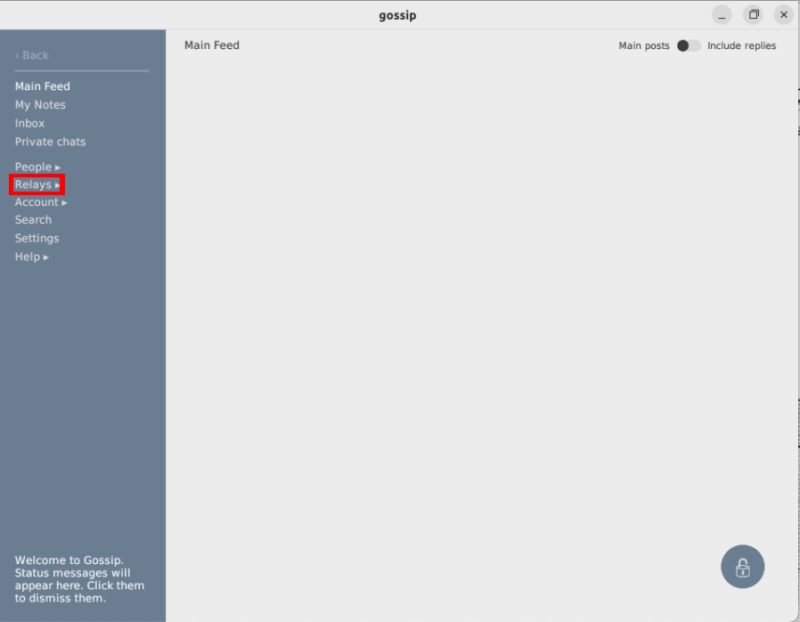
Click the Add Relay button under the “Relays” category.
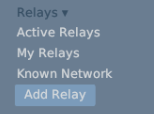
This will bring up a small textbox where you can write the address of your nostream instance. Provide the address of your new relay along with its WebSocket “wss://” protocol header.

Click “Check”, followed by “Configure” to set up your new relay.
Gossip will then load a settings page where you can determine how your new relay will behave with your client. To send and receive messages from your instance, toggle the “Read” and “Write” switches on the settings page.
Toggle the “Inbox”, “Outbox” and “Advertise” switches in order to communicate with other relays.
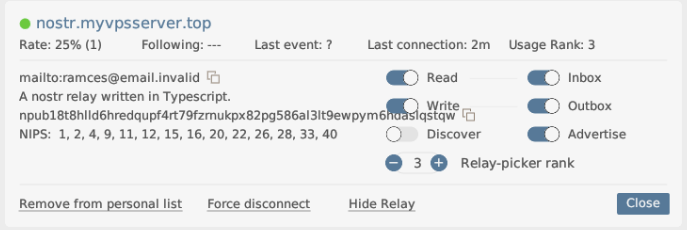
Test whether your relay is properly working by sending a new Nostr note.

Linking nostream with the Amethyst Nostr Client
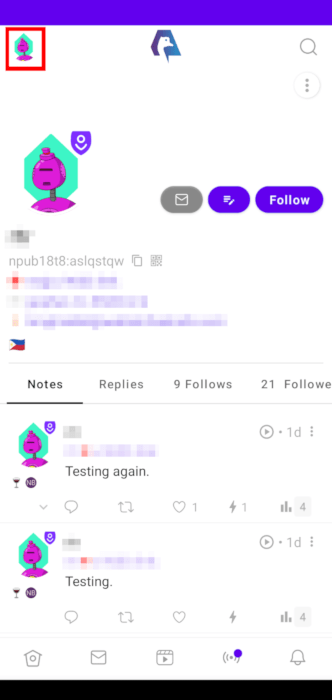
Aside from Gossip, you can also link your new nostream instance with other Nostr clients such as Amethyst. To do that, click your user icon on the app’s upper left corner.
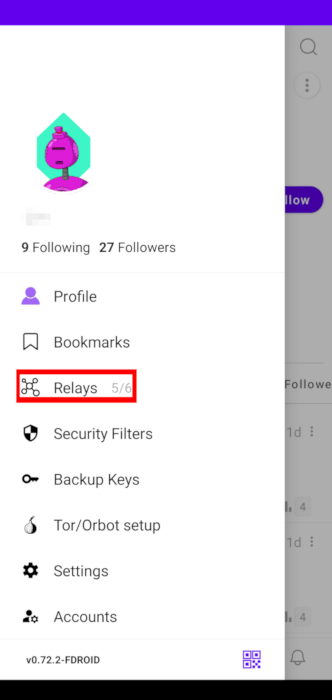
Click the “Relays” option on the popup sidebar.
Select the “Add a Relay” textbox, then type the address of your new relay without its protocol header.
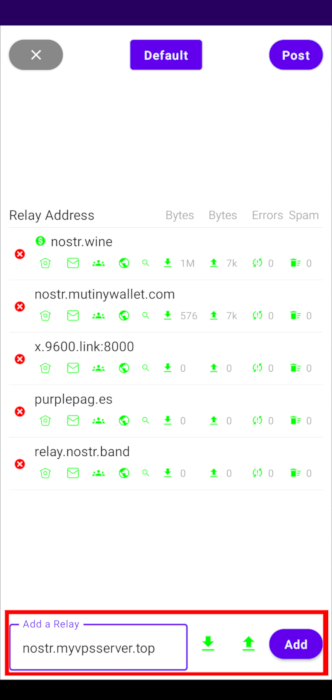
Click “Add” to apply your new nostream instance to your client.
Test whether your new instance is properly relaying messages by sending a sample Nostr note.

Hosting a Nostr relay is just one way of taking back control of your digital life. Aside from your own social media platform, you can also serve a cloud office platform using ownCloud as well as hosting your own video hosting website through Peertube.
Image credit: Paulina Chmolowska via Unsplash. All alterations and screenshots by Ramces Red.
Our latest tutorials delivered straight to your inbox