
The ISO 9660 standard is one of the most popular formats for distributing CD and DVD data images online. In essence, it is a system-agnostic filesystem for optical discs that is meant to be accurate, reliable and consistent. This makes ISO ideal for storing data that you want to be both burnable to a physical medium but also readable on different operating systems.
Here we show you how to mount ISO files to your machine’s filesystem in Linux. Further, we will also demonstrate how to convert BIN and CUE files to ISO so that you can easily mount them to your Linux system.
Mounting ISO Files in Gnome
Open the Files application and navigate to the directory of your ISO file.
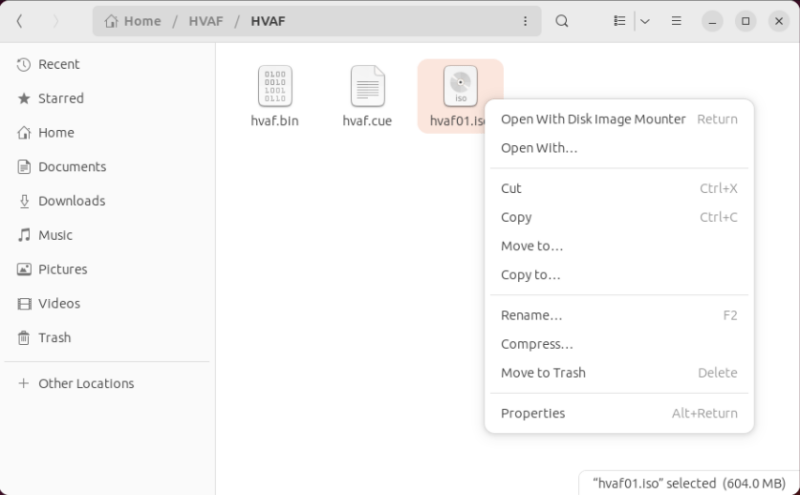
Right-click the ISO file that you want to mount, then click Open with Disk Image Mounter.
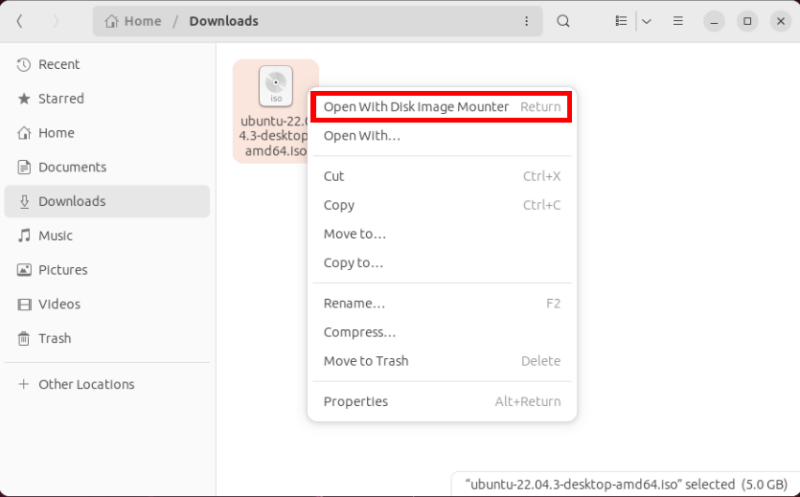
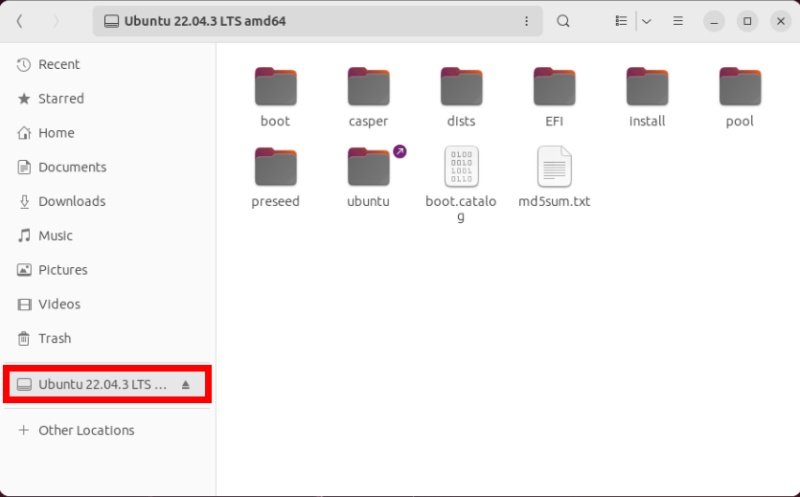
Doing that will load the ISO image to your machine’s filesystem. Click the name of your ISO file on the file manager’s left sidebar to load its contents.
Mounting ISO Files in MATE
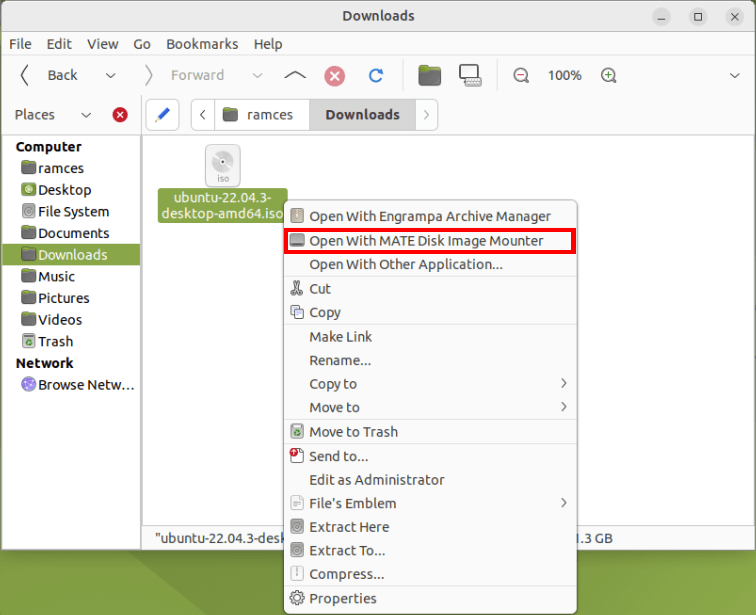
If you are using the MATE desktop environment instead of Gnome, open the Caja File Manager, right-click your ISO file, then select Open with MATE Disk Image Mounter.
Mounting ISO Files in KDE
Open the Dolphin File Manager, then navigate to the directory of the ISO image that you want to mount.
Right-click the ISO file, then select the Mount option on the item’s context menu.
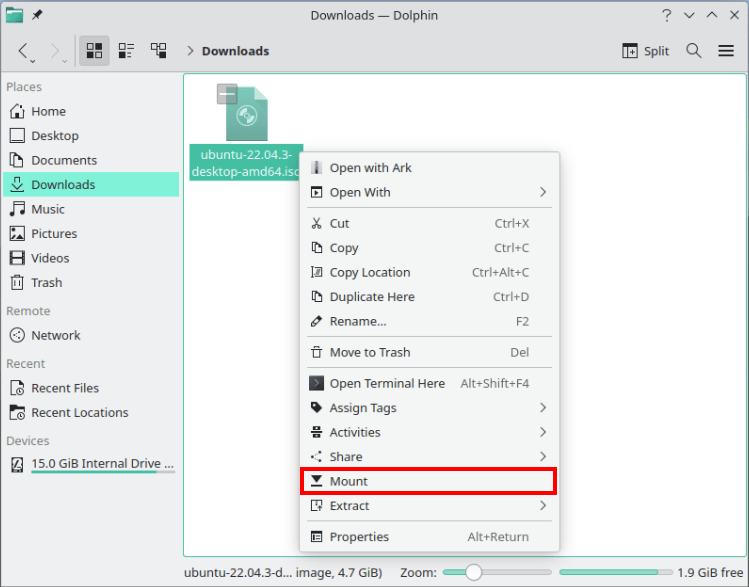
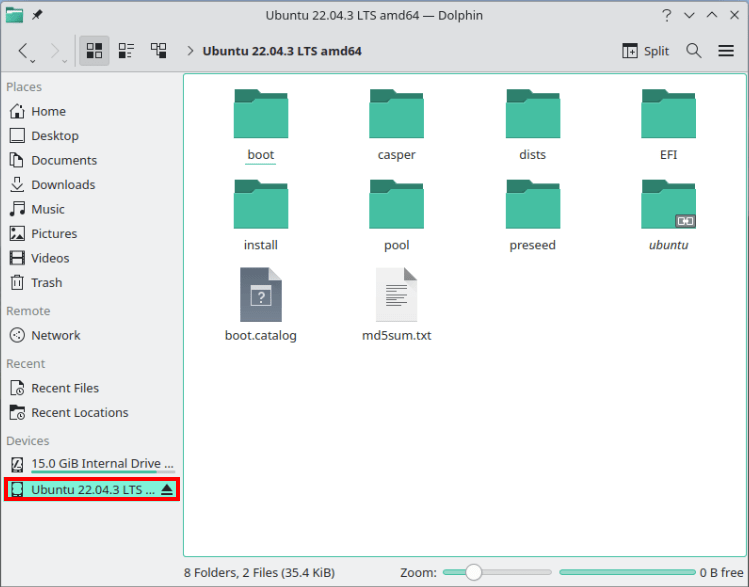
Similar to GNOME and MATE, this will load the ISO image to your computer’s filesystem. Check whether you can access the data inside the image by clicking its name on the file manager’s sidebar.
Mounting ISO Files in XFCE
Open the Thunar File Manager, then go to the folder where you have the ISO file that you want to mount.
Right-click the ISO file, then select the Open with Disk Image Mounter option on the file’s context menu.
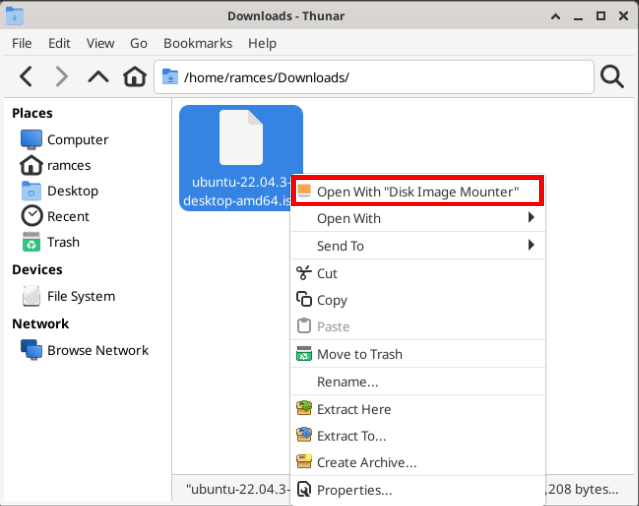
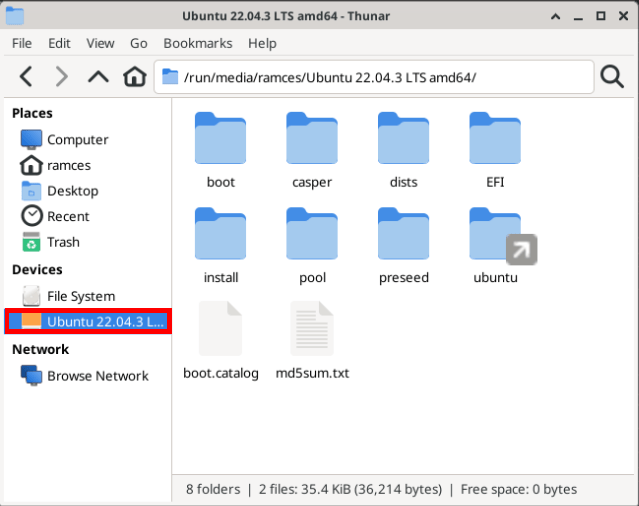
This will create a new Devices entry on Thunar’s left sidebar which you can click to access the contents of your ISO file.
Mount ISO Files via the Terminal
If you prefer the command line method to access the content in your ISO file, you can mount ISO files using the mount command.
First, create a mount point. It can be anywhere you like. In this case, we use “/media/iso”:
sudo mkdir /media/iso
Next, navigate to the location of the ISO file:
cd /path/to/iso-file/folder
Lastly, mount the ISO file with the mount command:
sudo mount file.iso /media/iso -o loop
The loop option is often used for mounting ISO files so as to make the content within accessible as a block device.
To view the content of the mounted ISO file, use the ls command:
ls /media/iso
To unmount ISO, use the umount command:
sudo umount /media/iso
Converting BIN and CUE Files to ISO in Linux
Unlike ISO files, there is no system-native way to automatically mount BIN and CUE files in Linux. This is because a BIN file can represent almost any type of binary data. Whereas, a CUE file is just a simple text document that tells a machine at which physical sector a disc starts.
As such, the easiest way to open a BIN and CUE file is to convert them to ISO first, then mount that with your system’s built-in file manager.
Open a terminal window and install the bchunk utility to your system:
Ubuntu/Debian
sudo apt install bchunk
In Manjaro, you can use pacman to fetch and install the utility:
sudo pacman -S bchunk
Meanwhile, in Fedora you can use dnf to obtain bchunk for your machine:
sudo dnf install bchunk
Navigate to the folder where you have your BIN and CUE files. For example, I have mine inside a folder called “HVAF”:
cd ~/HVAF/HVAF
Convert your BIN and CUE file to its appropriate ISO image by running the following command:
bchunk ./your-disk.bin ./your-disk.cue your-disk
This will produce a new ISO file which you can then mount using your distro’s built-in file manager.
Storing data on an ISO file is just one way of creating an accessible archive of your digital data. Learn how you can create your own internet archive by hosting ArchiveBox in Linux.
Our latest tutorials delivered straight to your inbox