
Roaming home directories is a neat way of managing multiple machines in a local network. It works by utilizing an IdM server to maintain a list of users and an NFS server that holds the users’ data. This allows you to log in to any machine in a network and get the same set of files every time.
This article will show you how to create a roaming home directory along with an identity management server using Red Hat’s IdM in RHEL 8. Further, it will also show you how to enroll a local machine to use the same identity and roaming directory system.
Tip: If all you want is to move your /Home folder to another partition, we have the instructions here.
1. Setting up a Red Hat IdM Server
Assumption: This guide assumes that you have a domain name with an A and PTR record pointing to your IdM machine’s IP address and hostname.
Note: The IdM system requires an entire subdomain block to work properly. In this case, we are setting up IdM for the “mte.home.arpa.” subdomain.
Set the hostname of your IdM server to a complete domain name:
sudo hostnamectl set-hostname idm.mte.home.arpaOpen the relevant ports for your IdM server:
sudo firewall-cmd --permanent --add-port={80/tcp,443/tcp,389/tcp,636/tcp,88/tcp,88/udp,464/tcp,464/udp,53/tcp,53/udp}
sudo firewall-cmd --reload
Enable the repository module for the IdM server binaries:
sudo dnf module enable idm:DL1
sudo dnf distro-sync
Fetch the IdM server-side binary to your machine:
sudo dnf module install idm:DL1/dns
Installing and Configuring the Red Hat IdM Server
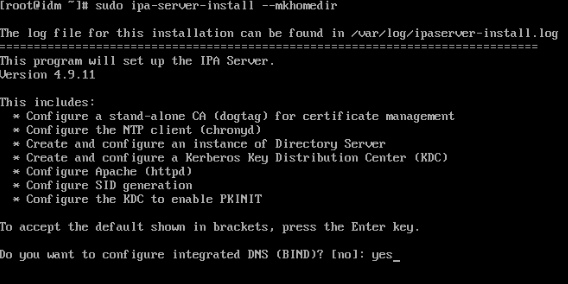
Run the following command to start the IdM server installation process:
sudo ipa-server-install --mkhomedir
Type “yes,” then press Enter when the installer asks if you want to include an integrated DNS server on your IdM setup.
Type your server’s hostname, then press Enter.

Press Enter twice to confirm the network’s domain name.
Provide a secure password for your network’s Directory Manager, then press Enter. This is similar to a web server’s database root password.
Provide a different secure password for your IdM server’s admin user, then press Enter. This will serve as your primary management account in the network.
Enable the IdM server’s DNS forwarding feature by typing “yes”, then press Enter.

Press Enter twice to accept the defaults for the IdM server’s domain values.
Type “no,” then press Enter to disable reverse zone lookup in IdM.

Press Enter twice, then type “yes,” then press Enter again to finalize your server’s configuration and start the installation process.
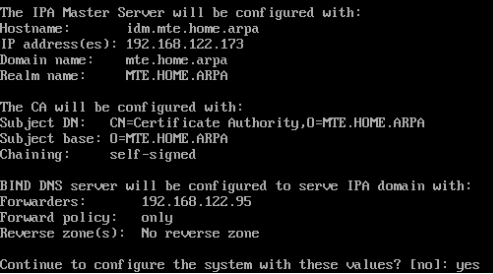
Go to your DNS registrar and create an NS record for your IdM subdomain. This record should point to the hostname of your IdM server. For example, the NS record for my IdM subdomain: “mte.home.arpa.” points to my “idm.mte.home.arpa.” IdM server.

Good to know: Check out our guide to find out the difference between RedHat, CentOS and Fedora.
2. Enabling NFS Automount on Your IdM Server
Open the relevant ports for your new NFS service:
sudo firewall-cmd --permanent --add-service=nfs
sudo firewall-cmd --reload
Run the following commands to create an IdM ticket for your NFS service:
kinit admin
sudo ipa service-add nfs/idm.mte.home.arpa
sudo ipa-getkeytab -p nfs/idm.mte.home.arpa -k /etc/krb5.keytab
Create a new file under “/etc/exports.d/” for your roaming home directory:
sudo nano /etc/exports.d/home.exports
Paste the following line of code inside your new exports file:
/home *(sec=krb5:krb5p:krb5i,rw)
Save your “home.exports” file, then run the following command to apply it to your server:
sudo exportfs -rav
Start your NFS server to enable its new settings:
sudo systemctl enable --now nfs-server
Check whether your IdM server is properly exporting its “/home” by running the following command:
sudo exportfs -s
Link your NFS and IdM servers by creating an automount map and key:
kinit admin
sudo ipa automountmap-add-indirect default auto.home --mount=/home
sudo ipa automountkey-add default auto.home --key "*" --info "idm.mte.home.arpa:/home/&"
3. Adding Users to IdM
Open a web browser and navigate to the domain name of your IdM server. This will bring up the server’s web console. Log in to this console with your IdM admin’s credentials.
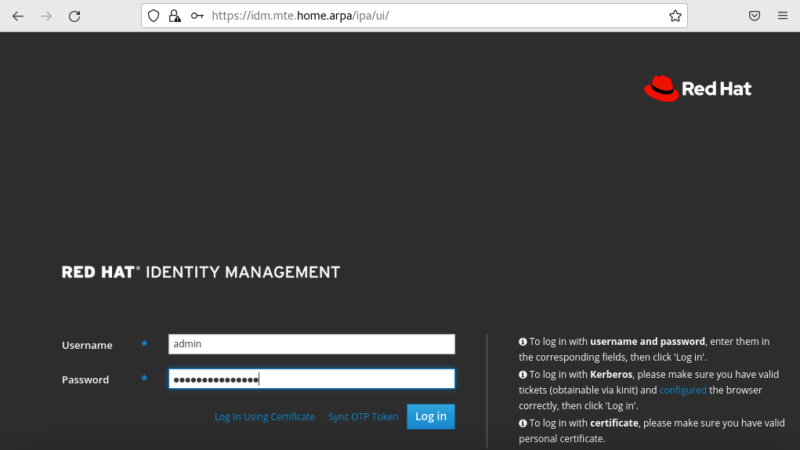
Note: Some browsers might return a security error when loading the console’s web page. In Firefox, you can bypass this by clicking “Advanced” then “Accept the Risk and Continue.”
Select the “Stage Users” category on the web console’s left sidebar.

Click the “Add” button on the page’s middle right corner.

This will bring up a small window where you can provide the details for your new user. Fill in all of the fields aside from “Class” then click “Add.”
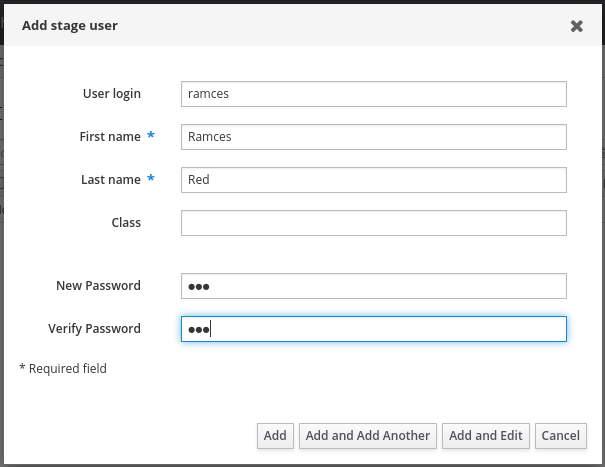
Tick the checkbox beside your user account, then click “Activate” to enable the new user.

Lastly, login to your IdM server using your IdM account to generate your “/home” directory.
4. Adding New Machines to the IdM System
Install the IdM client-side binary in your local computer:
sudo dnf module install idm
Start the IdM client installation process by running the following command:
sudo ipa-client-install --enable-dns-updates
Type “no” on the NTP prompt, then press Enter.
The ipa-client-install program will then print a summary of your IdM server’s details. Type “yes,” then press Enter to start the enrollment process.

Provide the username of the IdM admin for your network, type its password then press Enter.

Enabling Automount on the IdM Client Machine
Run the following command to link the IdM automount details to your client machine:
sudo ipa-client-automountRestart some of the key services for your system’s automount daemon:
sudo systemctl restart rpc-gssd
sudo systemctl restart rpcbind
sudo systemctl restart nfs-idmapd
Reboot your system and click “Not Listed?” on the client system’s login screen.
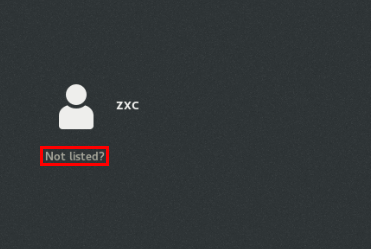
Provide the username of your IdM user along with its password, then click “Sign in.”
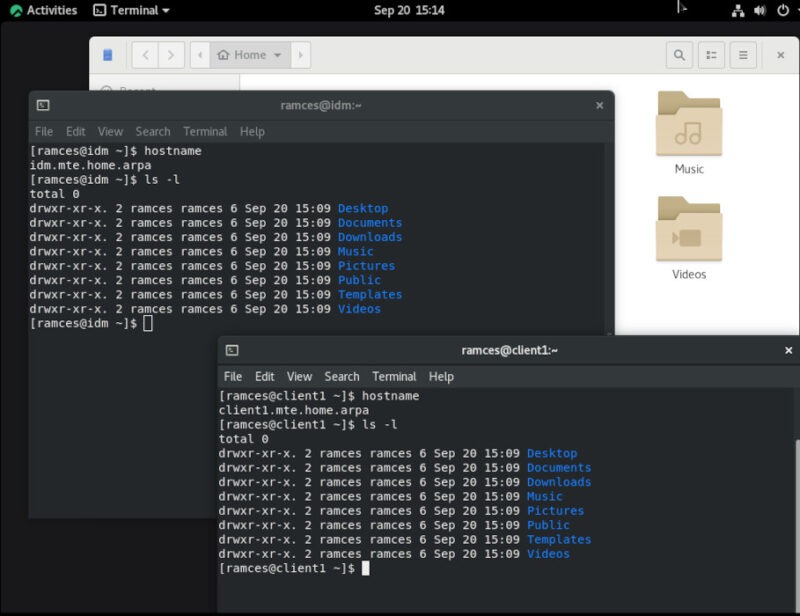
Test whether your roaming directory works by creating a file on your IdM server, and checking whether it shows up on your client machine.
Frequently Asked Questions
Is it possible to migrate a machine with a local /home to a roaming one?
Yes. You can do this by running the ipa-client-install command on your target machine. However, this will only work on a system where you don’t have a “/home” directory yet. This is because roaming directories will always overwrite “/home” making the local files inaccessible during normal use.
Are there any limitations to using roaming directories?
One of the biggest limitations of roaming directories is that the file system can only be as fast as your NFS server’s network interface. For example, if the server’s maximum throughput is 1 Gigabit, every file operation on the client machine’s “/home” will run at 1 Gigabit.
Can you enroll non-Enterprise Linux machines in roaming directories?
Yes and no. Both the ipa-server-install and ipa-client-install programs are Red Hat-specific tools that are meant to run on Red Hat-like Linux distros. While it is not possible to use these with Debian and Ubuntu, you can enroll other Red Hat Linux distros such as Fedora and CentOS Stream to your IdM server.
Image credit: Marvin Meyer via Unsplash. All alterations and screenshots by Ramces Red.
Our latest tutorials delivered straight to your inbox