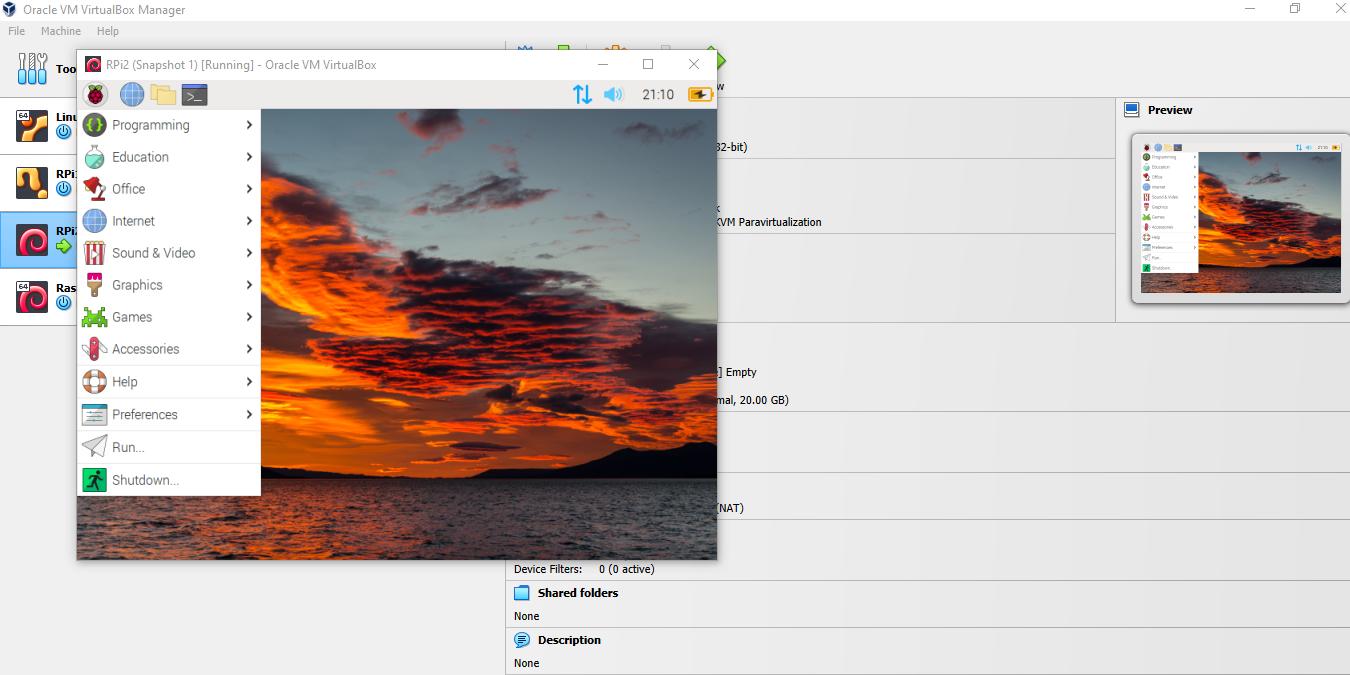
The Raspberry Pi is one amazing little machine with a bit of a caveat: the RAM and SD card storage. And it’s not like you can do anything with that since everything is soldered directly on the board. That’s why upgrading both RAM and storage is impossible – unless you make a Raspberry Pi virtual machine.
And the good news is that it’s so easy to make one. Here we show you how to make a Raspberry Pi virtual machine.
What You Need
You only need three things to do this:
- Raspberry Pi Desktop ISO image
- Oracle VM VirtualBox
- A Windows, Linux, or Mac PC that can run VirtualBox
Many OS installs on VirtualBox follow a two-step process. The first one sets up the OS image in some form of a bootable disk, much like a bootable USB. After that, the second step is about installing the OS, itself.
However, since the Raspberry Pi OS doesn’t have some sort of a “bootable” form, the second step will look different from normal VM installs. This guide will make sure that you won’t make a mistake on that part while setting yourself up a Raspberry Pi OS virtual machine.
Download a Raspberry Pi ISO Image
To make a virtual machine with the Raspberry Pi, you’ll first need an ISO image. Unfortunately, the version normally installed on a Raspberry Pi won’t work because that’s saved as an IMG file.
- Go to the Raspberry Pi operating system images download page. You should see a list of links and versions to download.
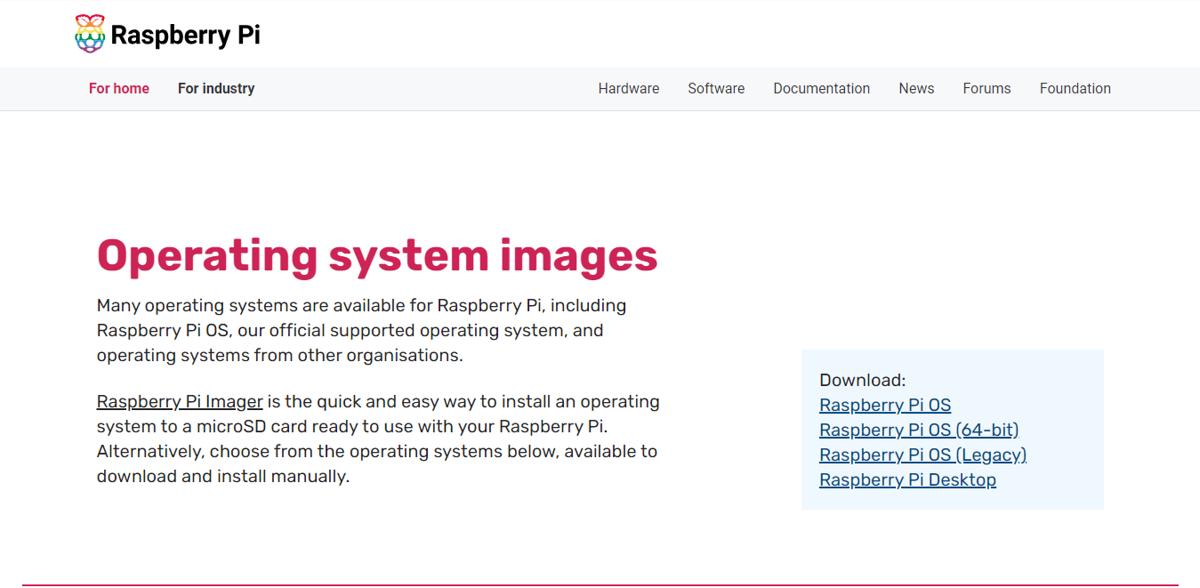
- Scroll down to Raspberry Pi Desktop and click the “Download” button. That’s the only version in the list that is saved as an ISO file.
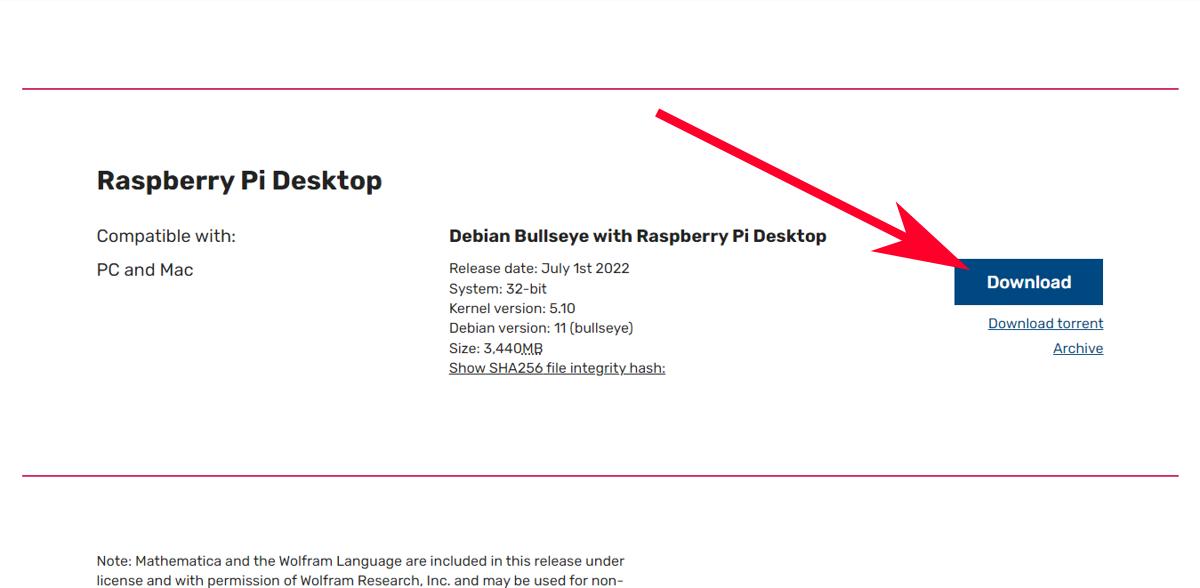
Alternatively: You can download older versions of Raspberry Pi OS or even Raspbian through the Raspberry Pi Downloads Archive.
Setup Raspberry Pi ISO Image on VirtualBox
- Download and install Oracle VM VirtualBox.
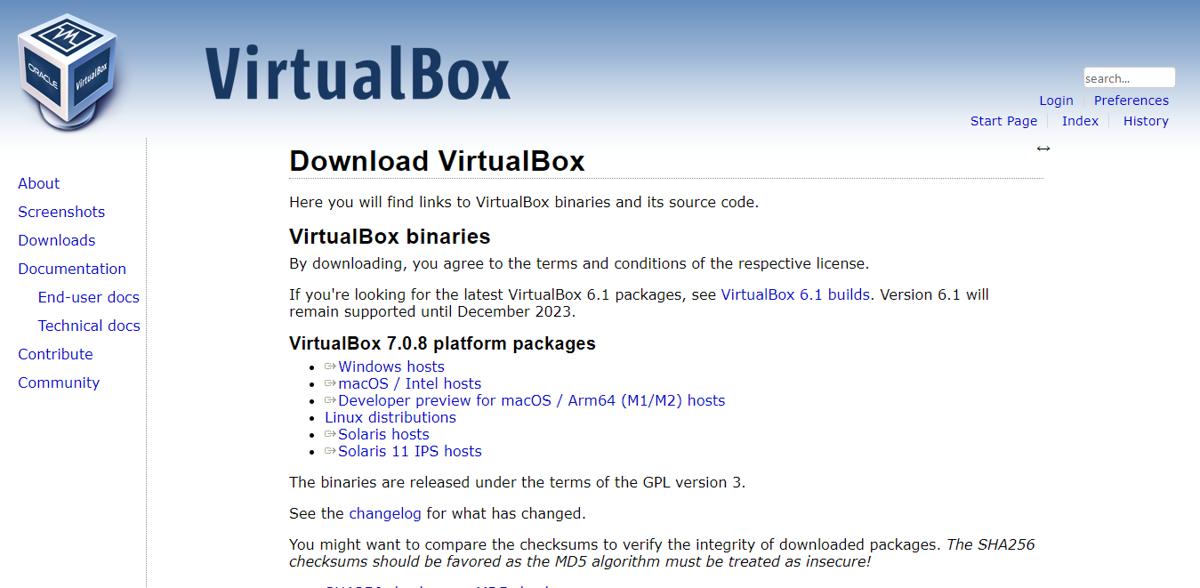
- On VirtualBox, click on the “New” button.
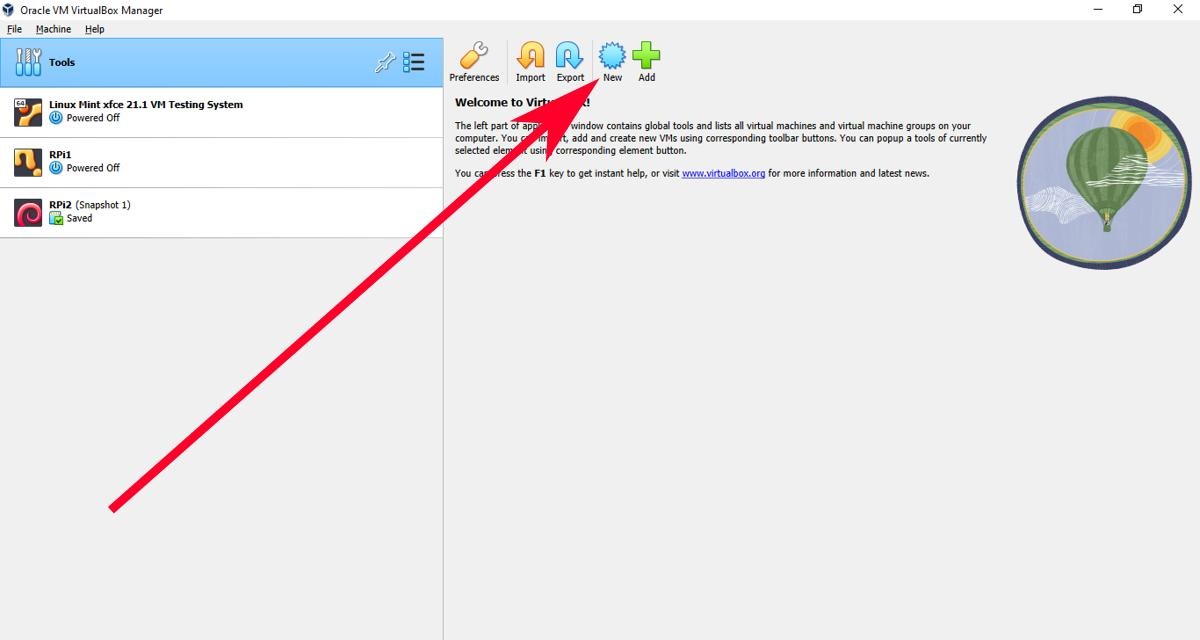
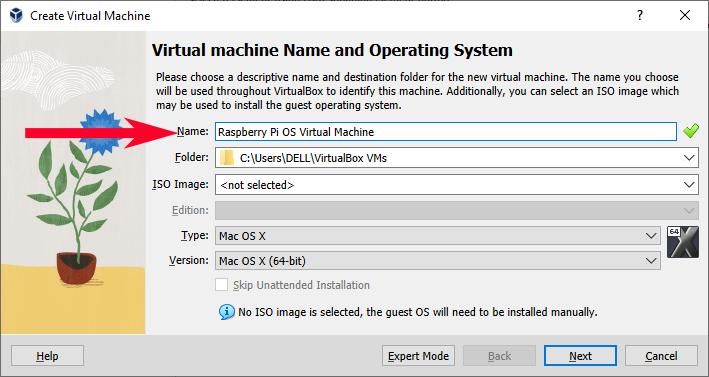
- The “Create Virtual Machine” window should pop up. On the “Name” field, add the name of your Raspberry Pi virtual machine.
- On the “ISO Image” field, click on the drop down menu and select the “Other…” option.
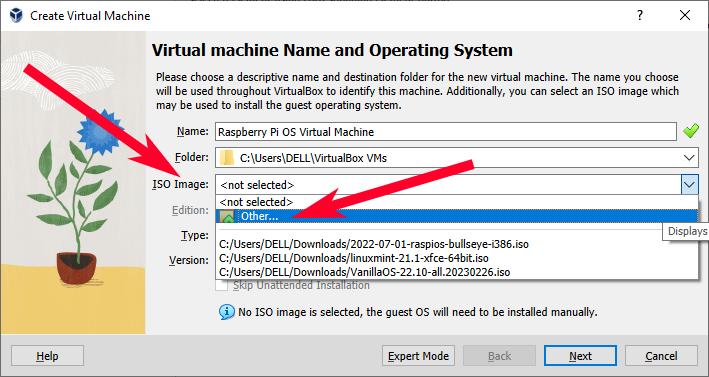
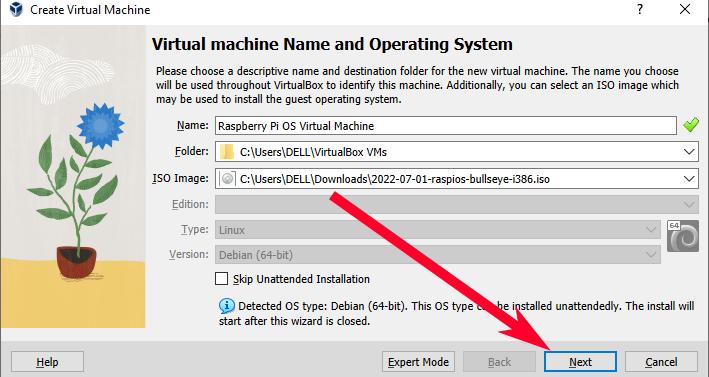
- You will be shown a file explorer to find your ISO file. Select your Raspberry Pi OS ISO file.
- After selecting the ISO file, all the other fields should gray out. Click the “Next” button.
- You should see an option for unattended guest settings. You can skip this part, but you might need to change the “Hostname” fields if you picked a name with spaces earlier. Click on “Next” after that.
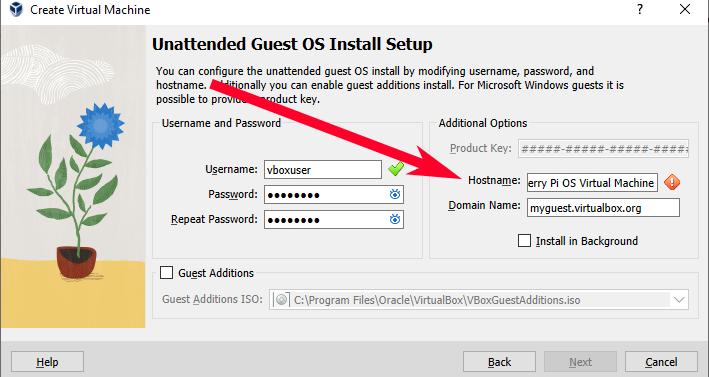
- Here is where you can increase or decrease the random access memory (RAM) and CPU count for your Raspberry Pi virtual machine. While the default should work, you can add more to speed it up even more. Click on “Next” after you’re done setting this up.
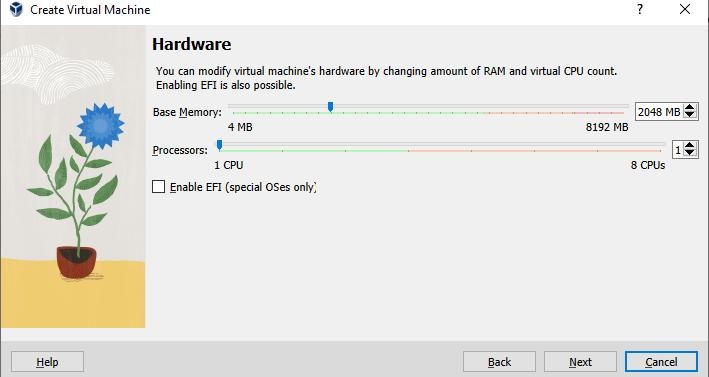
- Next up is the virtual hard disk. This is the size of disk memory your Raspberry Pi virtual machine can use. Ticking the “Pre-allocate Full Size” check box immediately allocates the max size on your host PC’s hard drive.
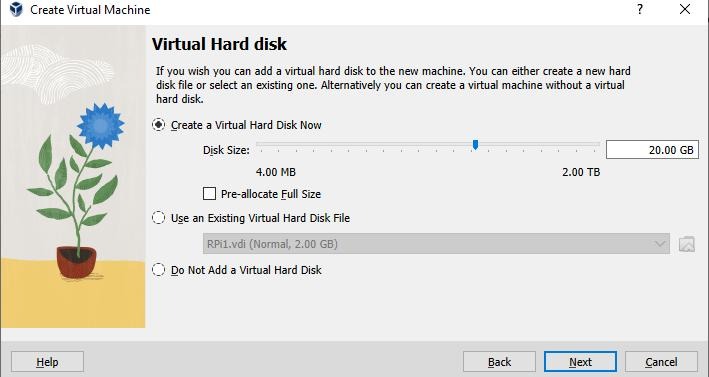
Note: You should allocate at least 8 GB of virtual hard disk to ensure that you have enough space to install the Raspberry Pi OS and any other programs you might need with it.
- After clicking “Next” from the previous section, you should see a page to review your current virtual machine settings. Click on “Finish.”
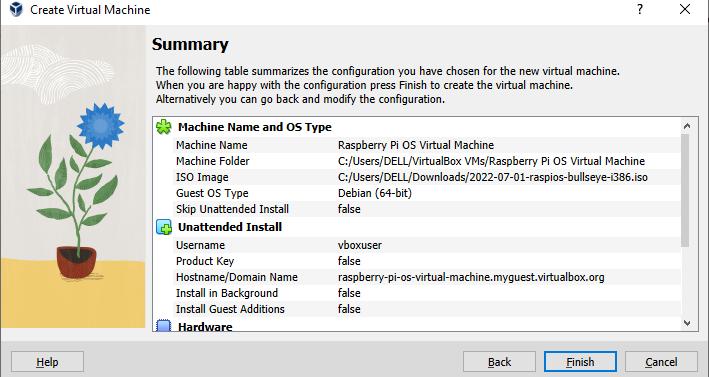
Tip: Other than Raspberry Pi OS, you can also install macOS in VirtualBox.
Installing the Raspberry Pi OS
The moment you click on “Finish” from the summary section, VirtualBox should automatically run the virtual machine for you. But then you’d see a problem: the ISO does not load and you’ll find an error code that says “No DEFAULT or UI configuration directive found!” on VirtualBox.
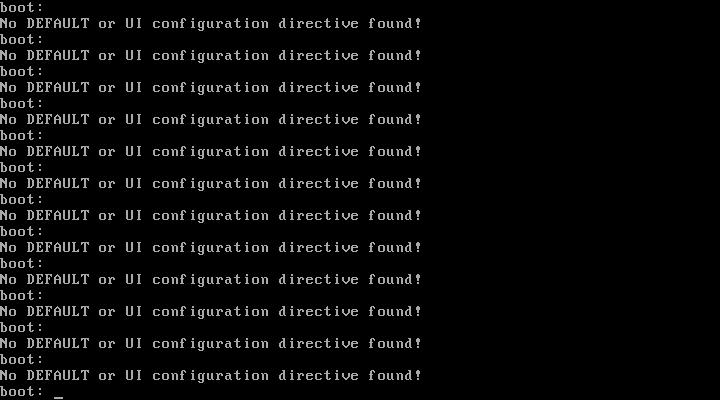
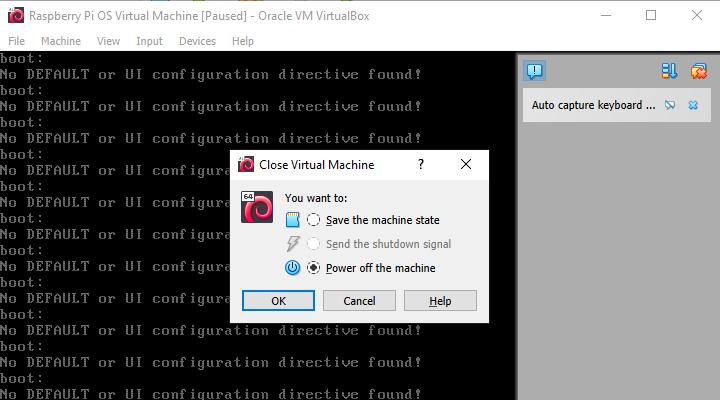
- To fix that, you’ll need to power off your machine.
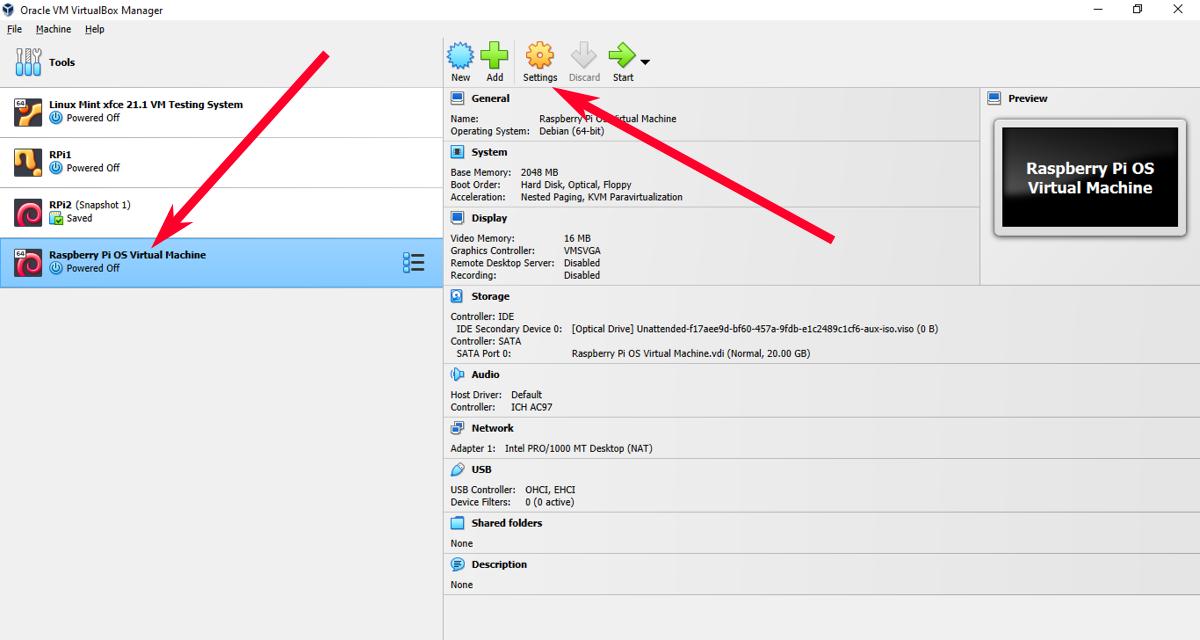
- From Virtualbox’s list of your virtual machines, select the Raspberry Pi virtual machine, then click on “Settings.”
- Go to “Storage -> contents of Controller: IDE.” Normally, this would be named “Unattended” followed by a string of alphanumeric characters. You might sometimes get one named “Empty” instead.
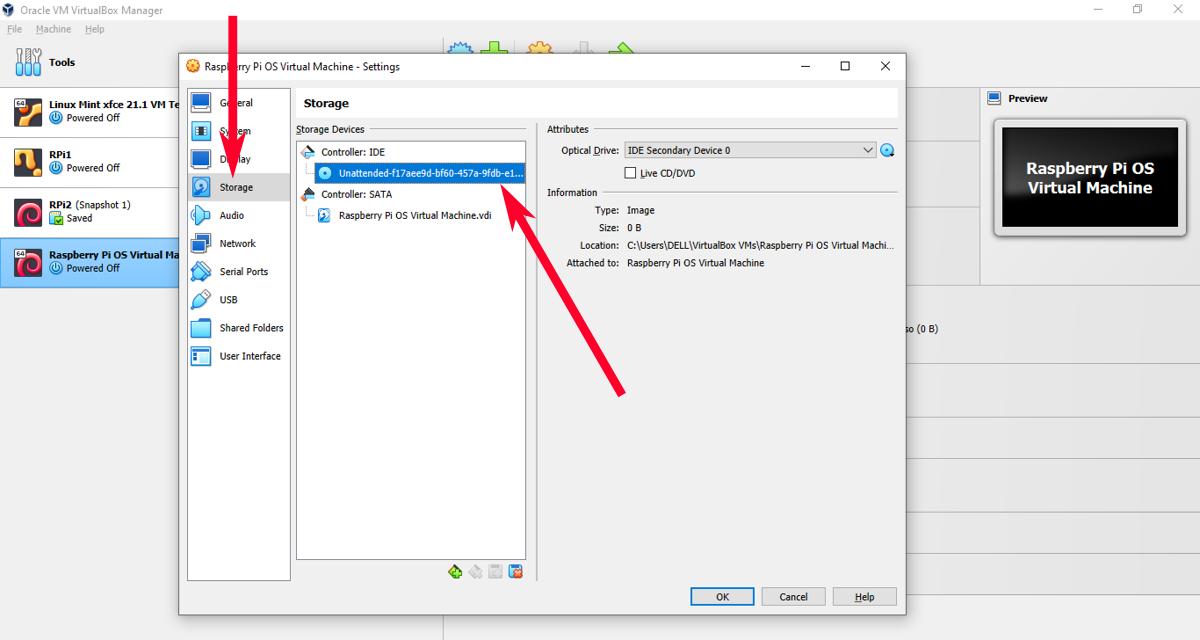
- After that, click on the disk icon beside the dropdown. This is a separate dropdown that lets you pick an ISO image. Select “Choose a disk file…” to access the file explorer or select your Raspberry Pi ISO image if it shows up on the list.
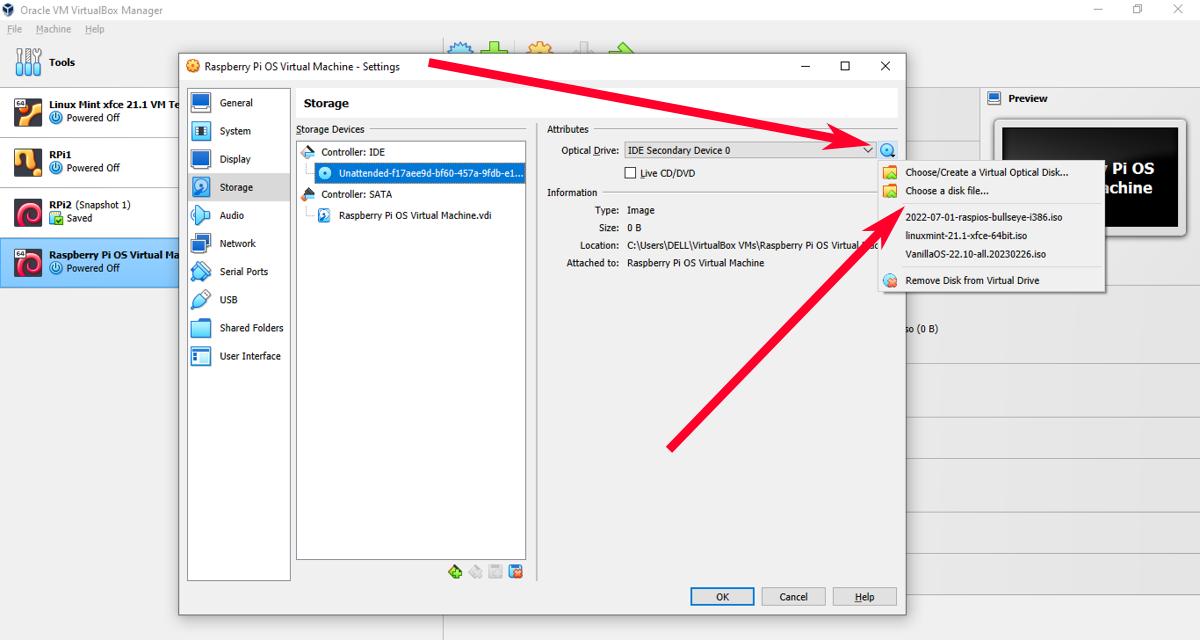
- Click on “OK” to finalize your settings. Your Raspberry Pi virtual machine should now run the Raspberry Pi installer the next time you run it.
Note: The BIOS mode settings will show up the moment you run your Raspberry Pi virtual machine. Leave it be until you see the Raspberry Pi welcome screen or hear the screen reader say “To install the screen reader, press Ctrl + Alt + Space.”
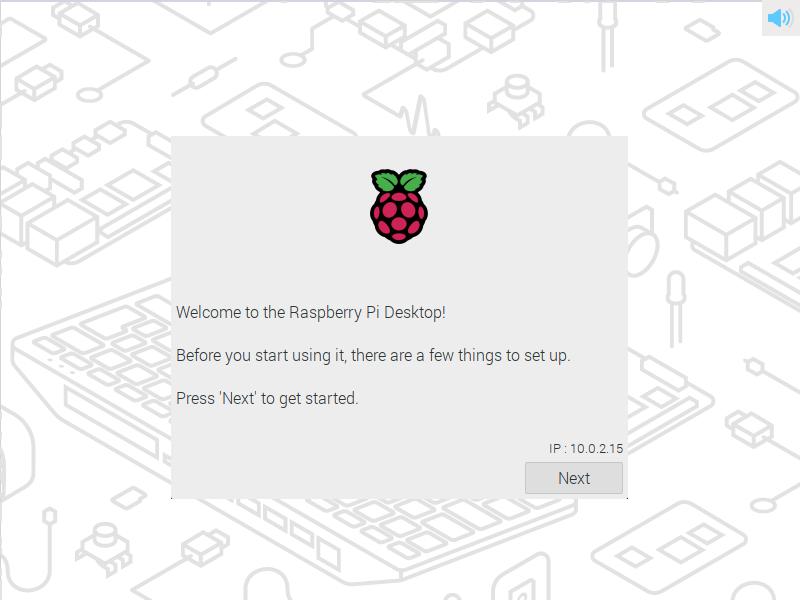
From this point on, installing the rest of the virtual machine will be similar to doing the post-installation configuration on a normal Raspberry Pi. This means you can now set up and personalize your new Raspberry Pi virtual machine.
Frequently Asked Questions
Why is my Raspberry Pi OS image not showing in VirtualBox import?
If you have downloaded the IMG file, VirtualBox can’t read IMG files, so it won’t show up when you try to import it.
Why does it take so long to install my Raspberry Pi OS image on VirtualBox?
This can depend a lot on your hard drive’s capacity. Allocating low CPU and RAM into your virtual machine makes installation a lot longer than it would on a normal Raspberry Pi. If you are installing a Raspberry Pi OS image along with GRUB, expect it to take even longer – perhaps even hours!
What is the difference between the Desktop version and the regular version of Raspberry Pi OS?
Other than the file extensions (ISO for Desktop and IMG for Raspberry Pi), both versions are practically the same.
Our latest tutorials delivered straight to your inbox