
Whether you’re preparing for a professional presentation, a cinematic experience, or enhancing your workspace, projectors are a great way to turn an average space up to 11. However, for Linux users, there can sometimes be difficulties getting different displays to work, and it may be important to walk through some troubleshooting steps to get things to work. Here we walk you through how to connect a projector to your Linux computer.
Alternatively, if you are looking to use your projector as your TV, here are the things you should take note of.
Setting Up the Projector
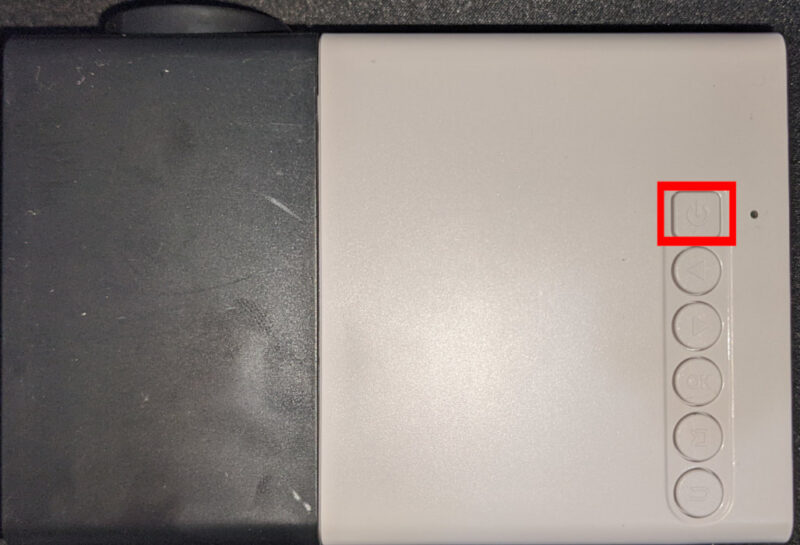
The first step is to ensure that your projector is up and running. You can do this by looking for a button with a power symbol along the surface of the device.
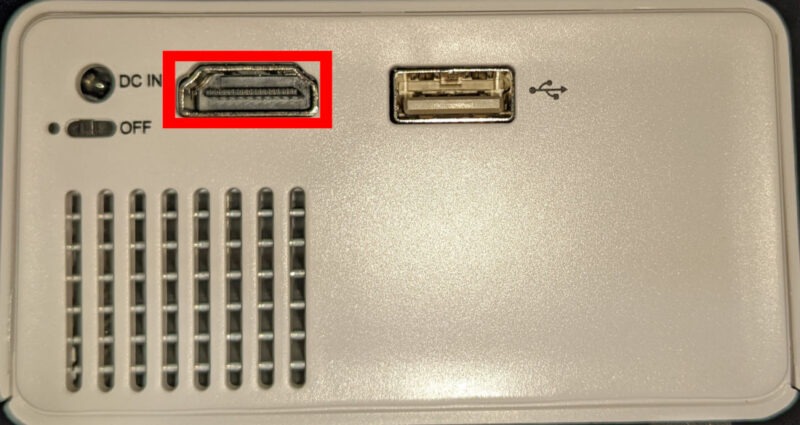
Look for any available display input port in your projector. The most common ones are VGA with a blue, 15 pin D-sub connector and HDMI.
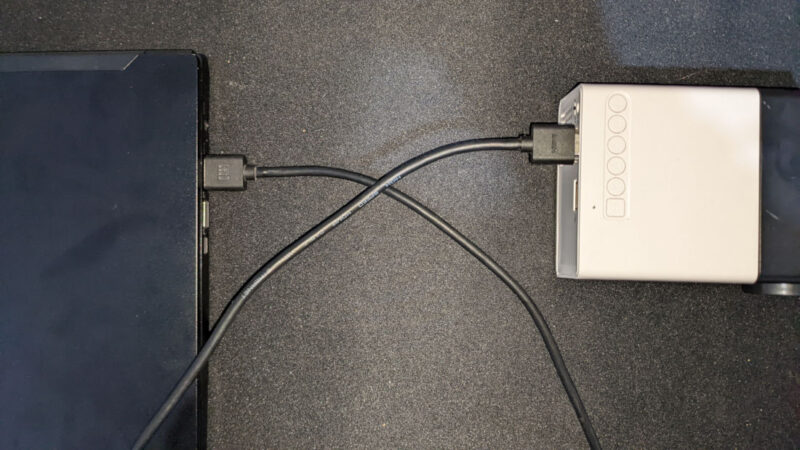
Find the accompanying display output port in your computer. You can find this either along the right side of your laptop or at the back of your desktop PC.

Note: There are instances where your projector does not have the correct input port for your computer’s output port. To fix this, you can get a VGA to HDMI or an HDMI to VGA display adapter.
Plug in the appropriate cable from your projector’s input port to your machine’s output port.
Setting Up the Display Settings
At this point, your Linux distro should detect the projector and reconfigure its display settings to accommodate your projector. However, there are cases where the projector itself will not automatically switch to your computer’s output port.
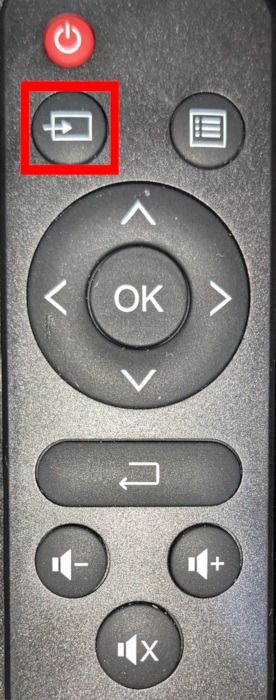
To fix this, find your projector’s remote then look for either a symbol with a square and an arrow pointing towards it or the text “Source.” Press that, then select the appropriate display input for your computer.
Aside from that, you can also check whether your system has the right display drivers for your graphics chip:
sudo apt install mesa-utils
glxinfo | grep -i vendor
For Nvidia-based chips, you can follow our guide on installing the latest proprietary drivers for your graphics card. For newer Intel and AMD-based chips, meanwhile, you can compile a mainline Linux kernel that includes support for your chip.
Good to know: If you are planning to get a portable projector, check out this guide first before you buy.
GNOME
By default, GNOME sets your projector as a “second display” on your current session. You will need to move the window to this second display before it will show up in the projector.
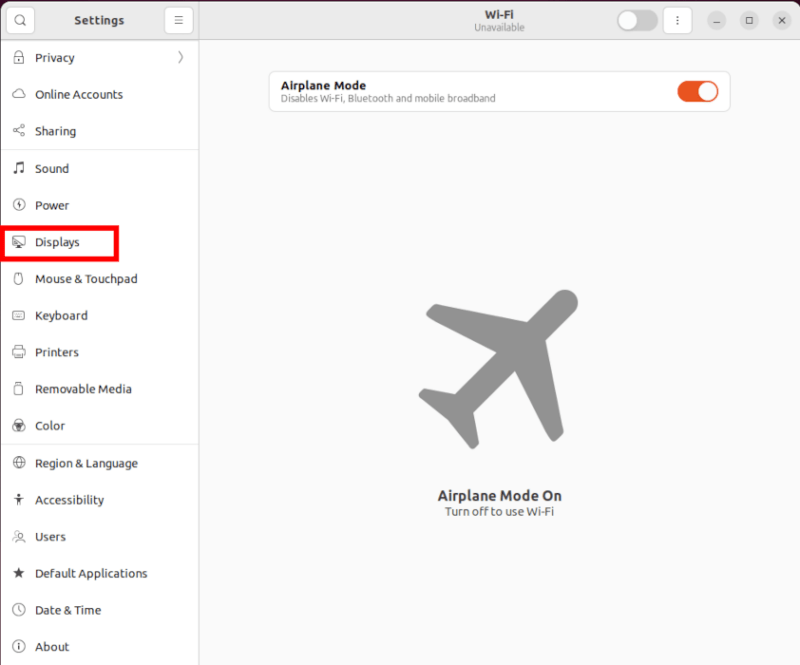
To change this, open your computer’s Settings panel and click the “Displays” category in the window’s left sidebar.
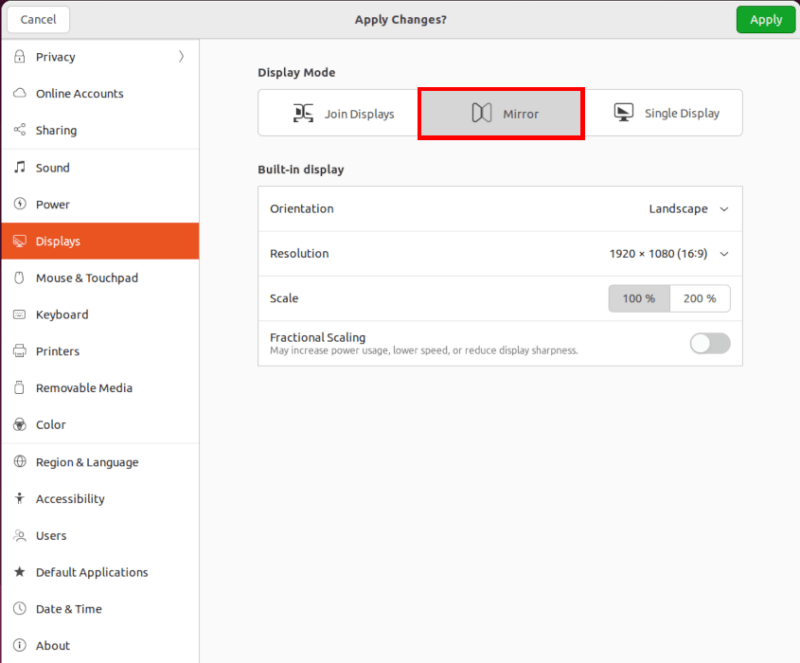
Select the “Mirror” button under the “Display Mode” category, then click “Apply” to enable your new settings. This will force your desktop to show the contents of your main monitor through your projector.
KDE
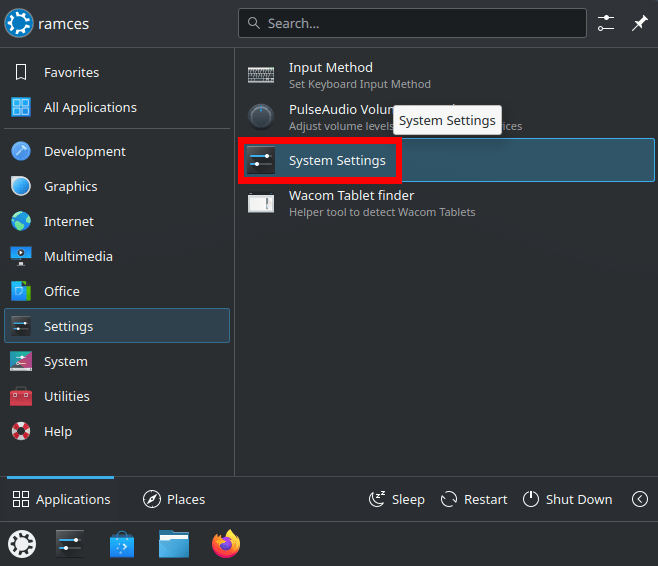
Open the desktop environment’s Settings panel and click “System Settings.”
Scroll through the left sidebar and then select “Display and Monitor.”
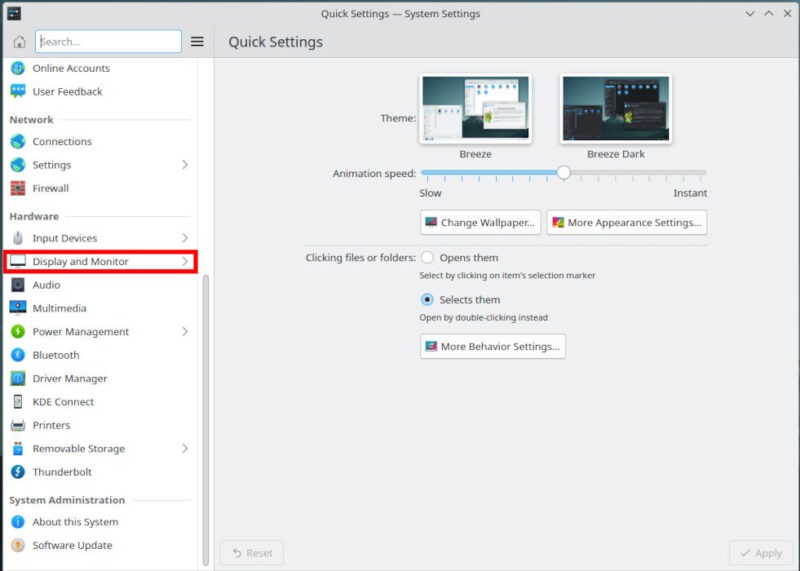
This will load a small subcategory where you can configure your internal and external displays. Click the name of the projector that you want to modify, then scroll down its configuration section.
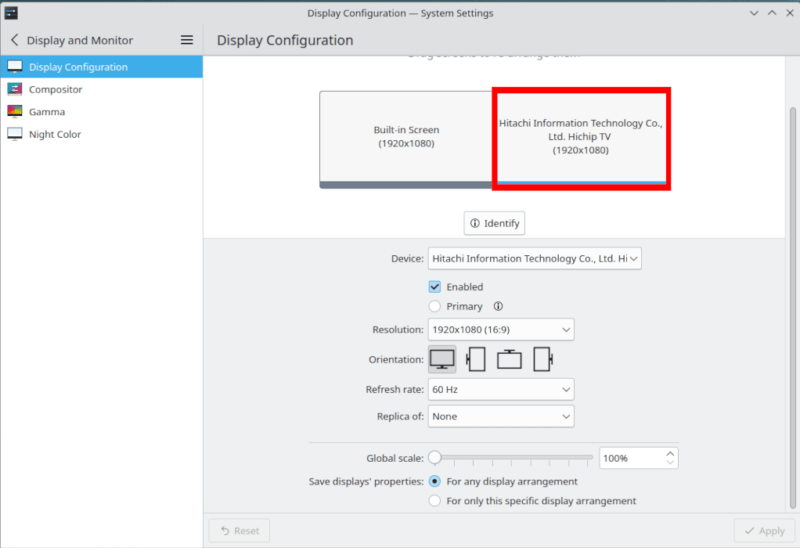
Click the “Replica of:” dropdown box, then select the display that you want to mirror to your projector.
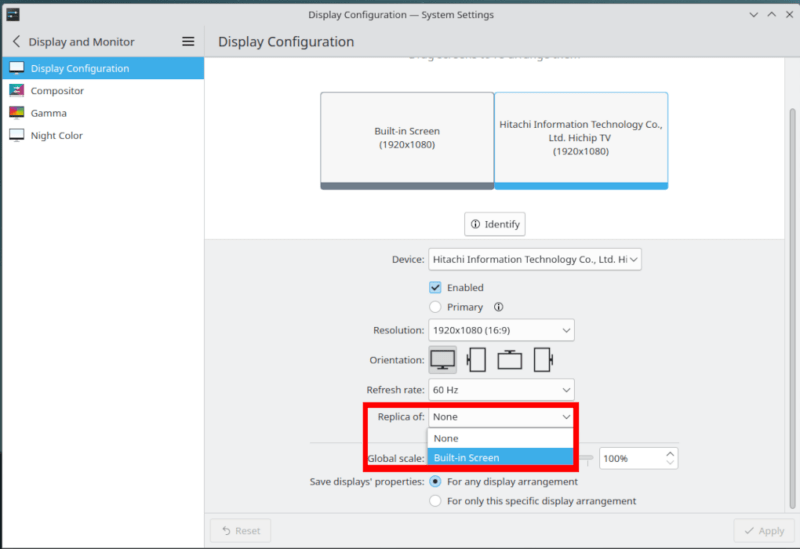
Select “Apply” to enable your new settings on the current session.
Tip: wondering what is the difference between a laser projector and a normal projector? We have the answers here.
XFCE
Open XFCE’s settings menu by clicking the XFCE logo on the desktop’s upper left corner, then selecting “Settings.”
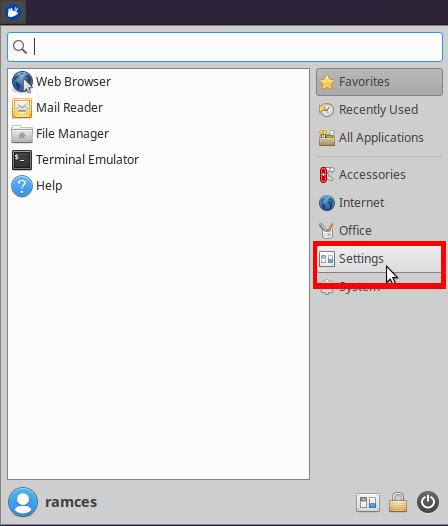
Click the “Display” category inside the menu. This will load a new window where XFCE will show all the available displays for your current session.
Click the “Advanced” tab on the window’s upper bar.
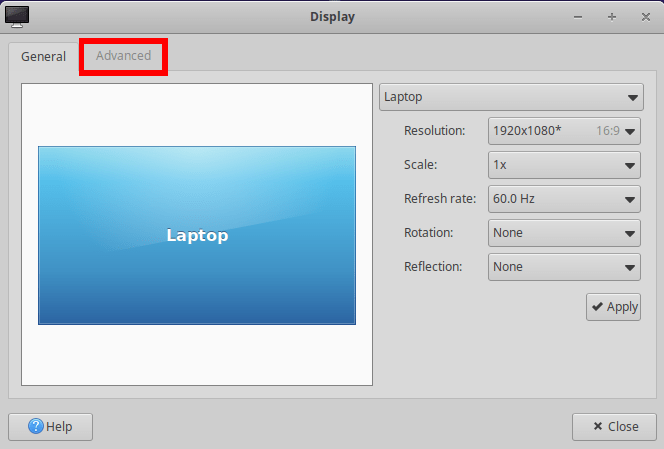
Toggle the “Configure new displays when connected” under the “Connecting Displays” subcategory.
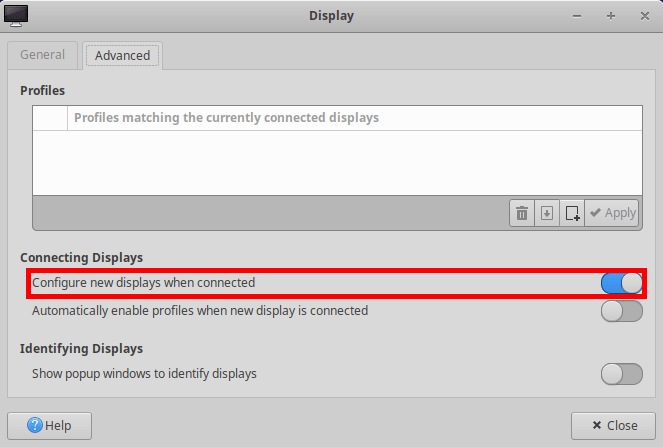
Disconnect, then reconnect the display output cable from your machine. This will load a small window on your desktop where you can customize how to load your external projector.

Learning how to connect an external projector to your Linux computer is just the first step in taking advantage of your machine’s inherent features. Expand your know-how by understanding how virtual filesystems work through mounting ISO files in Linux.
Image credit: Alex Litvin via Unsplash. All alterations and screenshots by Ramces Red.
Our latest tutorials delivered straight to your inbox