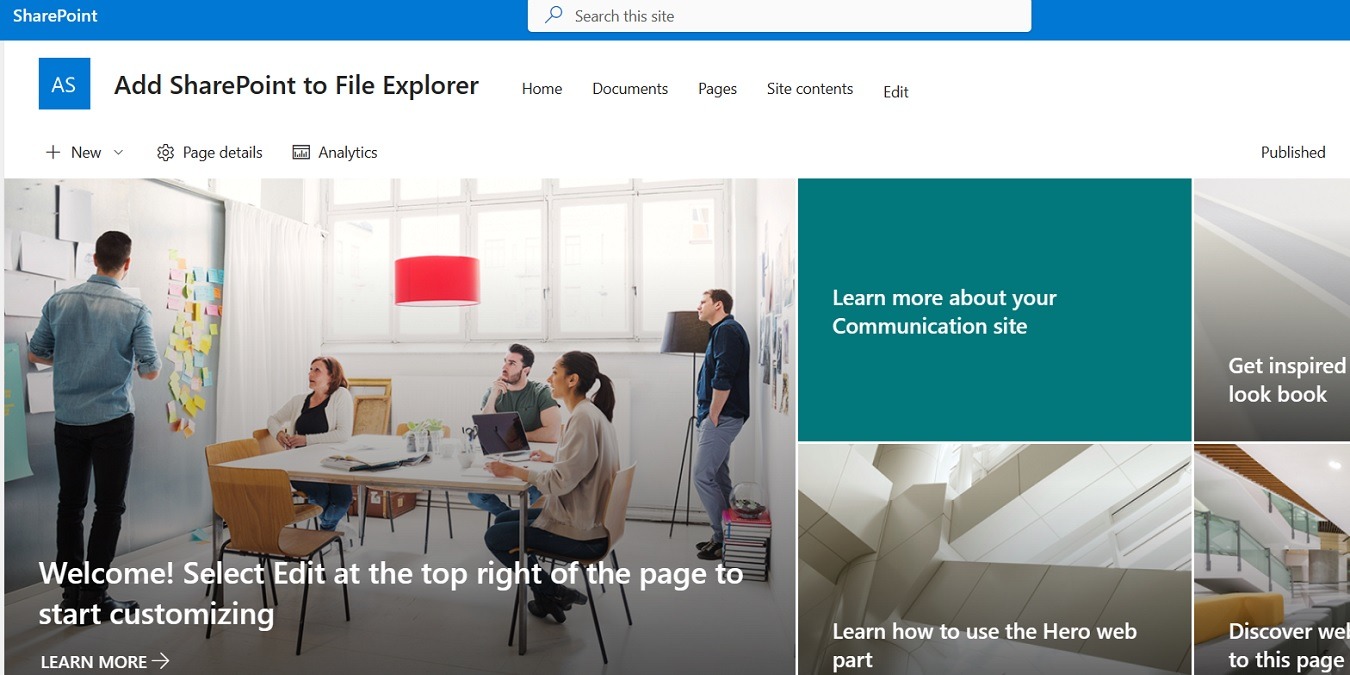
Adding SharePoint to File Explorer allows you to easily access your files from any Windows PC. This saves a lot of time, as you don’t have to open a browser to access SharePoint libraries and documents. By doing so, you can not only view SharePoint in File Explorer but also sync it to your device to gain access to newer SharePoint uploads. The following guide covers how to add SharePoint to File Explorer through various methods.
Good to know: don’t want Windows auto-saving files and folders to OneDrive? Learn how to prevent it.
1. Add SharePoint to File Explorer Using OneDrive for Business
There are more than a few ways to access SharePoint from File Explorer. The easiest is to connect your SharePoint account to File Explorer using OneDrive for Business on your local PC. Note that this method won’t work with the OneDrive Personal Vault.
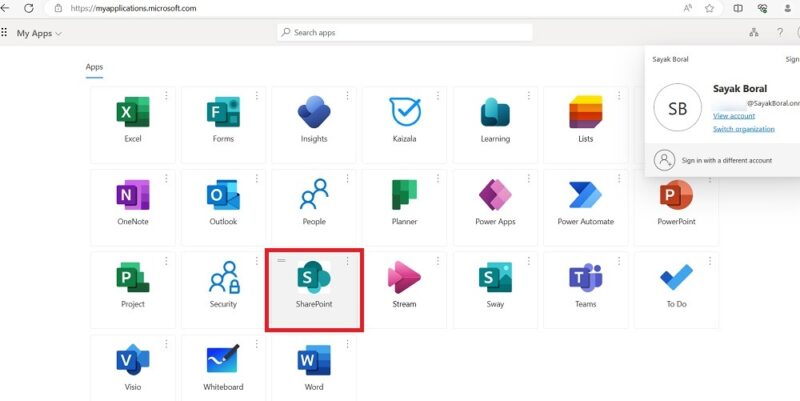
Open the default browser on your Windows PC, and visit Microsoft’s My Apps portal. Sign in using the username you use to access SharePoint. It’s either a custom domain or an onmicrosoft.com account that links to you when you create a Microsoft 365 Business account.
If you’re a non-admin user, you will have to contact your administrator for the username and password. Once you log in to the My Apps portal, select SharePoint from the list of apps. You’ll be taken to your existing SharePoint sites.
After opening SharePoint’s online homepage, look for your favorite website under the subheadings: Following, Frequent Sites, and Recent. Once you’re inside that website, navigate to the Documents tab to view its files and folders.
As you can view SharePoint documents, click Sync to copy its folders to your OneDrive account. The SharePoint online version lets you select specific folders or your entire SharePoint documents library.
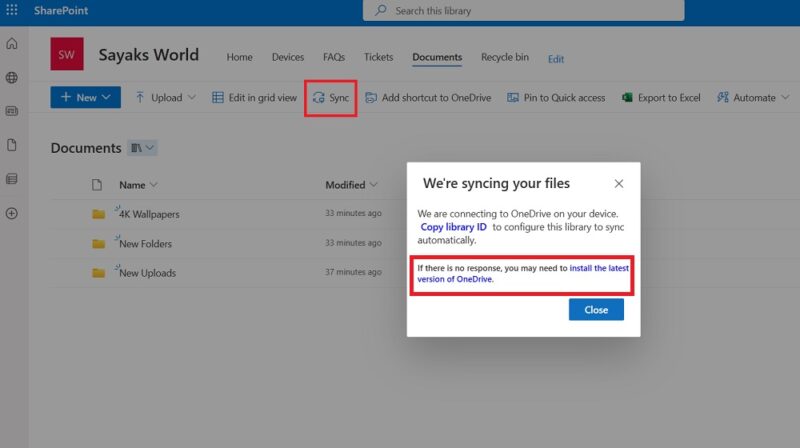
The above action triggers a “We’re syncing your files” message, while the folders are being copied to your device. Wait a while for this to finish. If, however, you don’t see any response on your Windows folders, it means the OneDrive on the PC is corrupted. You will be prompted to install the latest version of OneDrive.
When you try to sync SharePoint files with your PC’s OneDrive folder, you will get a pop-up alert on your browser window that says, “This site is trying to open Microsoft OneDrive.” Click Open to proceed.
The OneDrive application on your Windows PC will automatically ask you to sign in with the username you use for SharePoint.
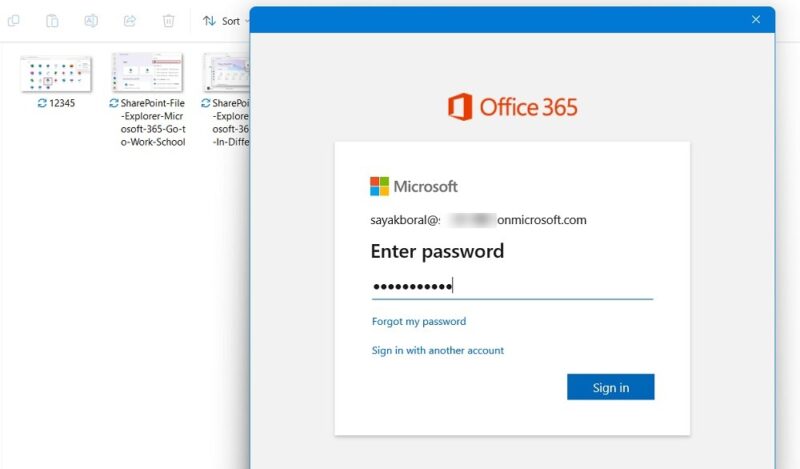
In the next pop-up window, select the option to Stay signed in to all your apps, and click OK to proceed. If you encounter any error while signing in to your SharePoint account, close the screen, and finish syncing OneDrive.
After your OneDrive Business account is ready, the SharePoint website will be available as a folder in File Explorer. You can confirm this by right-clicking the file folder’s Properties to view it.
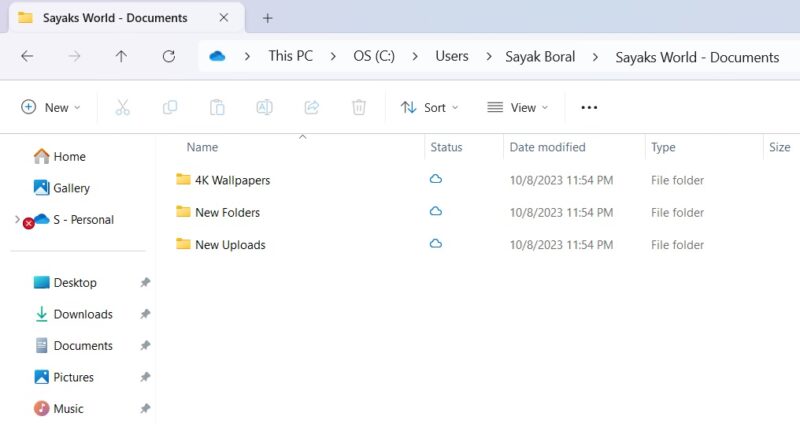
Note: in the past, the online version of SharePoint had a specific option under All documents, called View in File Explorer. It could sync your SharePoint files directly with File Explorer. This option is no longer available.
Tip: learn how to enable tabs for File Explorer in Windows.
2. View SharePoint in File Explorer Using Microsoft Store
Microsoft Store is one of the sources that initially helped you add SharePoint to File Explorer.
Download and install the official Microsoft 365 app, and open it from within the Store. You can also open the application by typing “Microsoft 365 (Office)” inside the Windows Search box.
If your Windows PC account is the same as your Microsoft SharePoint account, you’ll easily find SharePoint inside the list of Apps on the left side. Otherwise, use the Microsoft 365 search bar to go to SharePoint through your work or school option.
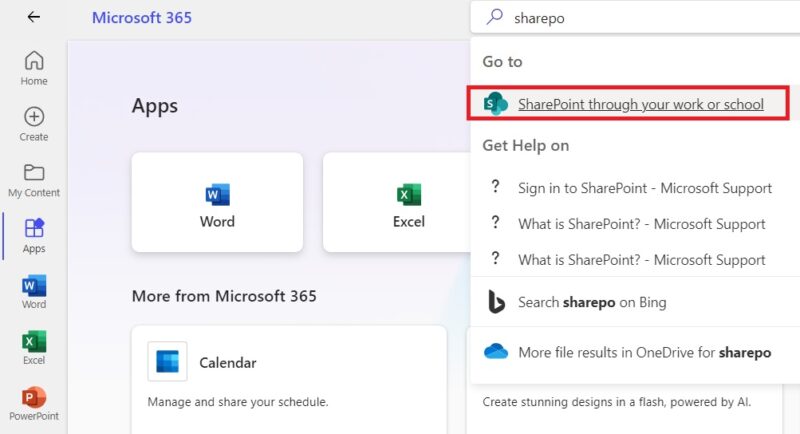
For both scenarios, a new tab opens on your default browser, taking you to SharePoint’s default sign-in page. You will need to enter the user credentials for your valid Microsoft 365 Business account to enable login access to your SharePoint account.
Once there, use the OneDrive syncing method as covered earlier to enable access to SharePoint in your computer’s folders.
3. Sync SharePoint to File Explorer Using Hub for SharePoint
Another way to connect to a root SharePoint site on a Windows PC is to use the Microsoft Store utility, Hub for SharePoint.
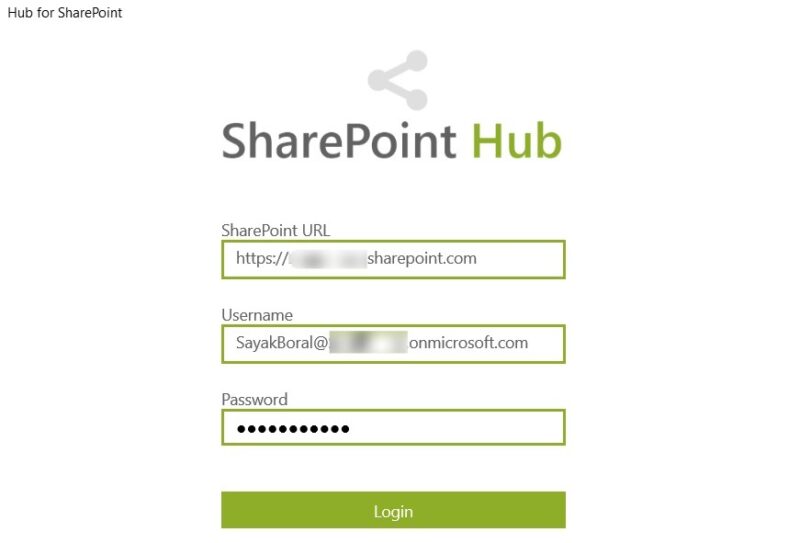
To begin, enter your SharePoint URL, which you can copy-paste from the address bar of SharePoint’s Start page. Instead of typing “sharepoint.com,” you may also enter the exact site location, such as “sharepoint.com/sites/XXX.” You can find that information in SharePoint My Sites.
Finally, enter your valid SharePoint username and password, and click Login to sign in to the Hub.
Hub for SharePoint does a pretty nifty job at importing all the correct documents from your SharePoint site. To view the latest file libraries online, just hit the button with the refresh symbol. It will automatically sync Hub for SharePoint with the real SharePoint folders in the cloud.
It’s really surprising that this amazing free app currently has a low rating on Microsoft Store. On that note, we have tested this to work accurately with the current versions of SharePoint online.
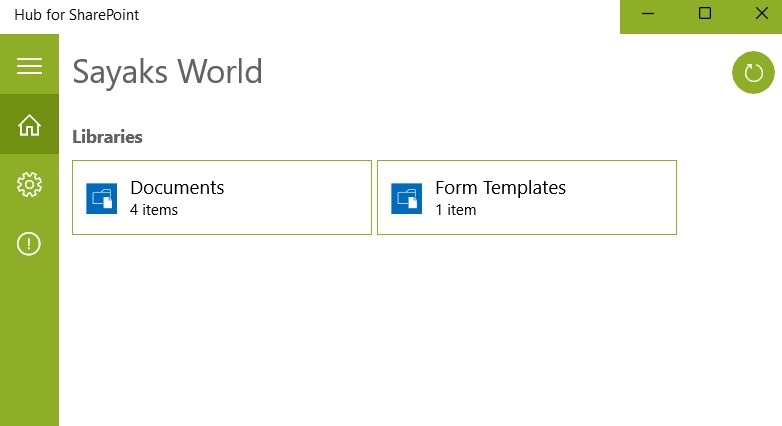
Like any other app, it’s easy to pin this utility to the taskbar. You can also add it to the Start menu and other folder locations for quick access.

FYI: in case you’re experiencing OneDrive sync issues on your computer, check this list of fixes.
4. Map SharePoint to File Explorer Using WebDAV
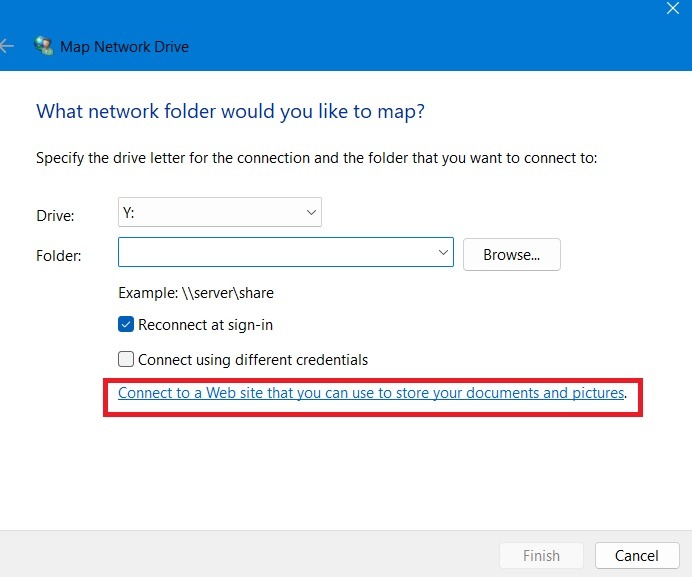
The classic method to map network drives is also a great way to connect your online SharePoint site with Windows. For this, go to your This PC menu in File Explorer, and right-click to select Map network drive.
Click the Connect to a website that you can use to store your documents and pictures option in the new window. This will open the Add Network location wizard that connects to FTPs and various online network locations.
Click Next to proceed. In the following step, choose a custom network location, and click Next once again. Specify the location of your website, which is a SharePoint URL. Remember to add /WebDAV/ to the end.
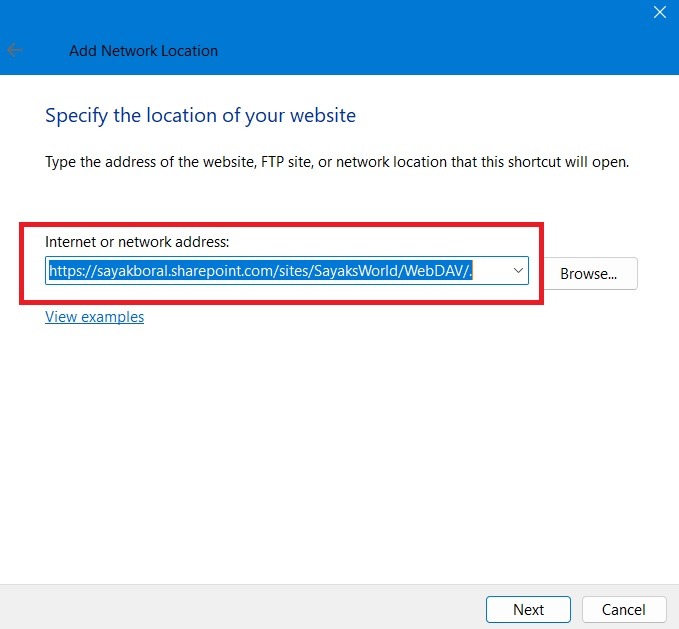
Enter your username and password to serve SharePoint directly into File Explorer.
When using the WebDAV method, there’s only one more thing to keep in mind. You will have to enable Internet Information Services (IIS) on your device. IIS is used in many other cases, too, such as installing ownCloud Server in Windows.
Once you’re able to successfully access SharePoint from File Explorer, you can do many things, including:
- Pin the SharePoint documents to File Explorer’s Quick Access menu
- Pin them to the Windows Start menu
- Access new and updated files in your SharePoint cloud from your local machine.
Tip: learn how to stop Microsoft Teams from opening up at startup.
Having examined all the different ways to add SharePoint to File Explorer, take stock that it may not be suitable for everyone. The biggest disadvantage is the huge license cost. We have a list of the best free SharePoint alternatives.
All screenshots and images by Sayak Boral.
Our latest tutorials delivered straight to your inbox