
Virtual private networks (VPNs) allow you to hide your online data transmissions and enhance your security while browsing the Internet from public places. Many online service providers offer both free and paid VPN options for you to use. However, even the best paid plans can be unreliable or slow at times.
Here we’ll discuss how you can use OpenVPN to create a secure connection on a Linux machine.
- Preparing the Server for OpenVPN
- Installing OpenVPN on the Server
- Connecting to Your OpenVPN Server From Linux
- Connecting to Your OpenVPN Server From Windows
- Connecting to Your OpenVPN Server From Mac
- Adding a New Client to the OpenVPN Server
- Remove Clients from OpenVPN
- Remove OpenVPN from your Server
- Frequently Asked Questions
Keep in mind that we’ll be creating a routing configuration and not a bridging one, which should be fine for most use cases. Windows users can follow along by reading the OpenVPN documentation, beginning with the section on setting up a Certificate Authority. Commands used in Windows will be similar to those shown below.
Note: In this tutorial, we are using Ubuntu, but the installation steps will work for other distros too.
Preparing the Server for OpenVPN
- Install the necessary dependencies:
sudo apt install wget curl
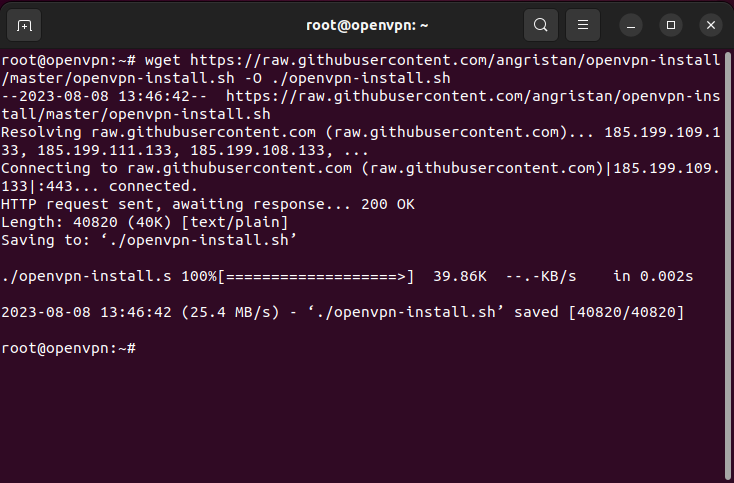
- Download the OpenVPN installation script from Github. This is a third-party script that automates a large portion of the setup process for server nodes:
wget https://raw.githubusercontent.com/angristan/openvpn-install/master/openvpn-install.sh -O ./openvpn-install.sh
- Enable the “execute” permission bits for your install script:
sudo chmod ug+x ./openvpn-install.sh
Installing OpenVPN on the Server
- Run the installer script with superuser privileges:
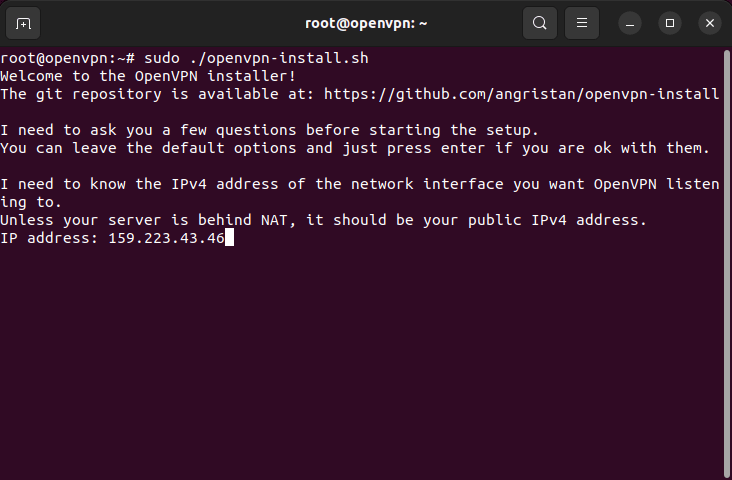
sudo ./openvpn-install.sh
- This will bring up a basic prompt where it asks you for the IP address of the interface that you want to use with OpenVPN. Since I am exposing the Ethernet interface, I will press Enter on the default value.
- Type “Y”, then press Enter to enable IPv6 support.
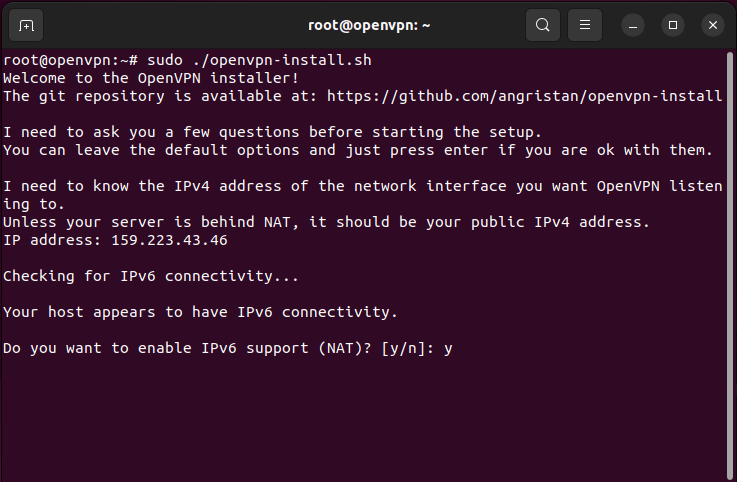
Note: There are instances where a VPS does not come with an IPv6 address right out of the box. For these, you need to type “N”, then Enter to skip the IPv6 setup.
- Press Enter to use the default OpenVPN port for your server.

- Press Enter again to allow OpenVPN to broadcast over UDP.

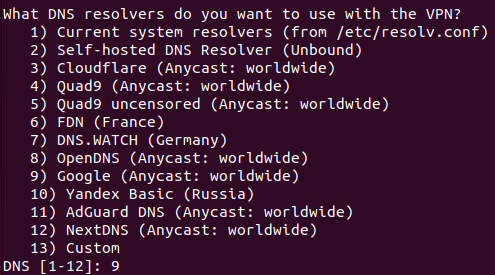
- Once done, the script will ask you for your server’s DNS resolver. The easiest and most reliable option is between either Cloudflare or Google DNS. In my case, I will enter “9” to use Google’s DNS service for my OpenVPN server.
- Type “N”, then press Enter for both packet compression and custom cipher set for your VPN.

- Press Enter to start the installation and setup process.

- Once the script is done installing, it will ask for the name of your first client machine.

- It will also ask if you want to include a custom password for your client. Type “1”, then press Enter to disable it.

- This should generate a client file (in this case, maketecheasier.ovpn) in the root directory.
Tip: Learn how you can participate in a new way of internet routing by installing Yggdrasil on Linux.
Connecting to Your OpenVPN Server From Linux
With your server up and running, you can now start setting up your local client to connect to the server via OpenVPN. To do this, you need to install OpenVPN and use either your system’s built-in settings page or OpenVPN’s.
- Download the .ovpn file from your remote server’s home directory. You can do this either by using an FTP client or running the
scpcommand:
scp user@your.server.ip.address:/home/$USER/maketecheasier.ovpn /home/$USER/
- Go to your distribution’s application launcher menu and search for “Settings.”

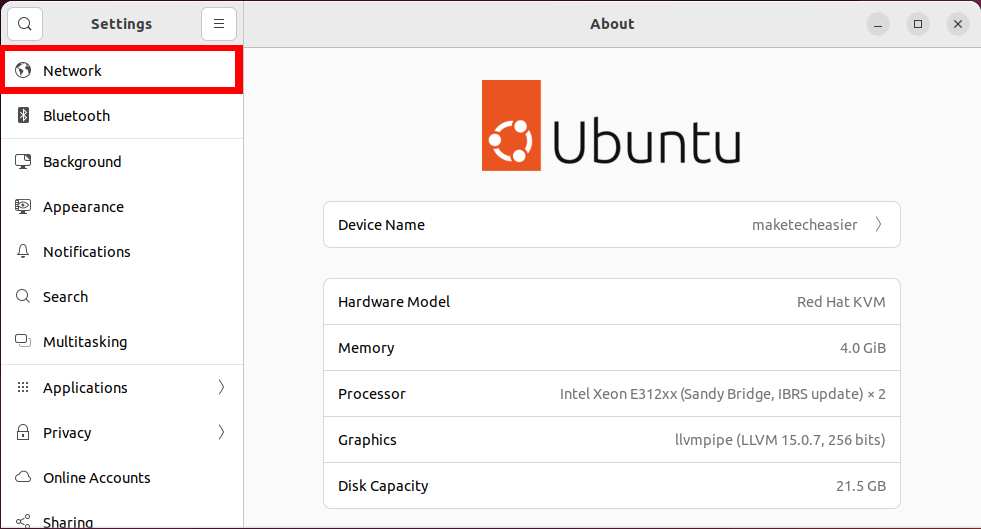
- Click the “Network” category on the application’s left sidebar.
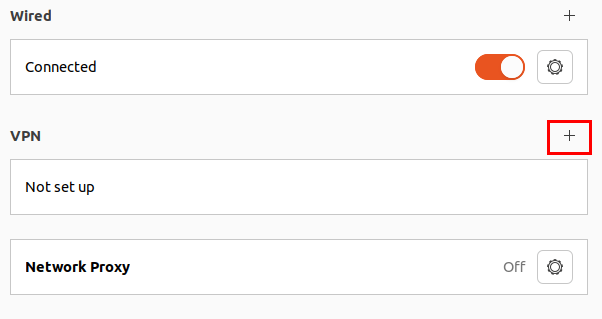
- Click the “+” icon beside the “VPN” category.
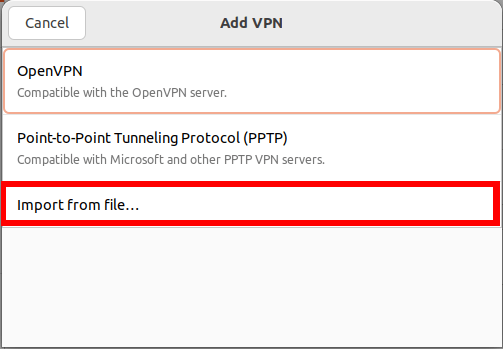
- Click the “Import from file…” option.
- Select the .ovpn file from your system’s file picker then click “Open.”
- Double-check if the details of your OpenVPN server are correct, then press “Add.”
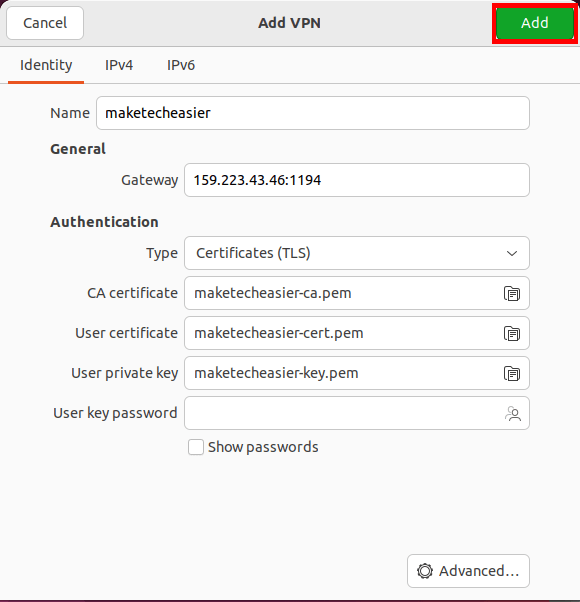
That’s it. You can easily connect to your OpenVPN server from the taskbar now.
Connecting to Your OpenVPN Server From Windows
- To connect a Windows machine to your OpenVPN server, download the client from the developer’s website.
- Run the client installer then click “Next” to start the installation process.
- Tick the “I accept the terms in the License Agreement” checkbox, then click “Next.”
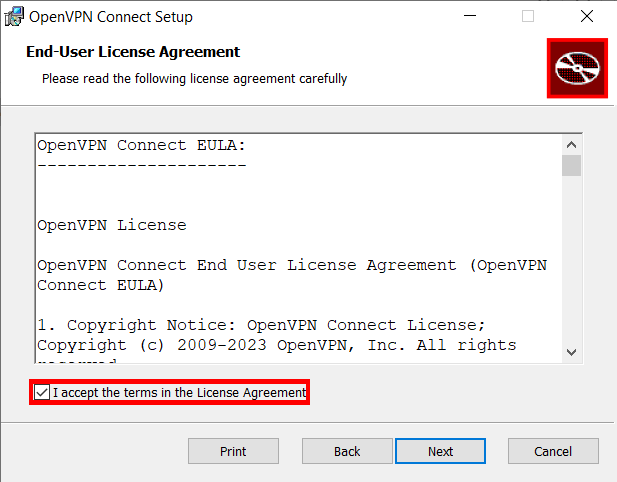
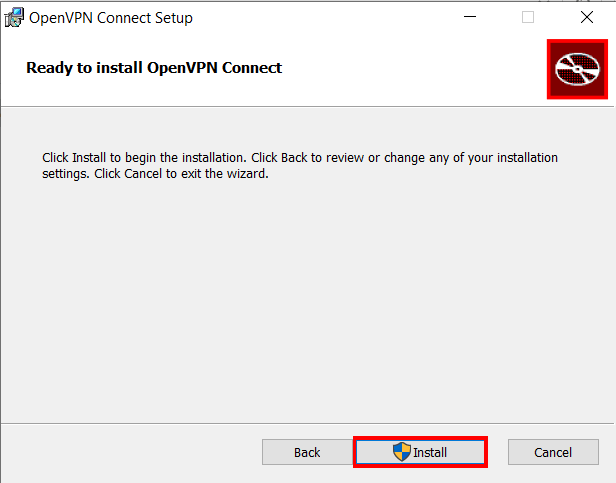
- Click “Install”, then “Yes” to the Windows UAC prompt.
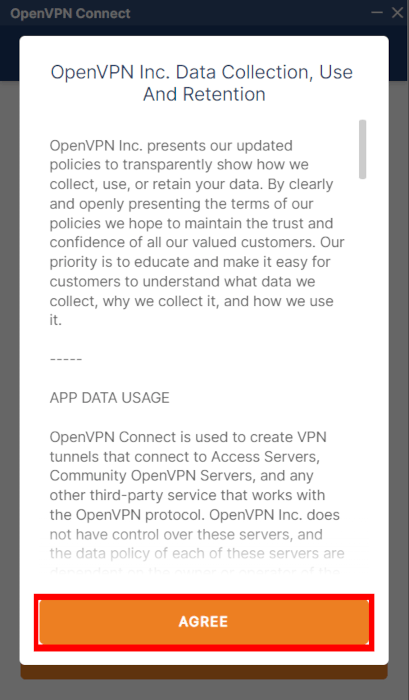
- Once installed, click “Agree” on the OpenVPN Connect Data Collection prompt.
- Click the “Upload File” tab, then click “Browse.”
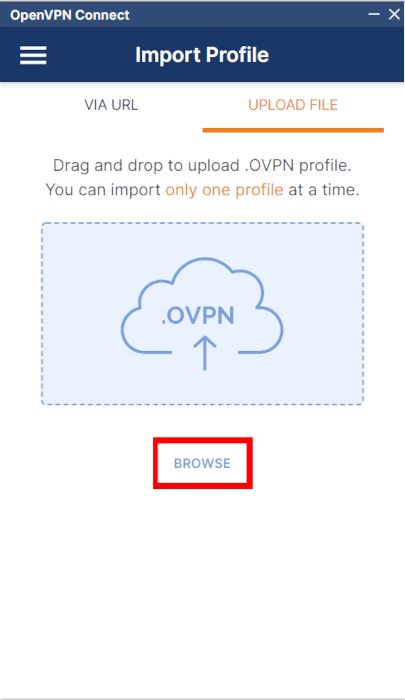
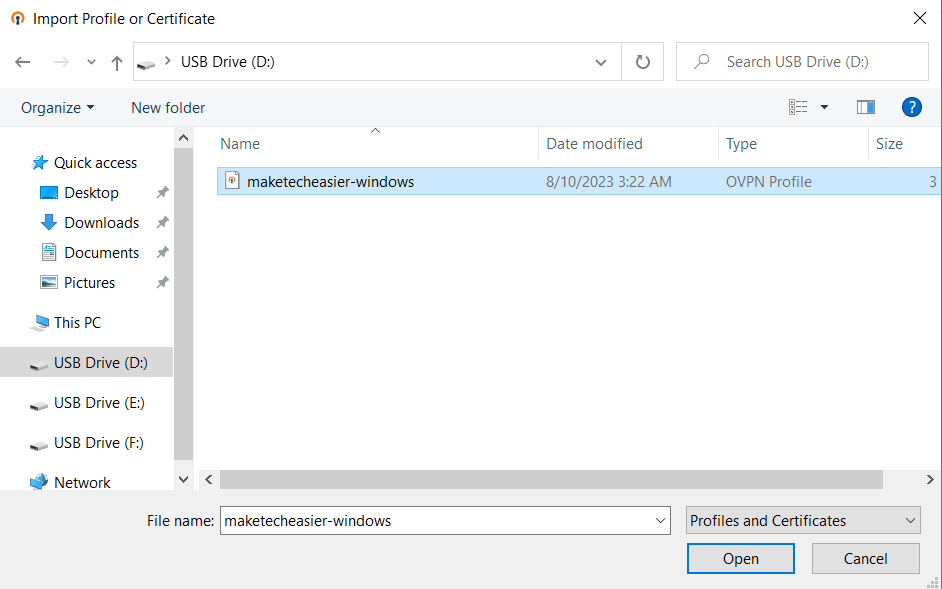
- Select your .ovpn file then click “Open.”
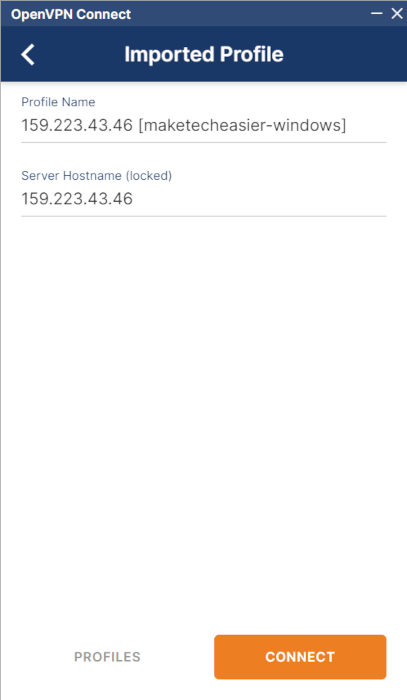
- Verify the details of your OpenVPN server, then click “Connect.”
Connecting to Your OpenVPN Server From Mac
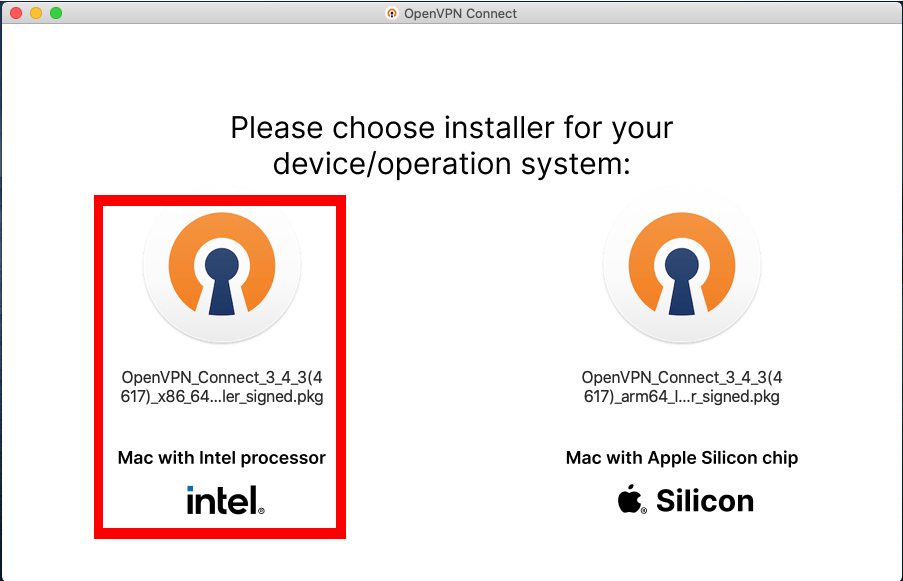
- Download and install the OpenVPN client for Mac.
- Depending on your Mac type, select the appropriate option.
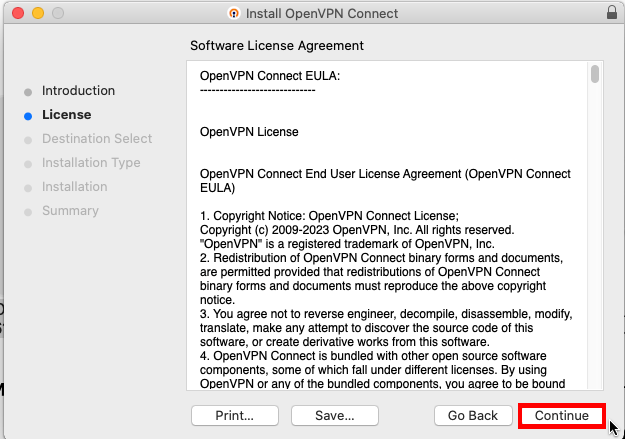
- Accept the License Agreement for the client software, then click “Continue.”
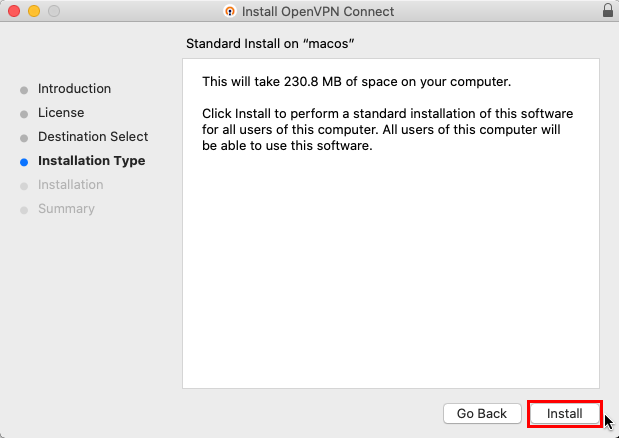
- Click “Install” to start the installation process.
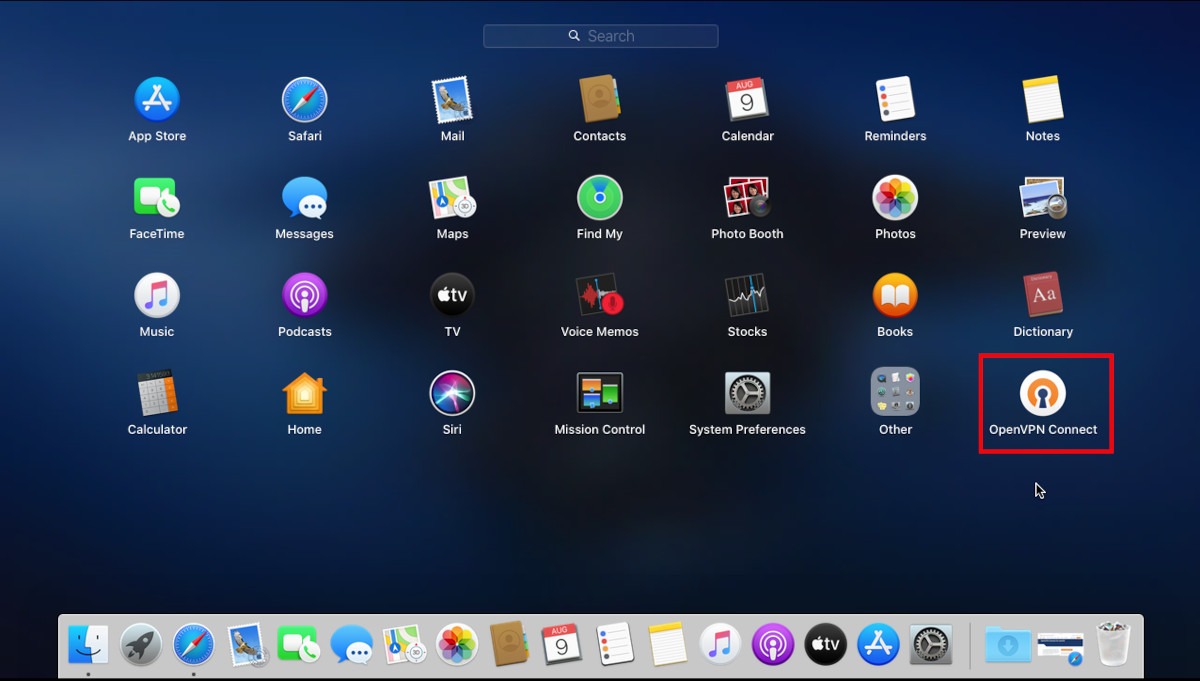
- Open the Launchpad then select the “OpenVPN Connect” icon.
- Click “Agree” on the OpenVPN Data Collection prompt.

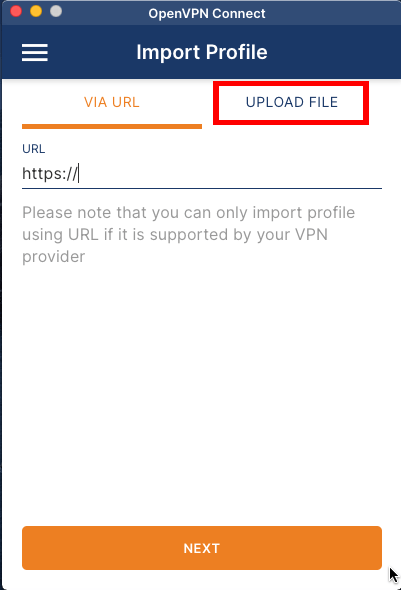
- Click the “Upload File” tab.
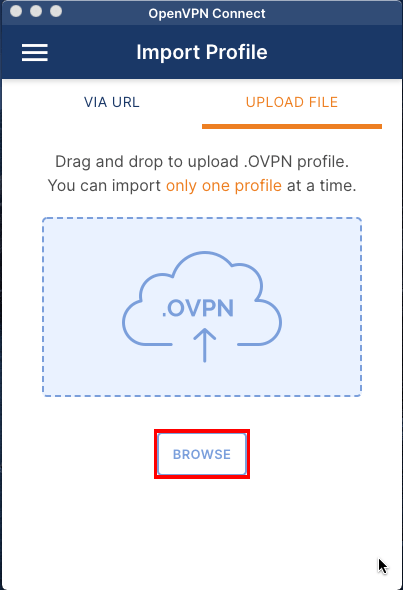
- After that, click “Browse” and select your .ovpn file from the file picker prompt.
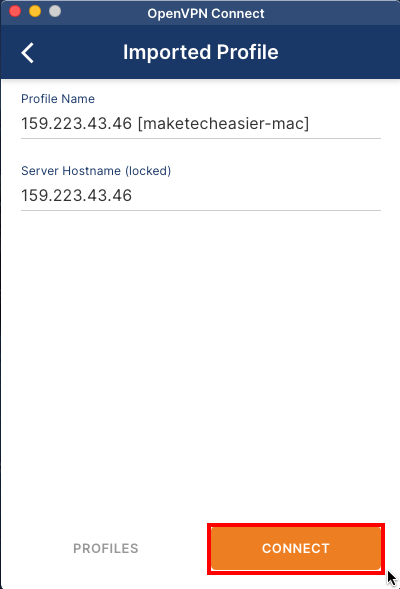
- Verify the details of your OpenVPN server then click “Connect.”
Do you know: you can also use Tunnelblick on your Mac as an alternative Openvpn client?
Adding a New Client to the OpenVPN Server
While OpenVPN works seamlessly between a server and a single client, there are instances where you want to share your VPN tunnel with multiple machines at once. This can be useful if you want to ensure that your outbound connections will always come from a single IP address.
- Run the installer script again:
sudo ./openvpn-install.sh
- Type “1”, then press Enter.
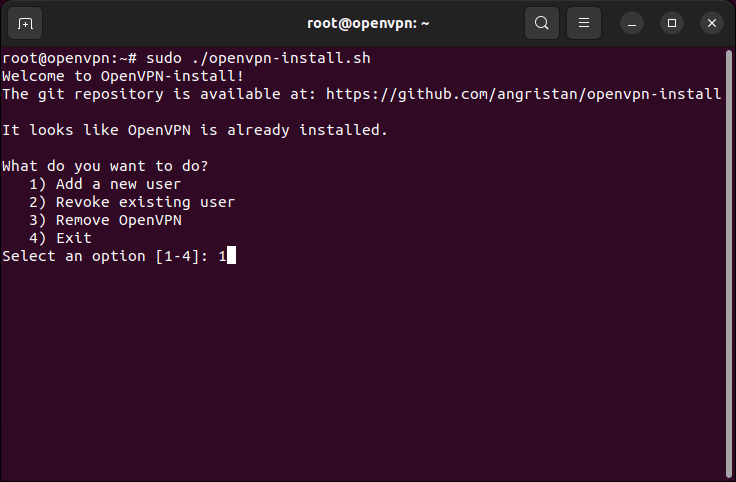
- Provide a name for your new client. In my case, I named it as “maketecheasier-2.”

- Type “1”, then press Enter to disable any password checks for your client.

This will generate a new maketecheasier-2.ovpn file. You can distribute this .ovpn file to the client that you want to connect to the network.
Remove Clients from OpenVPN
Aside from setting up an OpenVPN cluster, the installation script can also remove existing clients from your private network.
- Run the installer script:
sudo ./openvpn-install.sh
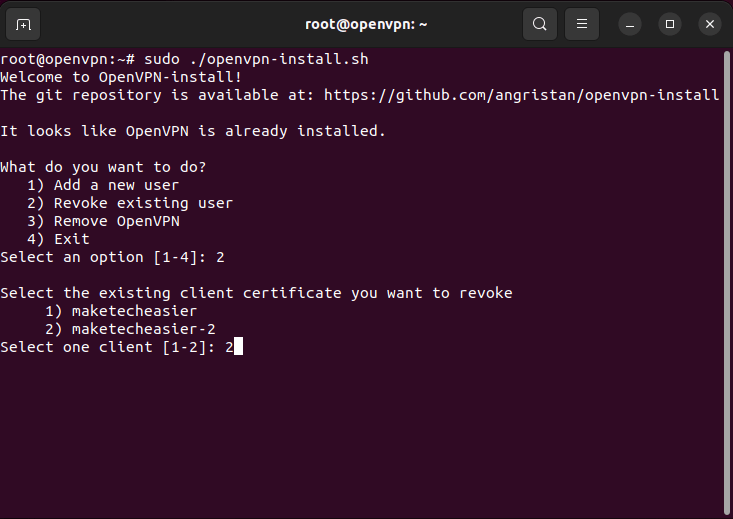
- Type “2”, then press Enter.
- Select the index number of the client that you want to remove from the server’s allowed clients list. In my case, I will type “2”, then press Enter.
Good to know: Tailscale is a VPN utility that allows you to create your own personal network. Learn how to start an intranet by installing Tailscale on Linux.
Remove OpenVPN from your Server
- Run the installer script:
sudo ./openvpn-install.sh
- Type “3”, then press Enter.
The script will then remove OpenVPN from your server.
Frequently Asked Questions
Is it possible to port forward a machine using OpenVPN?
No, OpenVPN does not allow an external machine to make an incoming connection to any system inside an OpenVPN cluster. One way to get around this issue is to either port forward your machine directly from your home network or use a dynamic DNS solution.
Do I lose my external IP address when I use OpenVPN?
No. You do not lose your machine’s original IP address when you use OpenVPN. The VPN only serves as a gateway between your local machine and the internet.
Is it possible to use multiple OpenVPN configurations in a single system?
Yes. To do this, you need to make sure that your second configuration file uses a different name than your original OpenVPN client file. For example, running sudo cp ./maketecheasier-new.ovpn /etc/openvpn/client-2.conf will ensure that your new file will not overwrite the original one.
Next, you also need to disable the original client unit file: sudo systemctl disable --now openvpn@client.service and enable the new one: sudo systemctl enable --now openvpn@client-2.service.
Image credit: Anthony Choren via Unsplash (Background) and Wikimedia Commons (Logo). All alterations and screenshots by Ramces Red.
Our latest tutorials delivered straight to your inbox