
Tailscale is a lightweight, yet powerful decentralized Virtual Private Network (VPN) service. It allows you to connect multiple devices across different connections in a single logical network. As a result, you can use Tailscale to host any local service across the internet without forwarding any ports.
This article will show you how you can set up Tailscale and route traffic between two Ubuntu Linux machines. Further, it will also highlight how you can expand your Tailscale network to other users through its built-in “sharing feature.”
Do you know: you can easily create your own VPN with OpenVPN?
Why Use Tailscale?
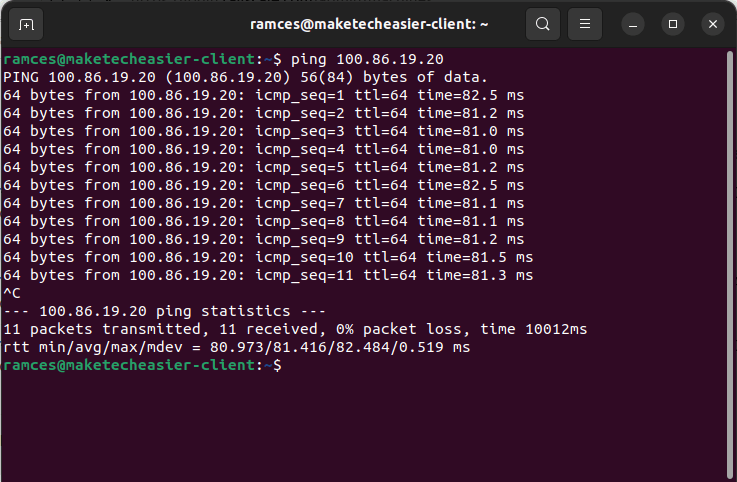
One of the biggest selling points of Tailscale is that it does not rely on a central server to route internet packets. Instead, it uses programming tricks to bypass both soft and hard NAT routers between two clients. This means that Tailscale will always have lower latency between clients compared to a traditional VPN.
Tailscale is also open source and free of charge for personal use. This makes it an ideal first project for a novice Linux user that wants to link multiple machines together but does not necessarily know how to either port forward or traverse hard NATs.
Tip: Learn how you can get your computer to automatically connect to VPN on login.
Obtaining and Installing Tailscale
- The first step in installing Tailscale is to install curl:
sudo apt install curl
- Obtain the GPG key for its package repository. You can do that by running the following command:
sudo curl -fsSL https://pkgs.tailscale.com/stable/ubuntu/jammy.noarmor.gpg | sudo tee /usr/share/keyrings/tailscale-archive-keyring.gpg > /dev/null
- Download the Tailscale repository file to your “/etc/apt/” folder:
sudo curl -fsSL https://pkgs.tailscale.com/stable/ubuntu/jammy.tailscale-keyring.list | sudo tee /etc/apt/sources.list.d/tailscale.list
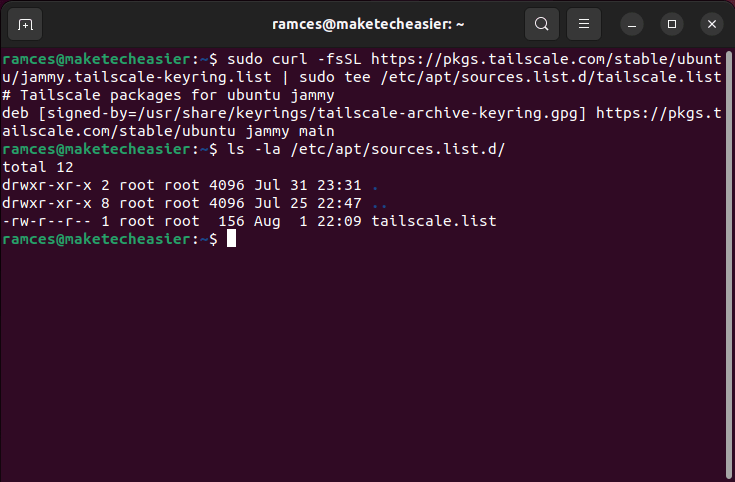
- Update your computer’s package repository database as well as upgrade any outdated software:
sudo apt update && sudo apt -y upgrade
- Install Tailscale using apt:
sudo apt install tailscale
Creating Your First Tailscale Network
- With Tailscale installed, you can now enable the Tailscale daemon in your computer. You can do this by running systemctl:
sudo systemctl enable --now tailscaled.service
- Run the Tailscale CLI client and link your first machine to an account:
sudo tailscale up- Right-click the link on your terminal and press “Open Link.”
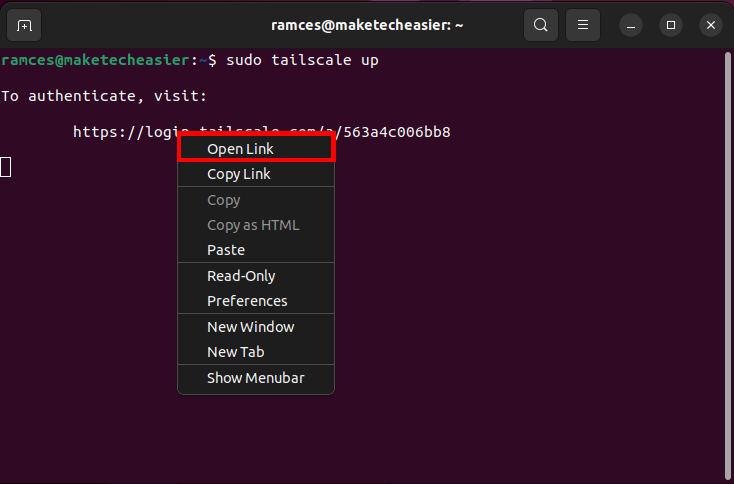
- This will open a new browser page where it will ask you to log in to an account.
- Once you are logged in, the webpage will ask if you want to link your machine to a Tailscale network. Click “Connect.”
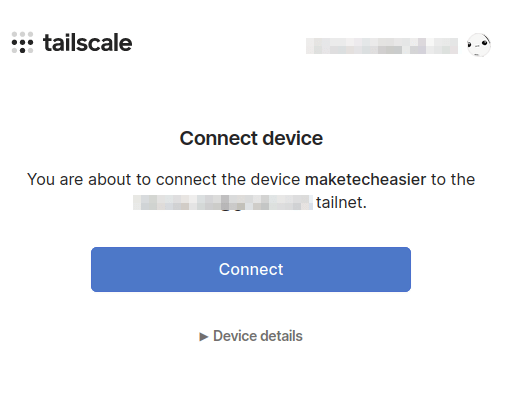
- Go back to your terminal and enable
systemd-resolvedfor your computer:
sudo systemctl enable --now systemd-resolved.service
- Create a symbolic link between systemd-resolved and “/etc/resolv.conf:”
sudo rm /etc/resolv.conf
sudo ln -s /run/systemd/resolve/stub-resolv.conf /etc/resolv.conf
- Restart your machine’s DNS subsystem to apply its new DNS settings:
sudo systemctl restart systemd-resolved.service
sudo systemctl restart NetworkManager
sudo systemctl restart tailscaled.service
Tip: Learn how you can create an on-demand VPN by installing Hamachi on Linux.
Adding a Second Machine to Tailscale
- Go to your second machine and install Tailscale with the above instructions.
- Link the second machine to your Tailscale account by running:
sudo tailscale up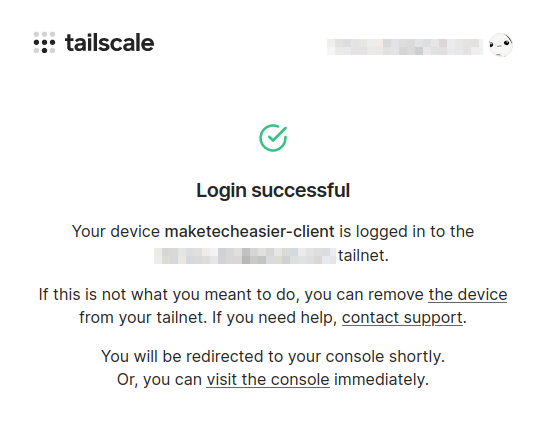
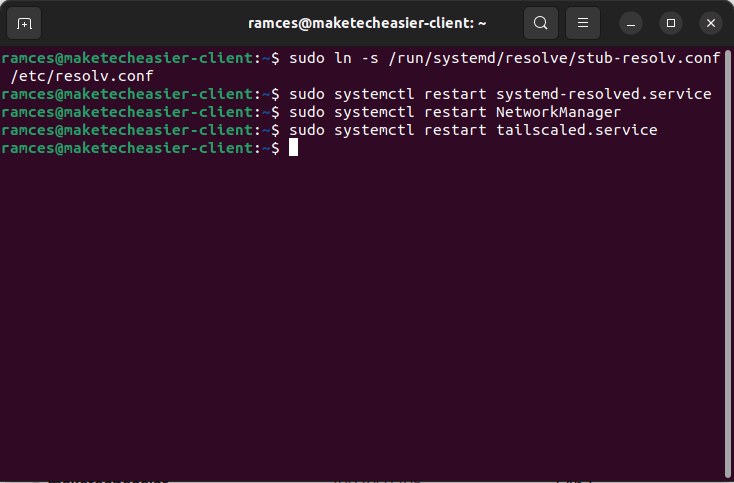
- Enable and link
systemd-resolvedas your second machine’s DNS resolver throughsudo ln -s. - Reload your machine’s DNS subsystem to apply its new settings.
Sharing A Machine with Other Users
By default, Tailscale only allows a single user on a network per account. While this is enough for a basic VPN setup between two machines, it can be a problem when you want to expose a machine to other users.
One of the easiest ways to solve this is by “sharing” your machine through the Tailscale admin interface.
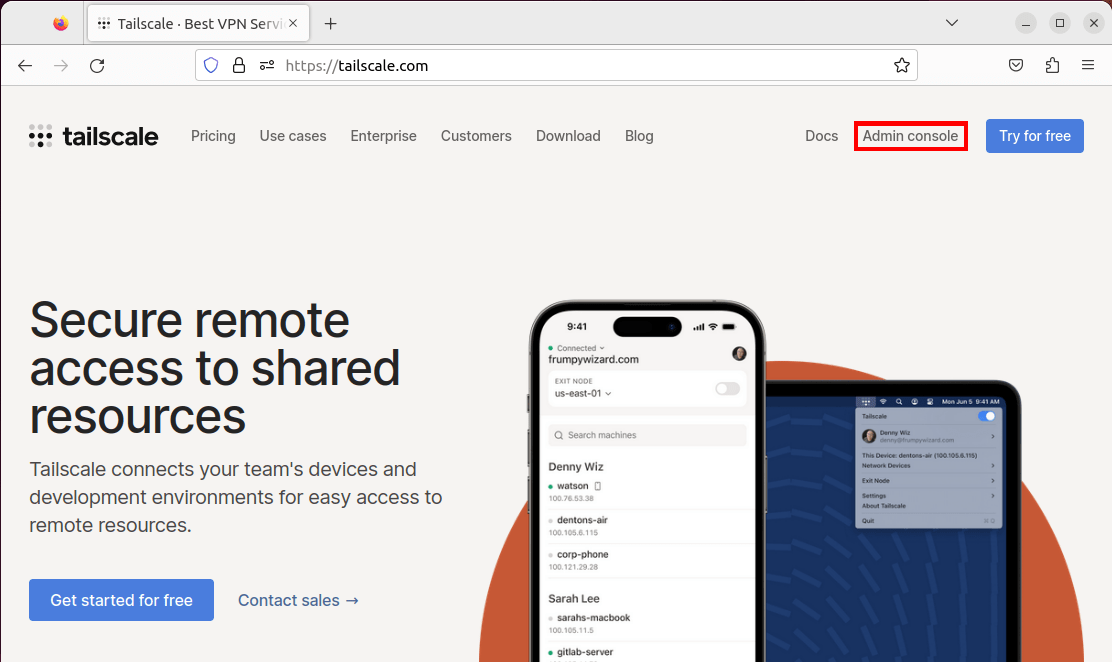
- Go to the Tailscale webpage and click the “Admin console” link on the page’s upper right corner.
- Once you are logged in, select the machine that you want to export, then click “Share…” on the row’s right corner.

- On the prompt popup, click “Generate & copy invite link.”

Note: An invite link will automatically expire once a user logs in through it. You can disable this by toggling the “Multi-use invite link” switch.
- Once the client clicks the invite link, the page will display a page on their end asking for their email address.
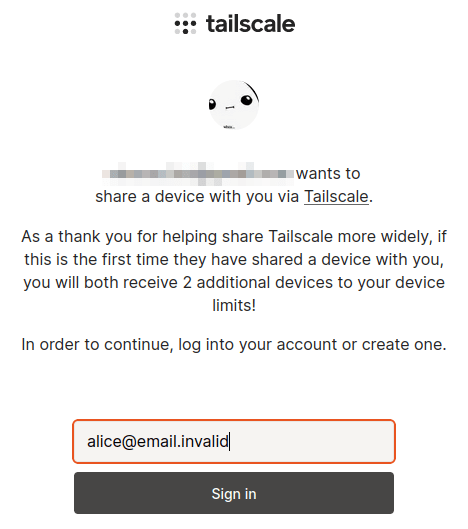
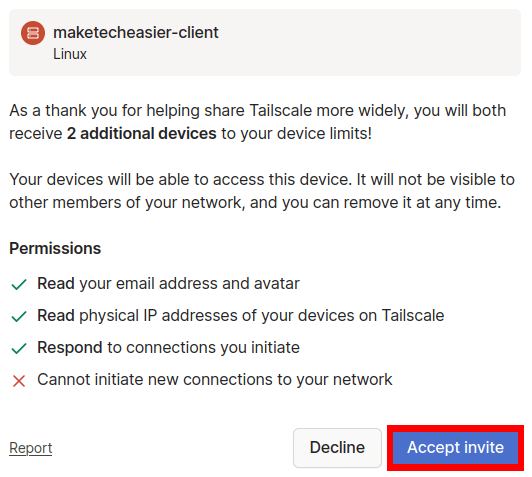
- After logging in, the page will confirm if the client wants to accept the invite for your machine. Click “Accept invite.”
- Test whether your machine can communicate with the client by pinging its address:
ping 100.117.185.109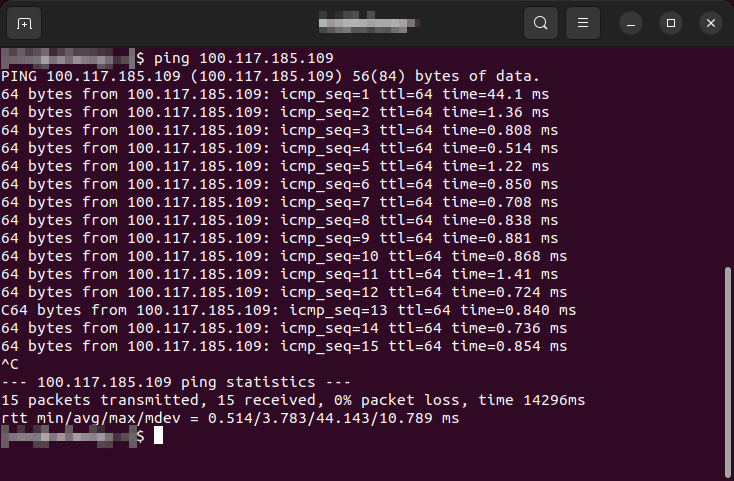
Tip: you can make use of Portmaster to detect any services that are siphoning your data.
Creating a VPN using Exit Nodes
One of the innovations of Tailscale is that its client can transmit and receive data from other hosts in the network. Unlike other VPN services, this means that it is possible to redirect outgoing traffic from one Tailscale machine to the other.
To do this, you need to set one of your machines up to be an “Exit Node.” These are computers that will accept traffic from internal hosts which it then transmits as its own.
- To create an Exit Node, open a terminal on the machine and run the following commands:
echo 'net.ipv4.ip_forward = 1' | sudo tee -a /etc/sysctl.d/99-tailscale.conf
echo 'net.ipv6.conf.all.forwarding = 1' | sudo tee -a /etc/sysctl.d/99-tailscale.conf
sudo sysctl -p /etc/sysctl.d/99-tailscale.conf
- Restart the Tailscale daemon using the following command:
sudo tailscale up --advertise-exit-node
- Open a web browser and go to your Admin Console Page.
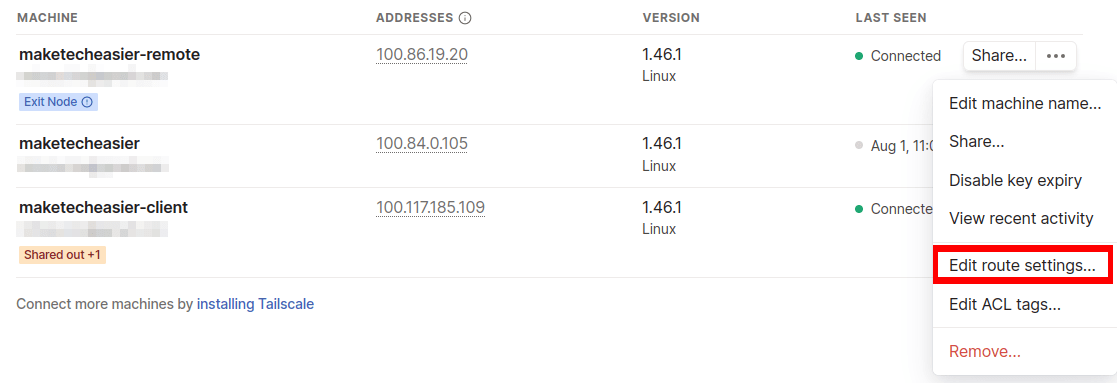
- Select your Exit Node machine, then click the “…” button on the row’s right side.

- Select “Edit route settings…”
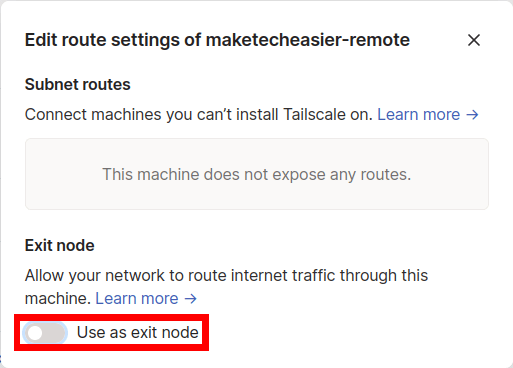
- Toggle the “Use as exit node” switch.
Linking a Client to an Exit Node
With a node up and running, the next thing that you need to do is to tell your clients that it exists. This is because Tailscale does not automatically route outgoing traffic to any exit node.
- Open a terminal on your client machine.
- Run
tailscale statusto find the address of your Exit Node.
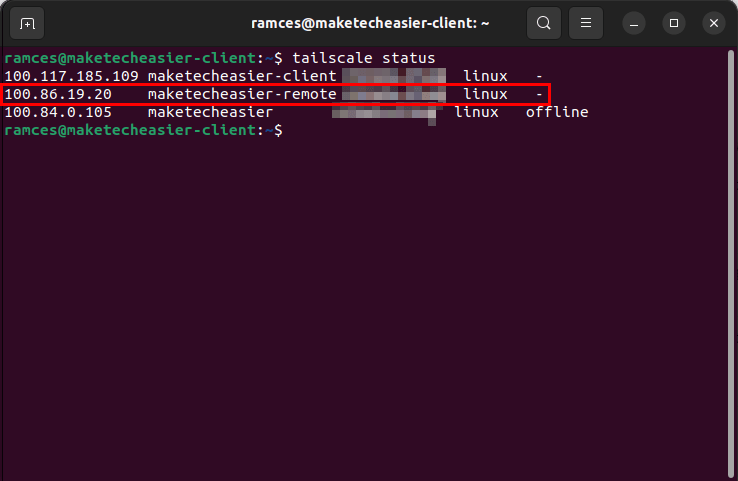
- Reload Tailscale with the
--use-exit-nodeflag followed by the address of your exit node:
sudo tailscale up --use-exit-node=100.86.19.20
- Check your new external IP address by querying an IP address checking service:
curl ifconfig.me/ip
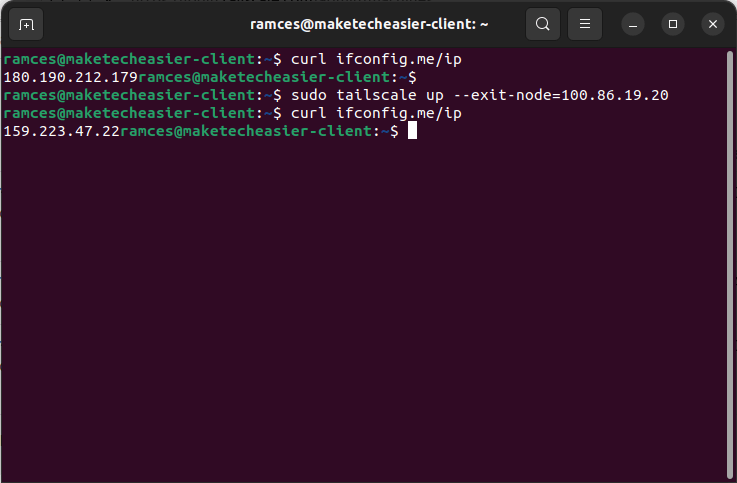
Good to know: Learn how you can participate in a new form of internet routing by installing Yggdrasil on Linux.
Frequently Asked Questions
Is there a limit to the machines and bandwidth that I can use with Tailscale?
Yes. At the moment, the free plan for Tailscale guarantees up to 100 devices connected to a personal private network. However, this does not limit the bandwidth between machines in a network even if those connections are using a third-party relay.
Is it possible to change my email once I made my account?
No. One of the downsides of using an external SSO is that it is not possible for Tailscale to change your email address once you start using it. One way to circumvent this is to create a new account using a different SSO method.
My friend cannot connect to my machine even after I shared it to him.
This issue is most likely due to an active firewall between you and your friend’s computer. One quick way to solve this problem is to find the port that you are using and running sudo ufw allow followed by the port number that you are using.
Image credit: Aris Munandar via Unsplash (Background) and Wikimedia Commons (Logo). All alterations and screenshots by Ramces Red.
Our latest tutorials delivered straight to your inbox