Every iPhone and iPad user knows that the built-in Photos app has functions far beyond storing photos. Dedicated albums for screenshots, people, and pets keep your photos organized, while robust machine learning allows you to identify and delete duplicate photos. Whether it be a photo of a receipt, a crucial address, or a cherished memory, we have all accidentally deleted more than one important photo. Learn how to quickly recover deleted photos from your iPhone and iPad.
Recover Deleted Photos Using Your Device
When you delete a photo or video from the Photos app on your iPhone or iPad, it is transferred to a hidden album labeled “Recently Deleted.” If you delete a photo or video by accident, you have 30 days to retrieve it from the Recently Deleted album before it is permanently deleted. Recover your photos by following the directions listed below.
Recover From Recently Deleted Photo Album
- Open the Photos app on your iPhone or iPad.
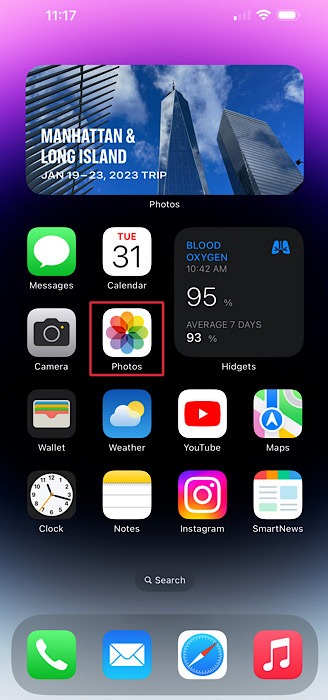
- Tap on the tab labeled “Albums.”
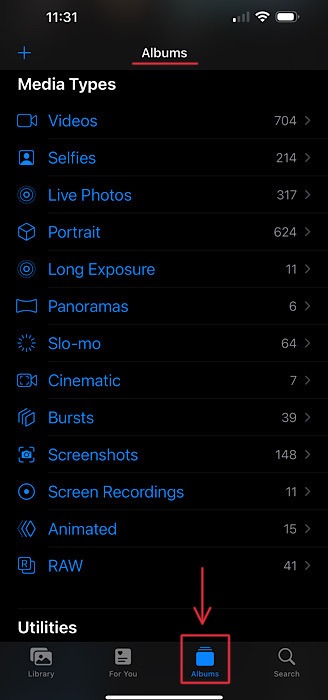
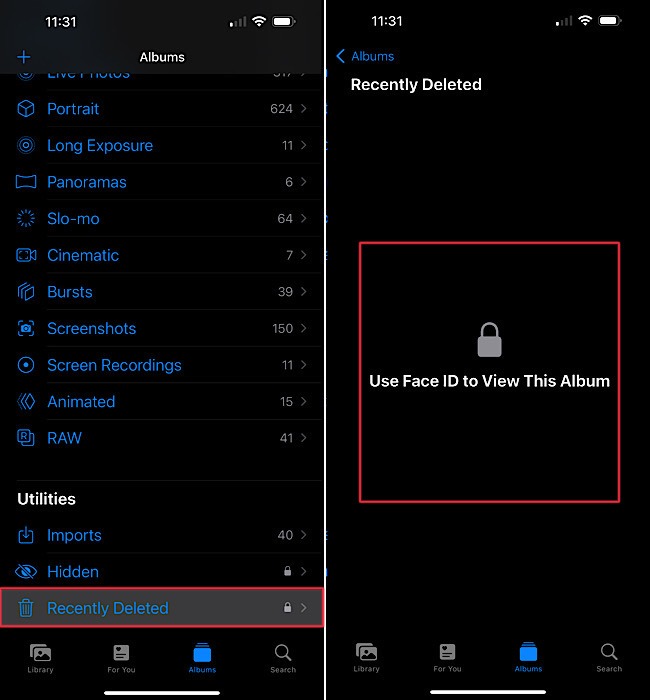
- Scroll down until you see a header titled “Utilities.”
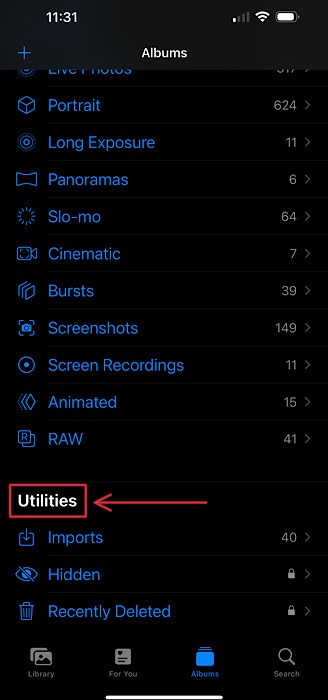
- Tap on “Recently Deleted” in the menu to access the album. For privacy purposes, you may be asked to authenticate using Face ID or Touch ID before you can view the album.
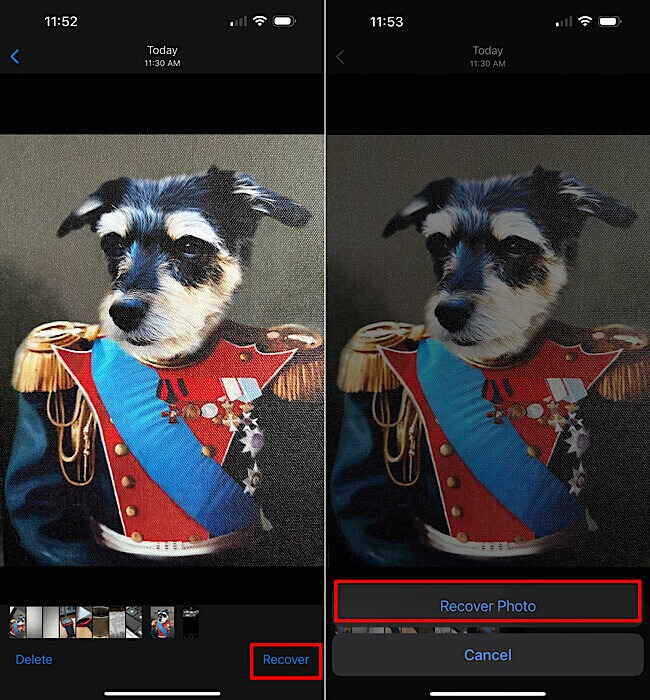
- Tap on the photo or video that you would like to recover, then select the “Recover” button located in the bottom-right corner of the display. To confirm, tap the “Recover Photo” button to transfer the photo back to your main library.
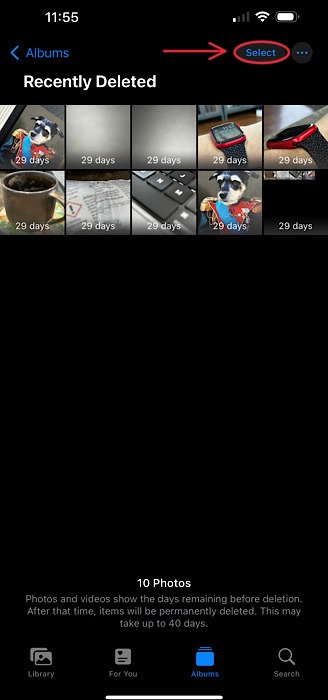
- If you would like to recover multiple or all photos from the Recently Deleted album, tap on the “Select” button in the upper-right corner of the screen.
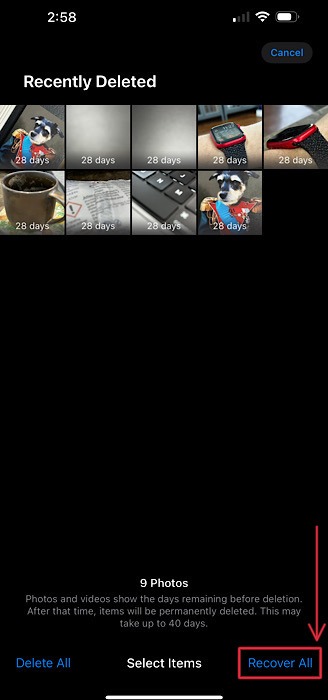
- To recover all photos from the Recently Deleted album, select “Recover All” in the bottom-right corner, then confirm.
- To choose the specific photos that you would like to recover, tap on them, then select the “Recover” button in the bottom-right corner and confirm.
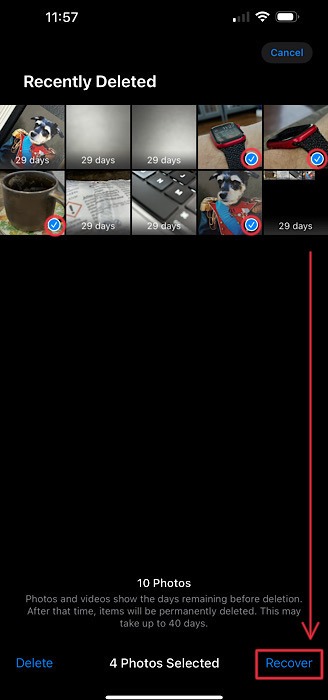
Tip: you can use the same workflow to access and recover deleted photos from the Recently Deleted album by signing in with your Apple ID at iCloud.com, then navigating to the Photos app.
Recover From iCloud Backup
If you have iCloud Backup enabled for your iPhone or iPad, you can restore your device to a previous backup, allowing you to retrieve photos or videos that you may have accidentally deleted. Follow these steps to restore from a backup using iCloud:
- Ensure that you have iCloud Backup enabled by opening the Settings app on your iPhone or iPad.
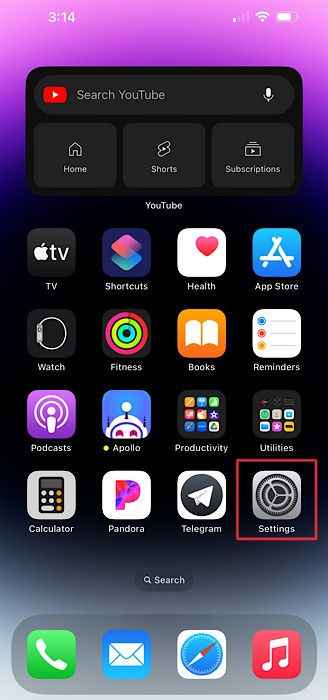
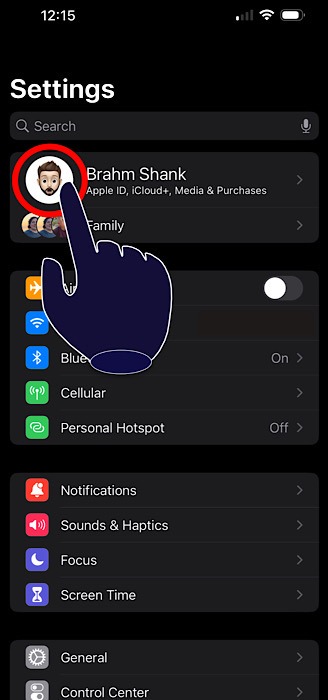
- Tap on your profile photo to access your Apple ID settings.
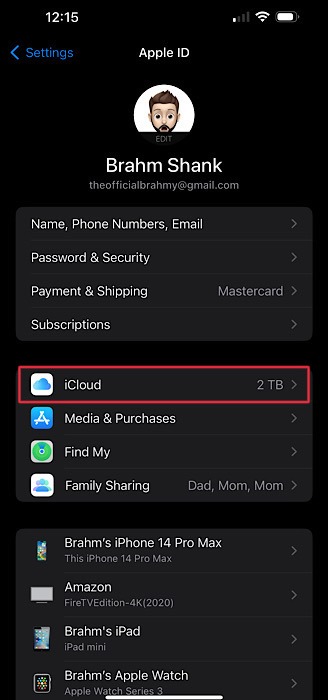
- Tap the list item labeled “iCloud.”
- Verify that the item labeled “iCloud Backup” is on. If it’s off, tap on it to change the status.
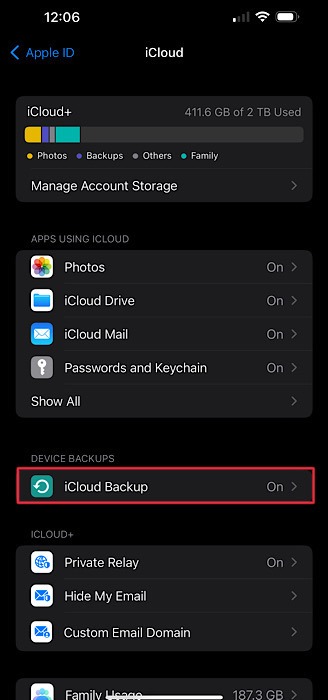
- Ensure that “Back Up This iPhone/iPad” is enabled.
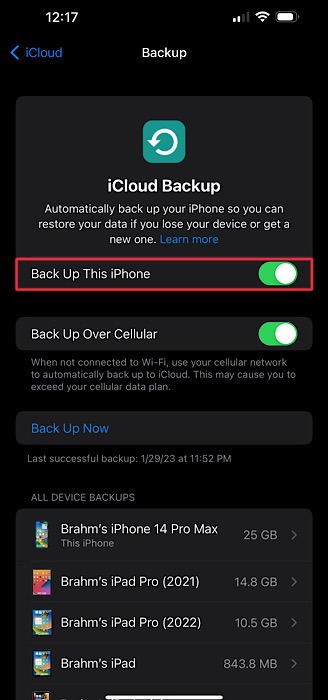
- Look toward the bottom to see whether your iPhone or iPad was last updated before you accidentally deleted the photo(s). If it was, you should be able to recover your device and the photo(s).
- Head back to the main screen in the Settings app and tap “General.”
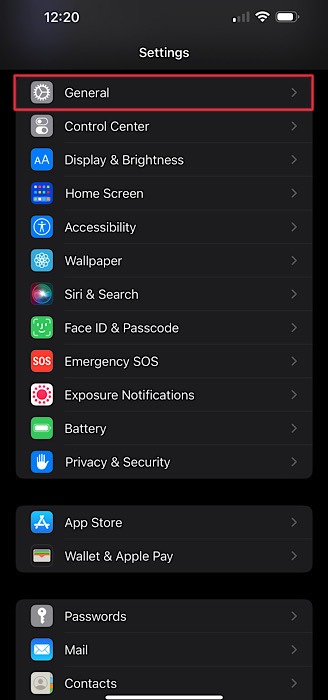
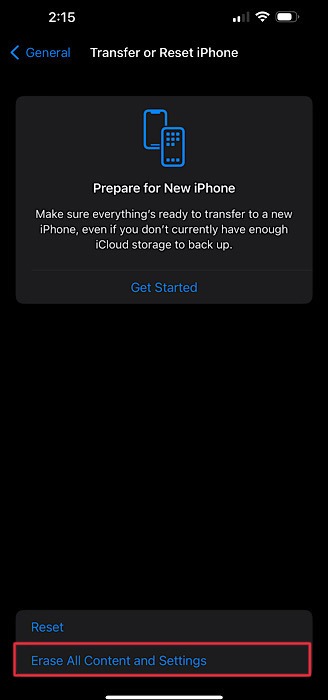
- Scroll all of the way to the bottom of the screen and select “Transfer or Reset iPhone/iPad.”
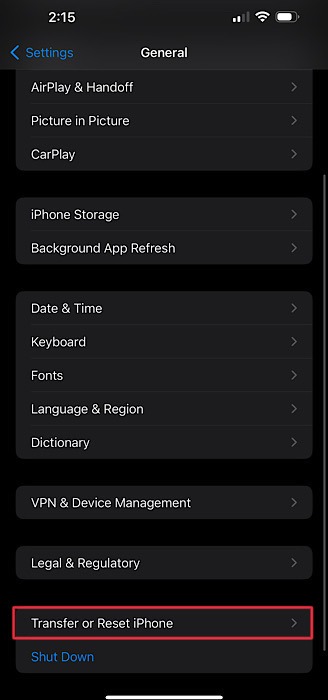
- On the next screen, tap “Erase All Content and Settings” to factory reset your iPhone or iPad.
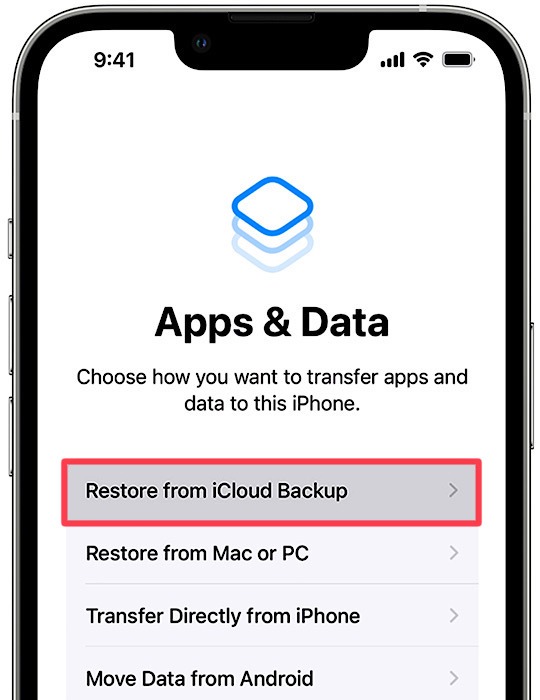
- When your iPhone reboots, follow the basic setup instructions until you reach a page titled “Apps & Data.” Tap “Restore from iCloud Backup.” You will be asked to sign in using your Apple ID credentials.
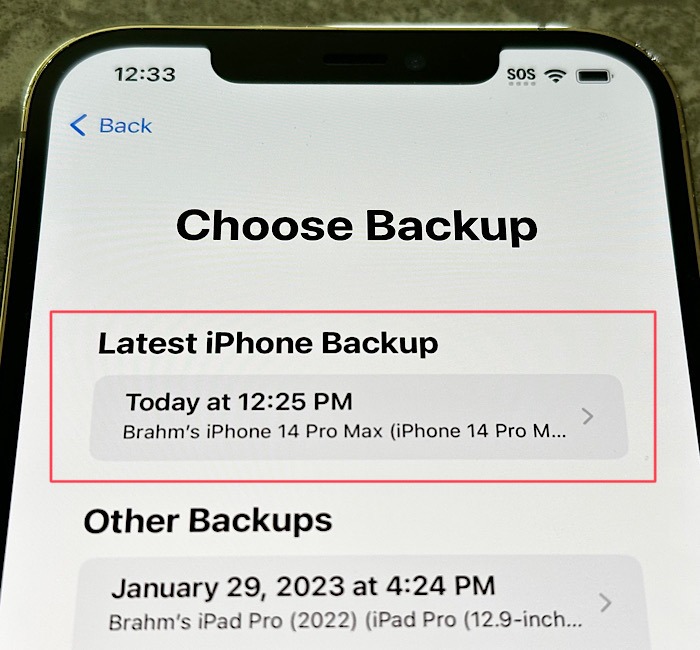
- Select the backup that you would like to use. Continue the setup process as normal to activate your iPhone and restore your deleted photos.
Good to know: looking for a way to print your newly recovered photos? Discover how to use AirPrint to print content from your iPhone or iPad.
Recover Deleted Photos Using a Computer
If you frequently use your computer to back up your iPhone or iPad using a wired connection, you can use the iTunes app or Finder to restore from a hard copy backup to recover your photos. Connect your device to your Mac or PC to get started.
- If you are running macOS Mojave or earlier or on a PC, open iTunes. If you are running macOS Catalina or later, open the Finder. In this example, we are using Finder on a MacBook Pro running macOS Ventura.

- Using a USB cable, connect your iPhone or iPad to your computer, then select your iPhone or iPad from the sidebar in iTunes or Finder.
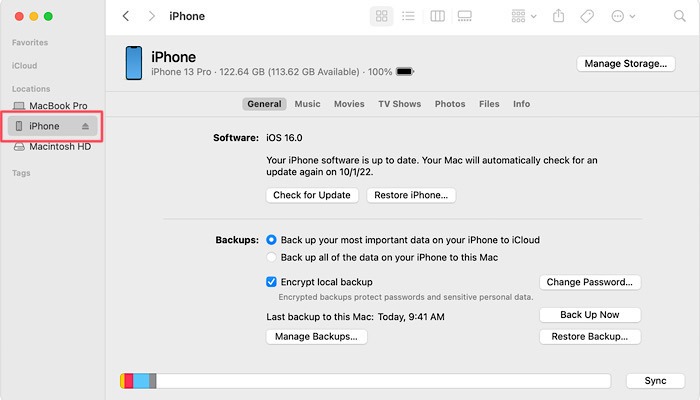
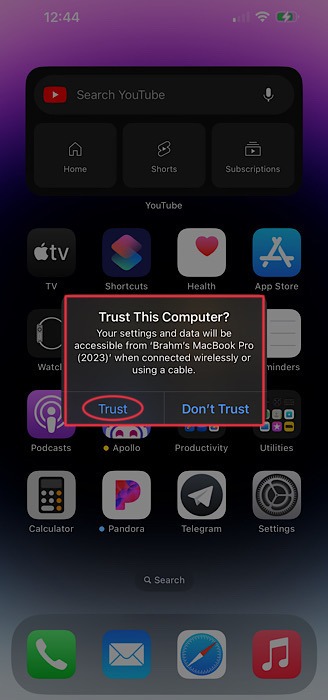
- If your iPhone or iPad does not show up in the Finder or iTunes sidebar, ensure that you have selected “Trust” from the “Trust This Computer?” pop-up menu on your iOS device.
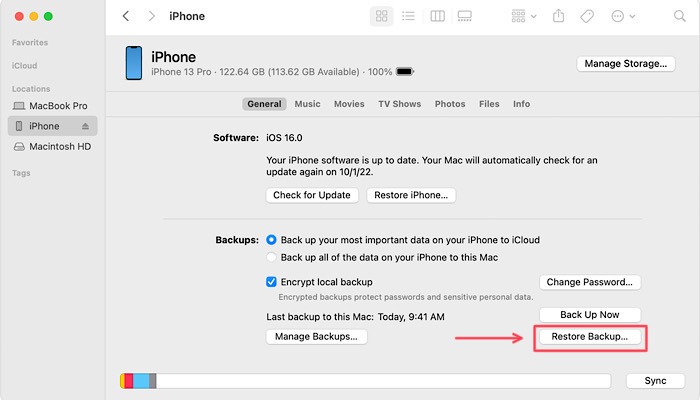
- Select the “Restore Backup” button in the lower-right corner of your computer’s screen
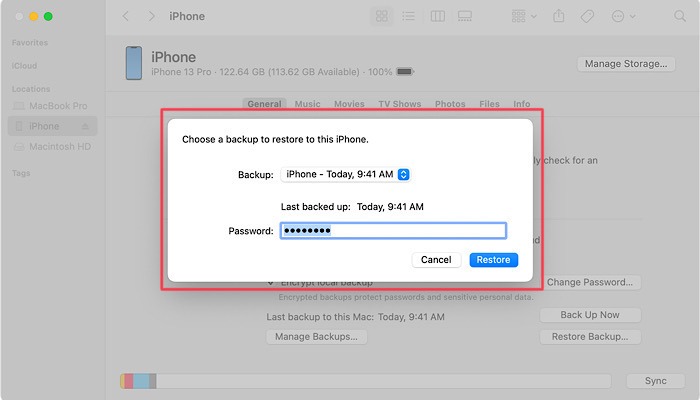
- Choose the most recent backup that you think may contain the photos that you accidentally deleted, then click the “Restore” button. You may be asked to enter a password if your backup was encrypted. Wait for your iPhone to reboot before you attempt to retrieve your deleted photos.
Frequently Asked Questions
Can I configure the Recently Deleted album to become viewable without using Face ID or Touch ID?
Yes. Remove the need to authenticate before viewing the Recently Deleted album by making the album unlocked by default. Visit “Settings -> Photos,” then turn off “Use Face ID.”
How do I back up my iPhone or iPad using a Windows PC?
Once you install the latest version of iTunes for Windows, it is a simple as plugging in your iPhone or iPad using a USB or USB-C cable. Our guide on how to back up your iPhone or iPad on Windows includes everything you need to know to get started.
Can I hide photos from my main library instead of deleting them?
Yes. While viewing the photo that you would like to conceal, tap the three dots in the upper-right corner of the screen. Select the menu item labeled “Hide.” This process is much more straightforward than the workflow required to hide files, folders, and desktop Icons on Mac.
Image credit: Unsplash. All screenshots taken by Brahm Shank.
Our latest tutorials delivered straight to your inbox