Is your Chromebook’s touchscreen damaged and ghost-clicking or randomly zooming in and out? Or do you want to clean your Chromebook’s touchscreen without turning off the device? For such situations, you can turn off the touchscreen temporarily on your Chromebook. While you cannot disable the touchscreen from Settings, there is another workaround using Chrome flags. Read on to learn how to disable the touchscreen on a Chromebook.
Good to know: there are several Chrome flags that can help improve your Chromebook user experience.
How to Turn Off the Touchscreen on Chromebook
Follow these steps to disable the touchscreen on Chromebooks from all brands, including Lenovo, HP, Dell, and Acer.
- Open the Chrome browser on your Chromebook.
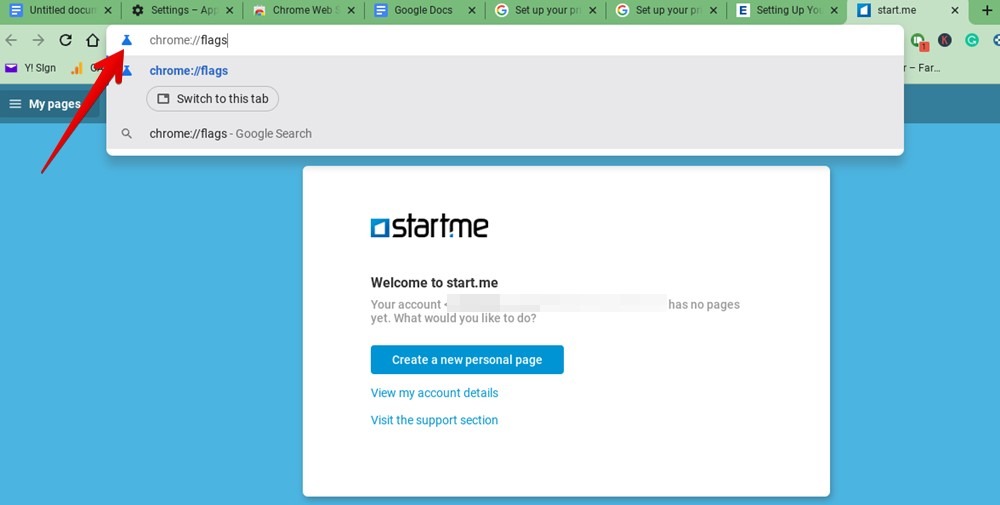
- Type chrome://flags in the address bar of the browser.
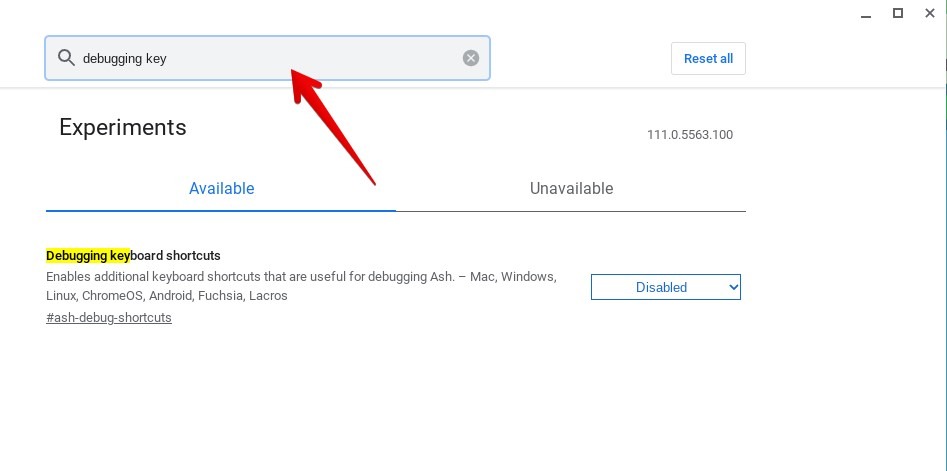
- Type “Debugging keyboard shortcuts” in the Search flags search bar.
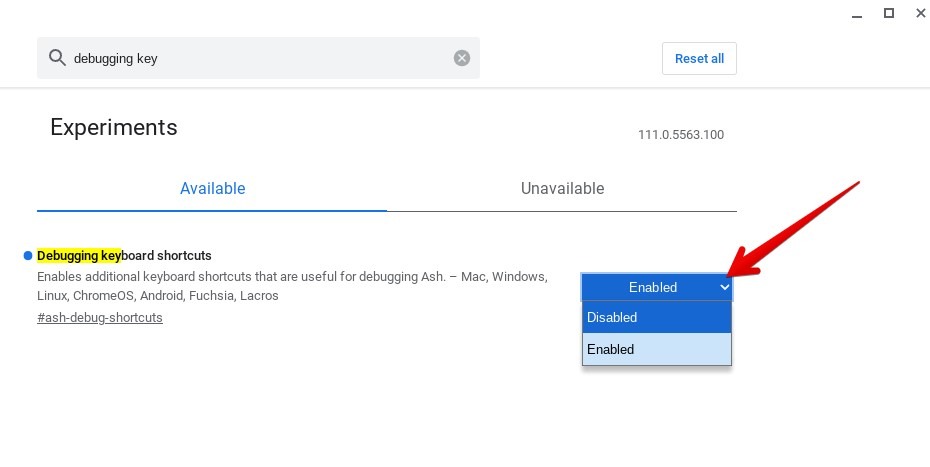
- Click on the “Disabled” button next to “Debugging keyboard shortcuts” and select “Enabled.”
Tip: you can quickly access the Debugging keyboard shortcuts flag using the chrome://flags/#ash-debug-shortcuts link.
- Click on the “Restart” button below to save the changes and restart your Chromebook.
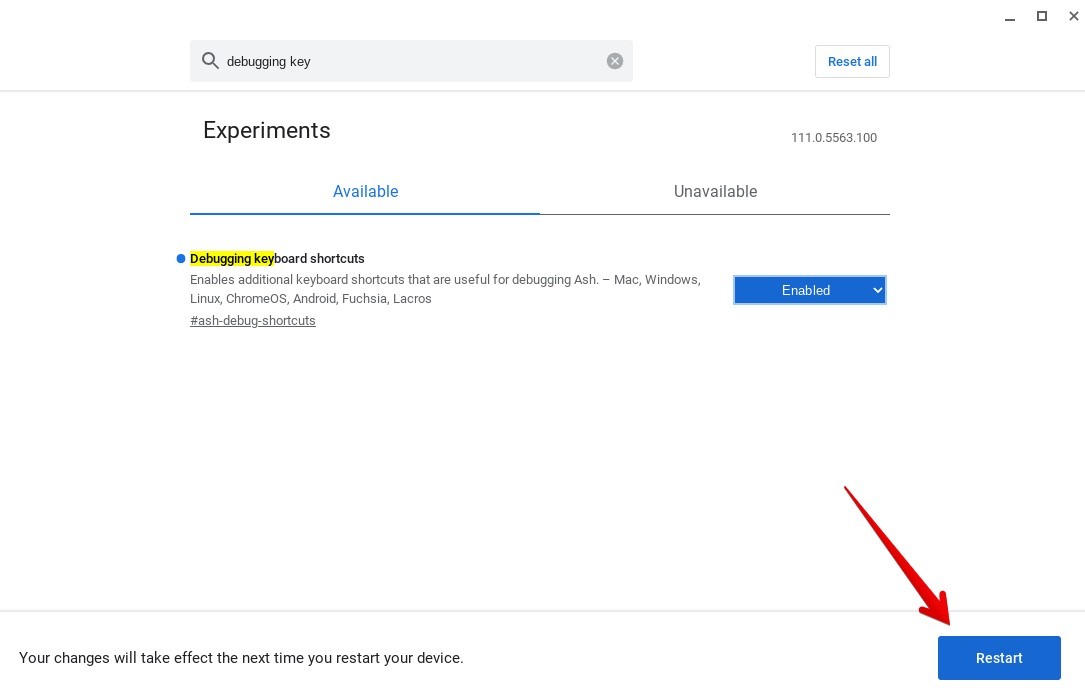
- When the Chromebook restarts and you log in, press the Search + Shift + t keyboard shortcut to disable the touchscreen of your Chromebook. Please note that you will not see any pop-up message or notification that you have turned off the touchscreen. You will have to manually touch the screen to verify whether it has been disabled.
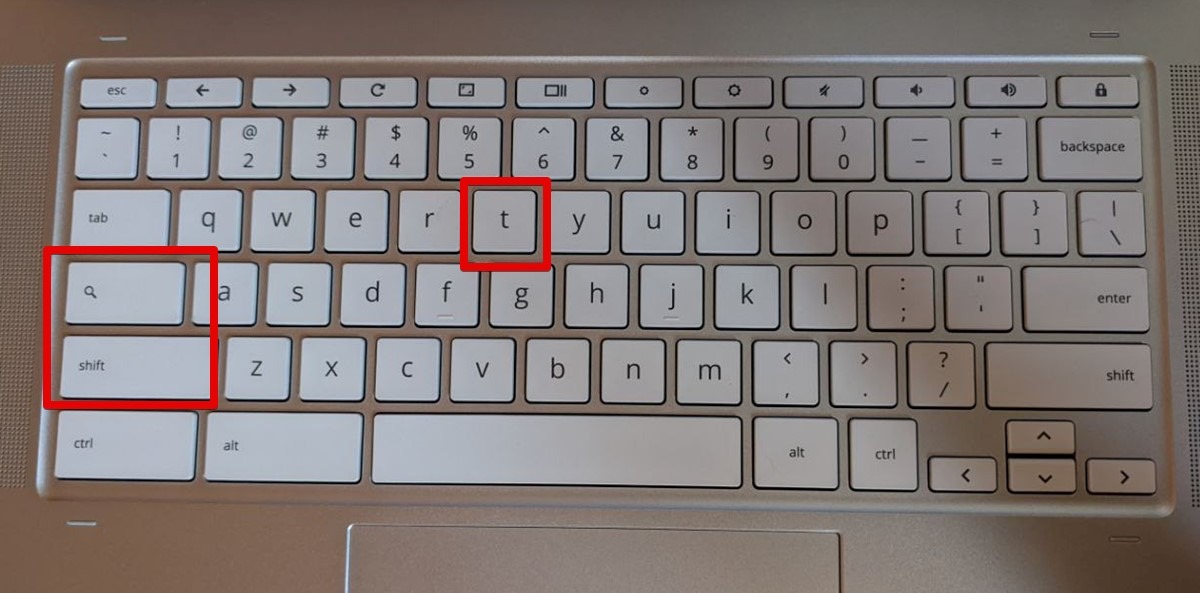
That’s it. You have successfully disabled the touchscreen of your Chromebook.
Also helpful: check out other useful Chromebook keyboard shortcuts.
Fix: Cannot Disable Touchscreen on Chromebook
If you cannot turn off the Chromebook touchscreen, first, ensure you have restarted the Chromebook as mentioned in Step 4 above. The keyboard shortcut to disable the Chromebook touchscreen will work only after you have restarted the device.
Next, make sure that the Search key is enabled on your Chromebook. You may have either disabled it or assigned some other function to it.
To check the Search key – and possibly enable it – on Chromebook, follow these steps:
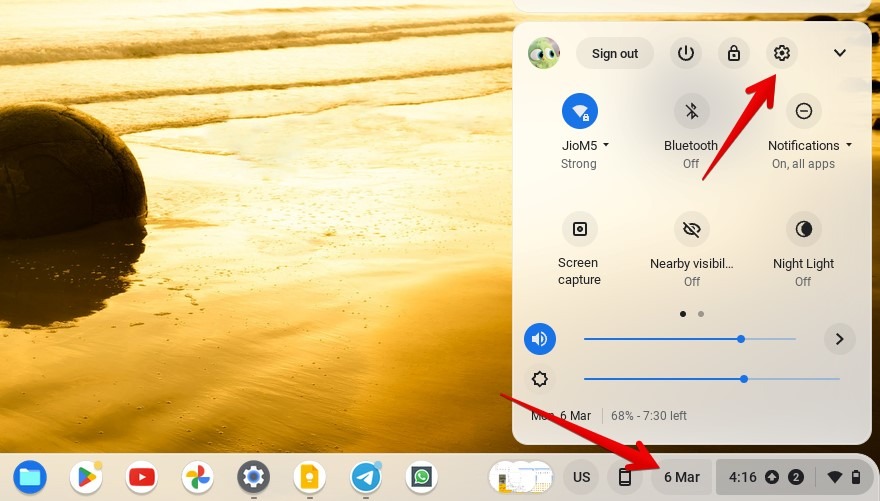
- Click the time at the bottom, then click the Settings icon.
- Go to “Device” followed by “Keyboard.”
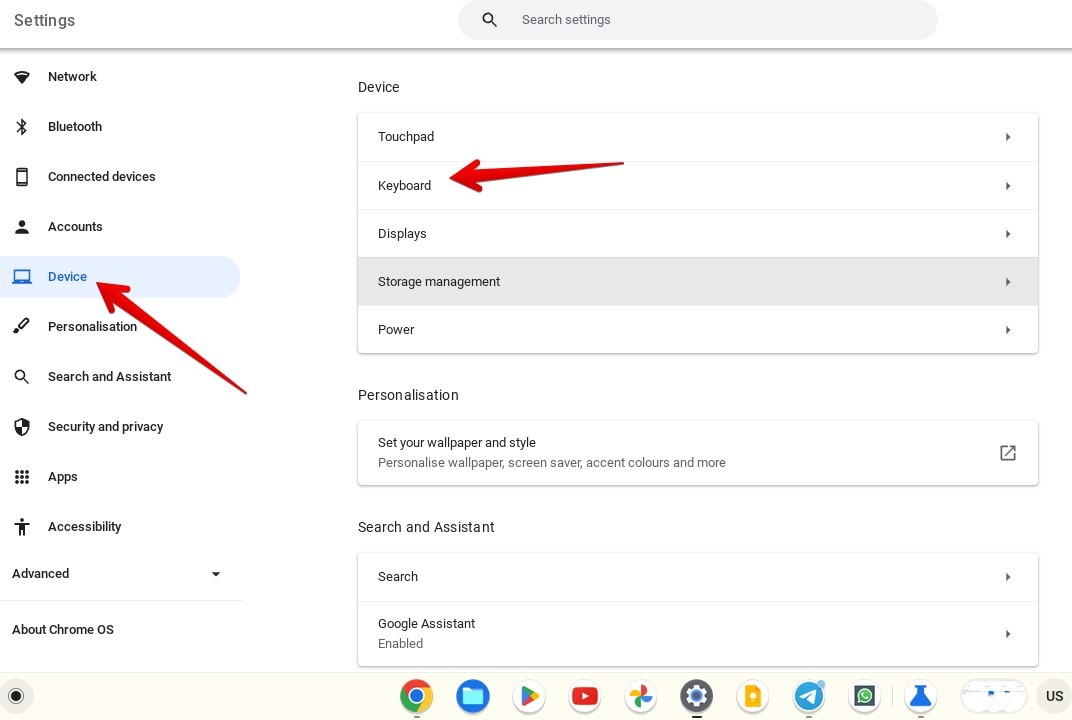
- Click on the drop-down box next to “Search” and ensure “Search” is selected underneath.
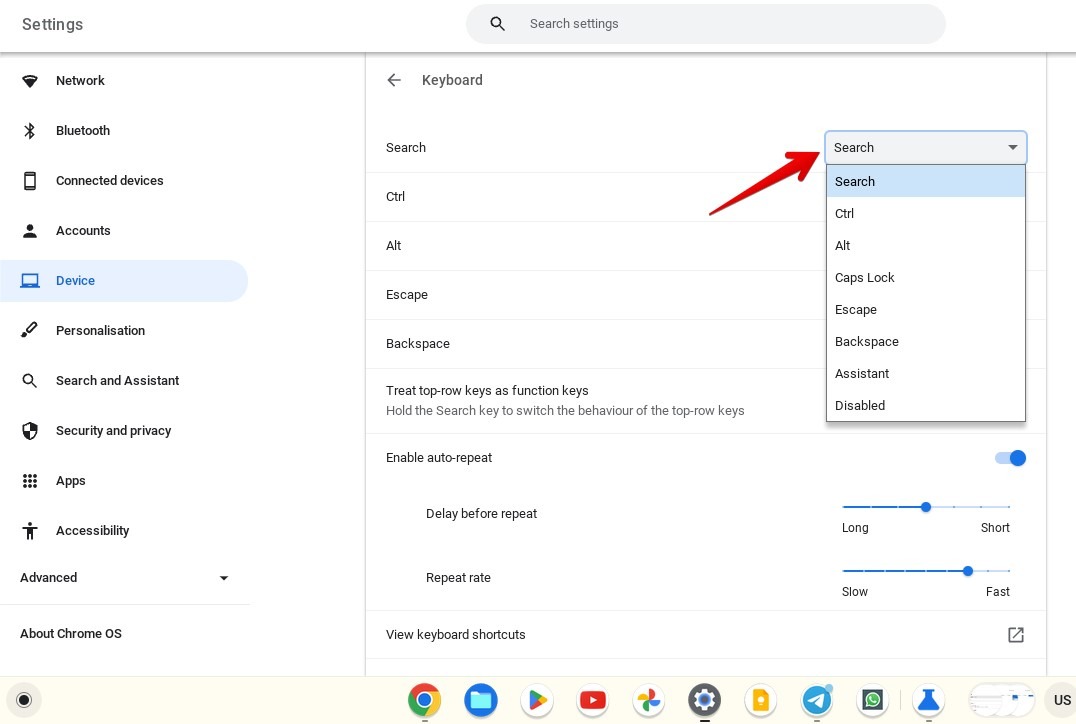
- Restart your Chromebook, then try using the Search + Shift + t keyboard shortcut to disable its touchscreen.
Tip: you can also remap keyboard shortcuts on Chromebook.
How to Enable the Touchscreen on Chromebook
After disabling the Chromebook’s touchscreen, you need to use the Search + Shift + t keyboard shortcut if you want to re-enable it. That will turn on the touchscreen, provided the Debugging keyboard shortcuts flag is enabled.
Alternatively, ChromeOS will automatically enable the touchscreen if you disable the Debugging keyboard shortcuts flag on your Chromebook. For that, repeat steps 1 through 4 of the Disabling touchscreen method but ensure that you select “Disabled” instead of Enabled next to the “Debugging keyboard shortcuts” flag.

Also helpful: check out 20+ tips and tricks for using Chromebooks.
Frequently Asked Questions
How can I disable the touchpad of my Chromebook?
To disable the touchpad, enable the “Debugging keyboard shortcuts” flag in Chrome, then disable the touchpad using the Search + Shift + P keyboard shortcut. Use the same shortcut to turn on the touchpad. If that doesn’t work, you can try fixing the touchpad on your Chromebook.
How can I turn off the touchscreen keyboard on a Chromebook?
To disable the touchscreen keyboard, aka the on-screen keyboard, go to “Chromebook Settings -> Accessibility -> Keyboard and text input.” Turn off the toggle next to “On-Screen keyboard.”
What does the Lock button on Chromebooks do?
The Lock button on the Chromebook keyboard signs you out of your account and locks the Chromebook. You will have to enter your password or PIN to unlock the device. To use the Lock button, press and hold it to be signed out immediately.
All screenshots and images by Mehvish Mushtaq.
Our latest tutorials delivered straight to your inbox