Whether it’s for school or work, recording your Chromebook screen can have many different use cases. Thankfully, Chromebooks make it incredibly easy with a built-in tool that ensures that you don’t need any extra software. Released with ChromeOS 89 in March 2021, the revamped screen capture menu added the native screen recorder on top of the ability to screenshot your display. Let’s take a look at how to start and stop a screen recording on a Chromebook.
Also read: How to Use Microsoft Office on Chromebook for Free
Use the Built-in Screen Recorder
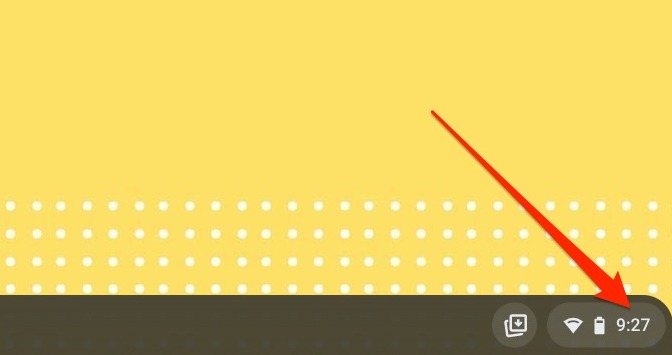
- Start by clicking on the time displayed in the bottom-right corner of the screen.
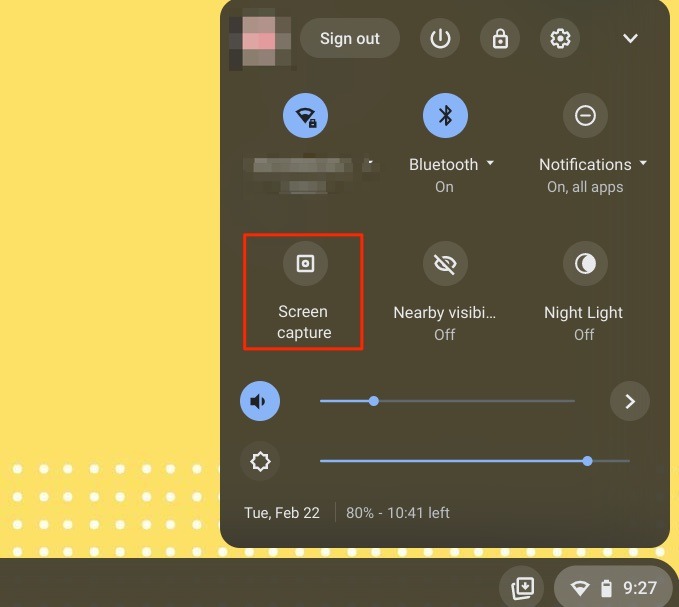
- In the “Quick Settings” pop-up window that shows up, click on the “Screen capture” option.
The “Screen capture” toolbar will now appear at the bottom middle of your screen. Alternatively, you can get to the same screen by clicking on Ctrl + Shift +
- Toggle between screen capture and recording at the bottom left of the toolbar to be ready to screen record.
Note that if you want or need to record with the microphone, tap on the Settings icon toward the right side of this toolbar to reveal a “Record microphone” toggle switch.
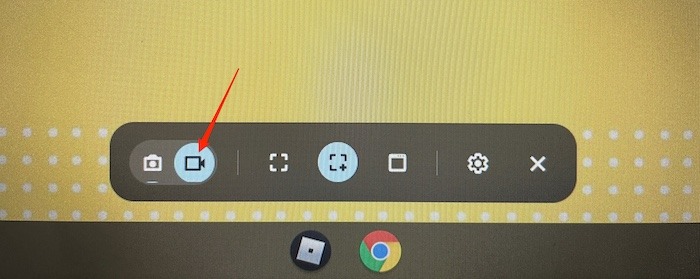
- Once recording has been selected (as opposed to screenshot), you can now “Drag to select an area to record,” as noted on the screen. In addition, you can choose from one of the three options in the middle of the toolbar to show full screen, partial screen or a window.
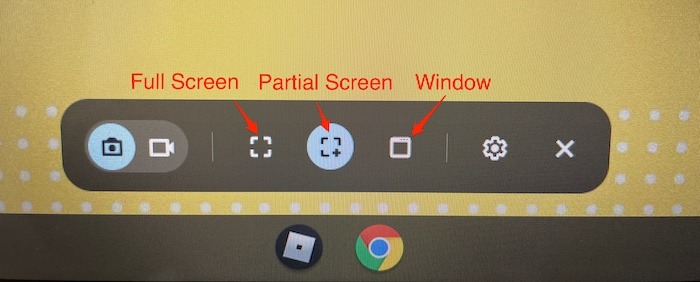
- Use the rectangular box to highlight whatever you want to record, then tap on the Record button overlaid on to the screen to kick off a three-second countdown before the actual recording starts.
- When you are ready to stop your recording, click on the red stop icon next to the Tote document hub at the bottom right of the screen next to the clock.
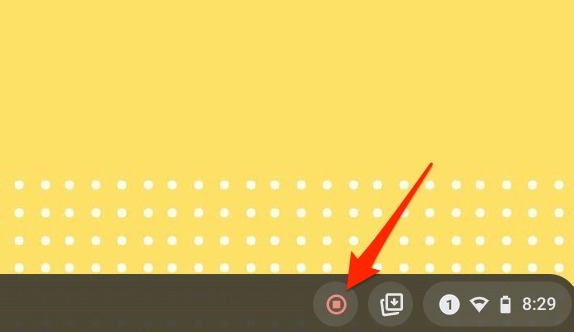
As soon as the recording ends, a notification appears indicating that the recording is available in your “Downloads” folder or wherever you have preset screenshots to automatically save. From here you can view, delete or move the video.
Also read: How to Enable Split Screen Mode in Chromebook
The Downside of Using the Native Screen Recorder
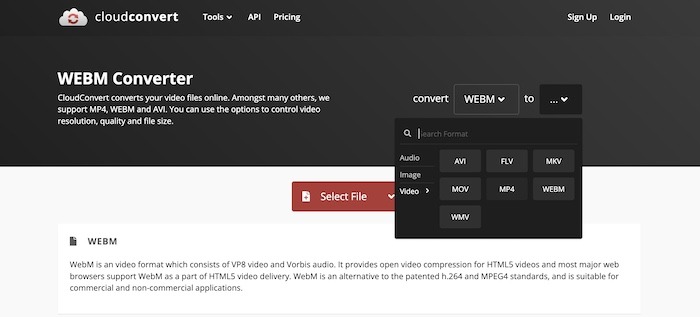
For the most part, the Chromebook recording process is pretty basic and does exactly what you need. The biggest downside is the format with which the recordings are encoded: WebM. This free video format is a Google-sponsored format, but while free and compatible with most desktop and web video players, it’s not nearly as friendly to use as .mp4 files. Fortunately, sites like CloudConvert exist (it’s a personal favorite) and can make quick work of WebM files.
Use a Third-Party App
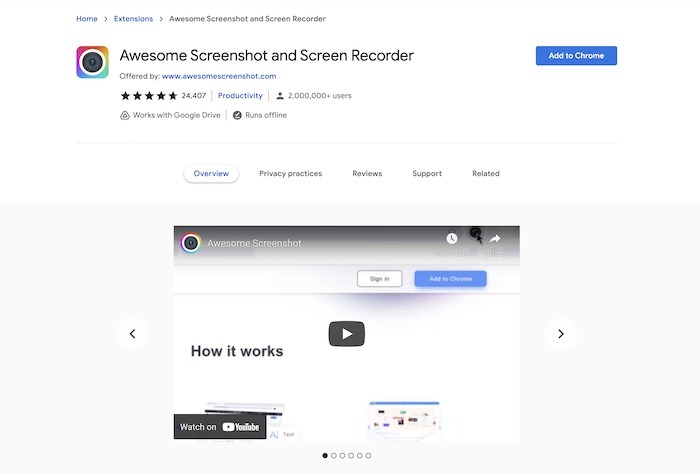
If the default recording option is too minimal, you can look to third-party alternatives for a better overall recording experience. That’s where Awesome Screenshot can help. Universally regarded as one of the better screen-recording Chrome extensions, Awesome Screenshot adds some useful features the native method doesn’t currently offer.
- Install the Chrome extension for Awesome Screenshot. Once it’s installed, open the extension and switch from the “Capture” tab to the “Record” tab in the extension pop-up.
- Switch the “Save video to” option to “Local” to save on your Chromebook or use your Google login and save to Google Drive. Underneath storage, you can also grant access to both the microphone and camera as part of your screen recording. In addition, you can adjust the max screen resolution as well, though the larger the resolution, the larger the file size.
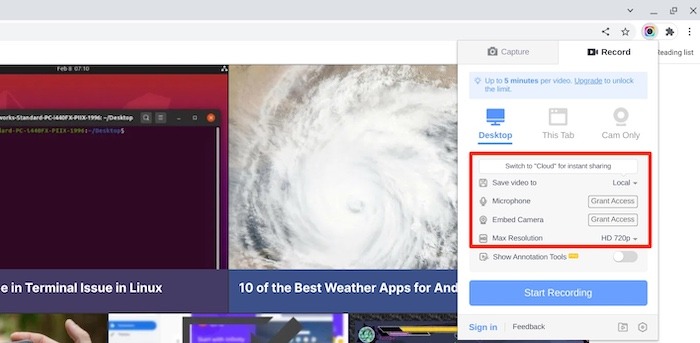
- Click or tap on the “Start Recording” button beneath the app options.
- Awesome Screenshot will ask you in a dialog box if you want to record the “Entire Screen” or a particular “Window.” Make that selection, then click on “Share.”
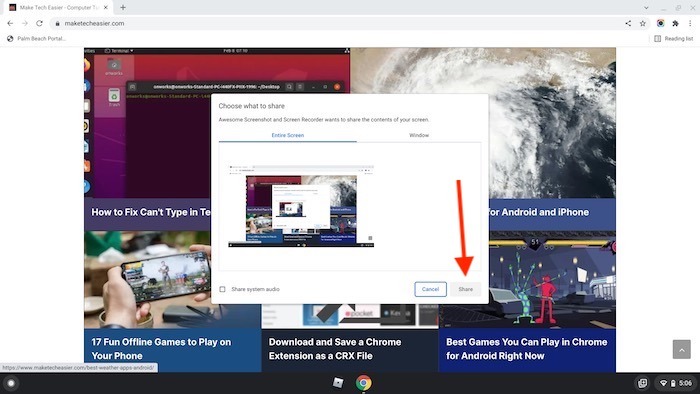
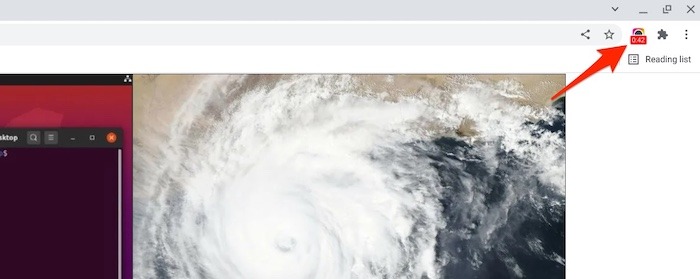
- Like the native Chromebook record option, you will get a three-second countdown before the recording begins. You can see the timer in the extension bar and also click on the extension icon to stop the recording.
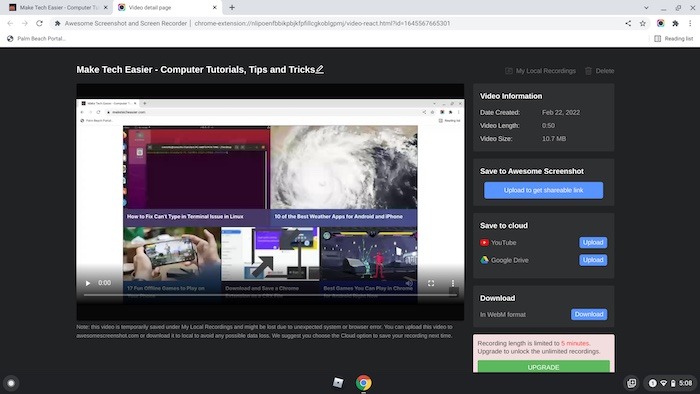
- When the recording stops, you will see an informational screen where you can save to a number of cloud options, upload to get a shareable link, date, time, file size, etc.
Also read: What You Need to Know About Your Chromebook Expiration Date
Frequently Asked Questions
1. Will these options differ depending on which Chromebook I own?
No, ChromeOS is pretty device-agnostic, and both the native and Chrome extension option (Awesome Screenshot) should be the same, no matter which Chromebook model you own. As long as your Chromebook is on ChromeOS 89 and later, you should be able to follow the above instructions with ease.
2. How long can you screen record on your Chromebook?
This is hinted at above, but essentially, you can screen record until you run out of space. That’s true for both the local and cloud storage options. Of course, you can switch to Google Drive if you are low on local space, but again, your screen record limit is how much free space you have available.
3. Is there anything I can’t screen record with a Chromebook?
No, the only limits are those that you set. If you want to record an entire lecture or class from school, you can. Of course, screen recording a newly-released movie and distributing it around the Internet comes with a different set of concerns, but you can screen record all the same.
Our latest tutorials delivered straight to your inbox